ISO in Photography [A Complete Guide]
In photography, ISO is a measurement of how sensitive a given film or camera sensor is to light.
ISO is named after the International Standards Organization, an organization that determines and sets the standards for measurement for this sensitivity. Originally, before digital photography came along, ISO just referred to how sensitive a film was to light. Film has names like Fuji Superia 100, Kodak Portra 400, or Ilford Delta 3200. These numbers refer to each film’s sensitivity to light.
ISO numbers are organized from low to high – the lower the number, the less sensitive it is to light and vice versa; the higher the ISO number, the more sensitive it is to light. With film, sensitivity comes from the chemicals used to make it and how sensitive those chemicals are to light.
With film, an ISO is often referred to as its ‘speed’. A higher ISO has a faster speed than a film with a lower ISO.
The thing about film is that once you load it, that’s the ISO you’re stuck with until you change out the film. Not so with digital cameras.
Digital cameras changed many things when it comes to photography, but one of the biggest differences is that you’re free to adjust your ISO at any time. Whereas with film cameras you put a load of film into the camera and you’re forced to shoot at the ISO of that particular film for 36 shots or however many shots the film holds, with digital you’re only limited by your camera’s range of ISO.
Digital cameras will have what’s called a ‘base ISO’ – usually its lowest ISO and the ISO in which the camera performs best in terms of image quality. The reason being is that, like the other two components of the exposure triangle (aperture and shutter speed), adjusting your ISO has a noticeable side effect.
A Typical ISO Range for Digital Cameras
Many cameras start with a base ISO of 100. From there, ISO values double in sensitivity from one to the next (in full stops), just how it works with aperture and shutter speed.
So a typical range may look something like this:
ISO 100, ISO 200, ISO 400, ISO 800, ISO 1600, ISO 3200, ISO 6400
Many cameras can go far beyond ISO 6400 and even down to ISO 50, so your camera may be slightly different.
But let’s say, for example you go from ISO 200 to ISO 400. In this case you’re doubling the sensor’s sensitivity and thus the amount of light you let into the camera. If, for example, you went down a stop from ISO 3200 to ISO 1600, you’re halving the amount of light.
Now, when you’re in manual mode and you’re adjusting your ISO, you have to take into account how changes in ISO affect your other camera settings. As an example, let’s say you’ve dialed in a correct exposure but want to make adjustments to your ISO. Imagine we’re keeping our aperture the same through this and we take a meter reading and it tells us at ISO 100 that we need a shutter speed of 1/30s. If we were to increase our ISO or shutter speed for whatever reason, we’d have to adjust the other one accordingly, like this:
ISO 100 = 1/30s
ISO 200 = 1/60s
ISO 400 = 1/125s
ISO 800 = 1/250s
ISO 1600 = 1/500s
ISO 3200 = 1/1000s
ISO 6400 = 1/2000s
…and so on.
Side Effect of Increasing your ISO
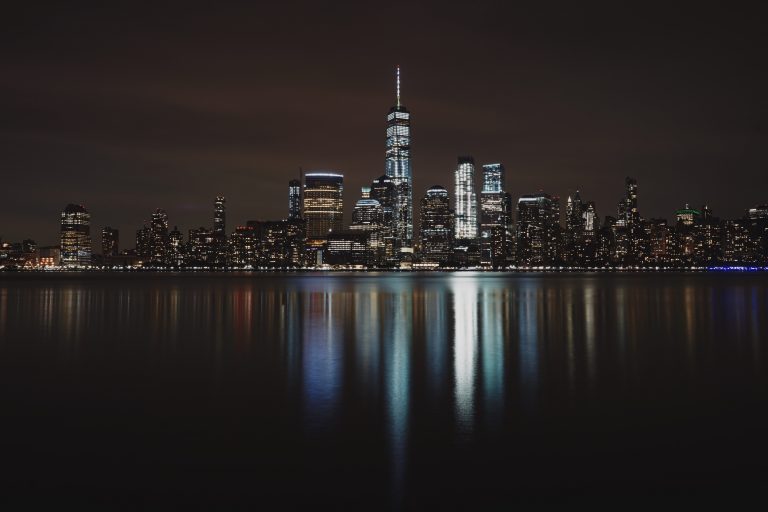
Being able to push your camera or film to a high ISO is great, as it allows you to get properly lit exposures in dark conditions. But as a result of shooting at high ISOs, you introduce grain to your images. In digital photography this is actually called ‘noise’, and is a result of increasing voltage to pixels within the camera’s sensor.
Grain/noise can vary from barely noticeable to so heavy that it essentially ruins an image.
Much like with the side effects of adjusting aperture and shutter speed, the grain you get from shooting at high ISOs can be used to creative effect. Some photographers like the grainy look they get from a certain film or shooting a particular camera model at a high ISO. There are several photographers I’ve talked to who love the way the Canon 5D line renders grain at higher ISOs.
However, in my experience, I never really intentionally shoot at high ISOs for the specific look of getting a grainy effect, although I have nothing against it per se. My reasoning being that:
1. You can easily add grain to your images with post-processing programs like Lightroom, Photoshop, Alien Skin or whatever photo editing program you prefer. Some photographers claim that they don’t like the look of ‘fake’ grain added in post but I think for the most part, non-photographers would not be able to tell the difference.
So there’s that and
2. When shooting at high ISOs, you’re not just degrading your image quality with grain, but damaging your dynamic range as well. If you haven’t heard of dynamic range before, in practical terms, it simply refers to how accurately a photograph reflects the colors in the scene photographed. (In more technical terms it means a camera’s ratio between the darkest and lightest colors it can capture, i.e. black and white.)
What this really means is that the quality and accuracy of the colors in your photographs will consistently go down as you raise your ISO. And depending on what camera and ISO you shoot at, if you push it too high, the colors in your photos will, for lack of better phrase, turn out like crap. There’s a certain point of ISO for every digital camera where images will be just completely unusable – whether from too much graininess, washed out colors, or both.
So, what’s the highest ISO you should shoot at in photography?
Well, like many things in photography, it depends.
Because every digital camera is different, the maximum ISO that can reasonably be used varies from model to model. And not only that, but in the end you as a photographer get to make the final say as to how high you’ll push the ISO on your specific camera. That means getting to know your camera intimately and knowing its limits. I recommend taking several shots of the same scene, adjusting your ISO up a stop for each one and finding out where it starts looking unusable.
You might set lower standards for yourself and the image quality you’re willing to accept for your personal work, but put yourself in the shoes of your clients too and consider what the highest ISO shots (with whatever camera you use) that you’re willing to deliver.
Keep in mind that digital cameras have “normal” ISO ranges and “expanded” ranges.
The normal range is what the camera manufacturer deems appropriate to shoot within, but they include expanded ISO ranges to at least give you the option of shooting at even higher ISOs for emergency situations where you really have no choice.
Even though cameras have what the manufacturer deems to be its normal range of ISOs, that doesn’t mean you should shoot at the highest possible ISO within a normal range. Even the higher ISOs within a standard ISO range can look bad.
Take one of the cameras that I shoot with for instance, the Nikon D600. This camera has a standard ISO that goes up to 6400 and even to 25600 in its extended ISO range. But I really prefer not to push this particular camera past 4000 ISO as a general rule. After that point, grain gets pretty heavy, colors get weird, and skin tones start getting a waxy look.
ISOs in expanded ranges are generally of very poor image quality; they can be extremely grainy and have bad colors. That’s not to say to never use an expanded ISO range, but these ISOs are best left exclusively for when you’re in a pinch and you have no other option. I almost never use a camera’s extended ISO range; in the cases I have it was most likely on accident, just not paying attention to where I was at. But for whatever reason you shoot at an extended ISO, you can minimize the effects of shooting at high ISOs by converting them to black and white; grain just fits better with black and white images and it also minimizes the fact that high ISO makes colors look bad.
How to Adjust Your Camera’s ISO
Confession:
I’m not the “read the manual” type.
At least not when I first get a piece of gear. Even though it may be frustrating as hell at times, I’d much rather figure out a camera’s functions on my own – I learn a lot more and faster by being hands-on and doing rather than reading about something.
You may be different, but that’s just the way I am and always was – even with my train sets or whatever when I was a kid.
Plus, camera manuals are a snooze fest. Snore. Boring!
Ok, ok. Camera manuals are essential for making the photography world go ‘round. Don’t get me wrong.
But the way I approach it is that I take a new camera, fiddle with all the settings and see what happens. When I want to do something specific, like change the ISO, I try to figure it out on my own first and then later revert to checking the manual if for whatever reason I can’t figure it out.
And actually, a lot of the times I’ll just do an Internet search to see if I can find the answer that way before looking at my manual. It’s part laziness, part efficiency. There’s just no way I’m going to shuffle through a camera manual fast enough to find a specific question as fast as I can by doing a google search. But I’m no camera manual hater – don’t get me wrong (again). Even if I’ve messed around with a new camera and found absolutely every essential function I set out to find, I always go back and read the manual, front to back.
Even though I’m not a huge fan of the technical photographic engineering jargon found in camera manuals, at the end of the day there really is no substitute for learning about every little nook and cranny of your camera. So I read through it. Even if it is more boring than an episode of Mr. Roger’s Neighborhood.
…Just kidding, Mr. Roger’s Neighborhood was awesome and I loved it dearly. But you get the idea I think.
I know that was a roundabout way of saying this but the bottom line is that all cameras are different. Even within the same manufacturer’s cameras, they’ll make adjustments for basic functions like aperture, shutter speed and ISO different.
BUT what they’re usually doing is just slightly deviating from the norm. Or at least the norm each brand has set for themselves.
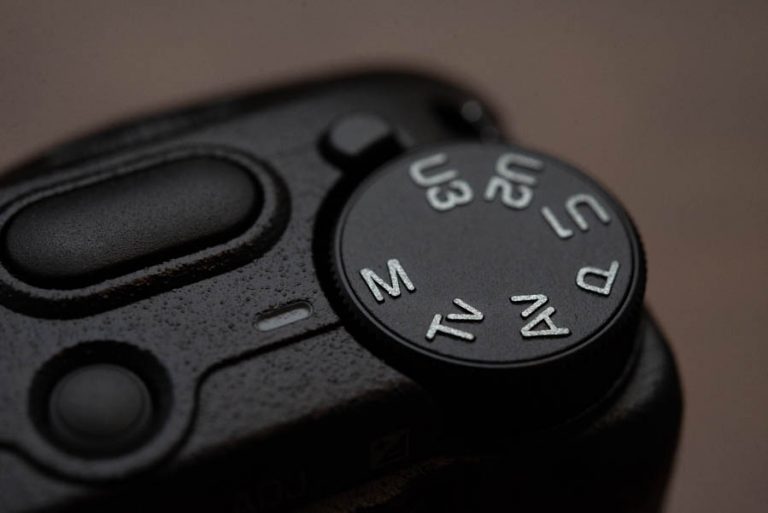
With Nikon and Canon DSLR cameras, you’ll generally press and hold down an ISO button and then make the ISO go up or down from what would normally be the shutter button.
Here’s an example from a Nikon camera (where the ISO button is on the left side of the camera):
For this particular camera, the D600, you hold down on the ISO button and move the thumb dial to the right (move it to the right to increase the ISO and move it to the left to decrease it).
To show how things can differ within one brand, take a look at how you change the ISO on a Nikon D800 or D500; instead of holding in on an ISO button on the back of the camera, it’ll be on the mode dial on the top left-hand side of the camera. In this sense, it’s not a huge deal in terms of how ISO control differs from camera to camera.
Sometimes, though, a particular camera will make you go through its menus to adjust its ISO, which frankly is just dumb in my opinion. I think there should always be a dedicated ISO button on every camera because it’s such an essential function for photography, but I digress.
When Should You Use Low ISO?
If you’re outside in bright light, use low or base ISO as much as possible. In situations where there’s a lot of bright light, like in an outdoors situation, I usually set my ISO first before my aperture or shutter speed.
That way, I can set my aperture and shutter speed accordingly after choosing an ISO that will get me the best image quality possible for the situation. That is, the lowest ISO possible as long as I can get 1/250s or faster. 1/125s at the slowest.
When Should You Use High ISO in Photography?
High ISOs should be used when you need to get more light in to your camera and you have no other option. High ISO can be used to intentionally get a grainy effect but like I said earlier I don’t really ever do that on purpose. But that’s not to say that I’m totally against it or anything.
There comes a point with every camera where it’s probably better to switch to using flash than to keep increasing your ISO. And there are some instances where it’s so dark that there’s just no chance you could get a decent exposure using only natural light.
Now that’s changing with the introduction of cameras that can shoot at crazy high ISOs, but for the majority of us mere mortals with standard, sub-$5000 cameras, we still have some limitations in terms of ISO. There’s a lot of instances where I’d rather use an off-camera flash or bounce flash on to a ceiling or a wall than get the inferior image quality I get when shooting at high ISOs, especially if it’s for professional work.
Situations Where High ISO May be Needed:
1. Weddings: there are a ton of different lighting conditions you’ll encounter throughout a wedding day, from very bright to very dark. Low light, indoor settings like dimly-lit churches or reception dance floors are the most challenging.
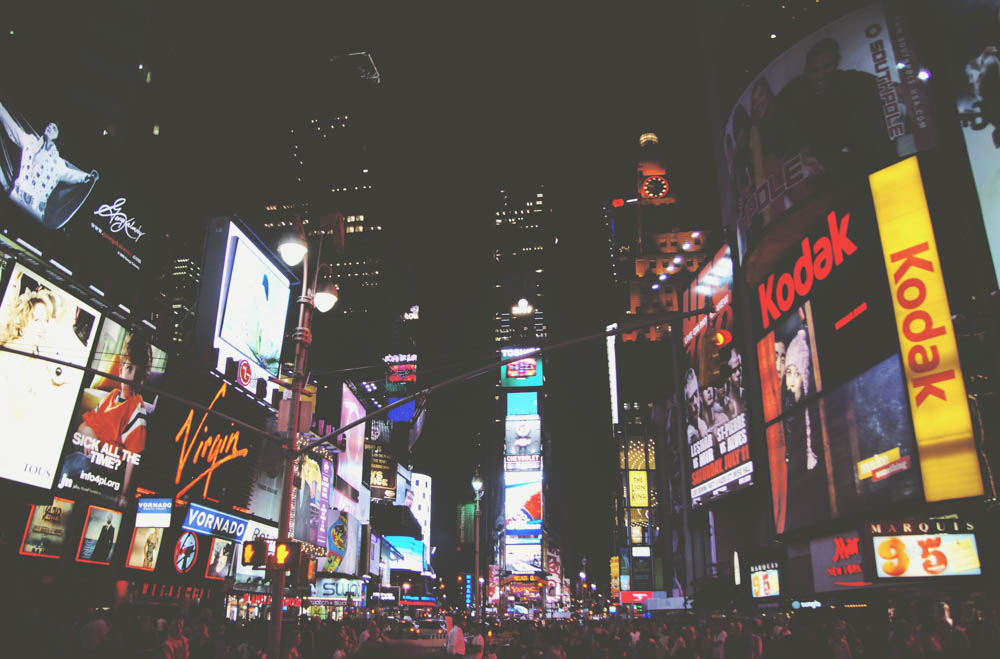
2. Shows/concerts: event photography usually presents photographers with tough lighting conditions, i.e. very low light and weird color casts from stage lighting. To top it off, a good deal of venues don’t allow you to use flash. These situations can require you to raise your ISO, open your aperture as wide as possible and really test the limits of your camera.
3. Indoor sporting events: Sporting events put you in the awkward spot of being poorly lit, plus you have to use a fast shutter speed to get freeze the action. That means cranking your ISO – I don’t think I’ve shot an indoor sporting event under 3200 ISO.
Conclusion
ISO in photography is a pretty simple concept; increase it to brighten your pictures and decrease it to darken them. Increasing it results in more grain/noise and decreasing ISO lowers grain.
However, it can be hard to keep these concepts straight at first when you’re just starting out. Not to mention being able to adjust your ISO quickly when you need to – that’s something that really just comes with a whole lot of practice and familiarity with your camera.
ISO in digital photography is a pretty simple concept but mastering it comes more from getting hands-on experience with it rather than just reading or watching videos about it, so get out there and mess around with your camera’s ISO until you feel really comfortable with it.
If you’re unsure of any of the terms used in this article, be sure to check out our photography glossary.
![Simple Ways to Improve your Food Photography [To Create Mouth Watering Images]](https://composeclick.com/wp-content/uploads/2018/01/OatmealChocChipCranberry-by-Amelia-Robertson-768x512.jpeg)