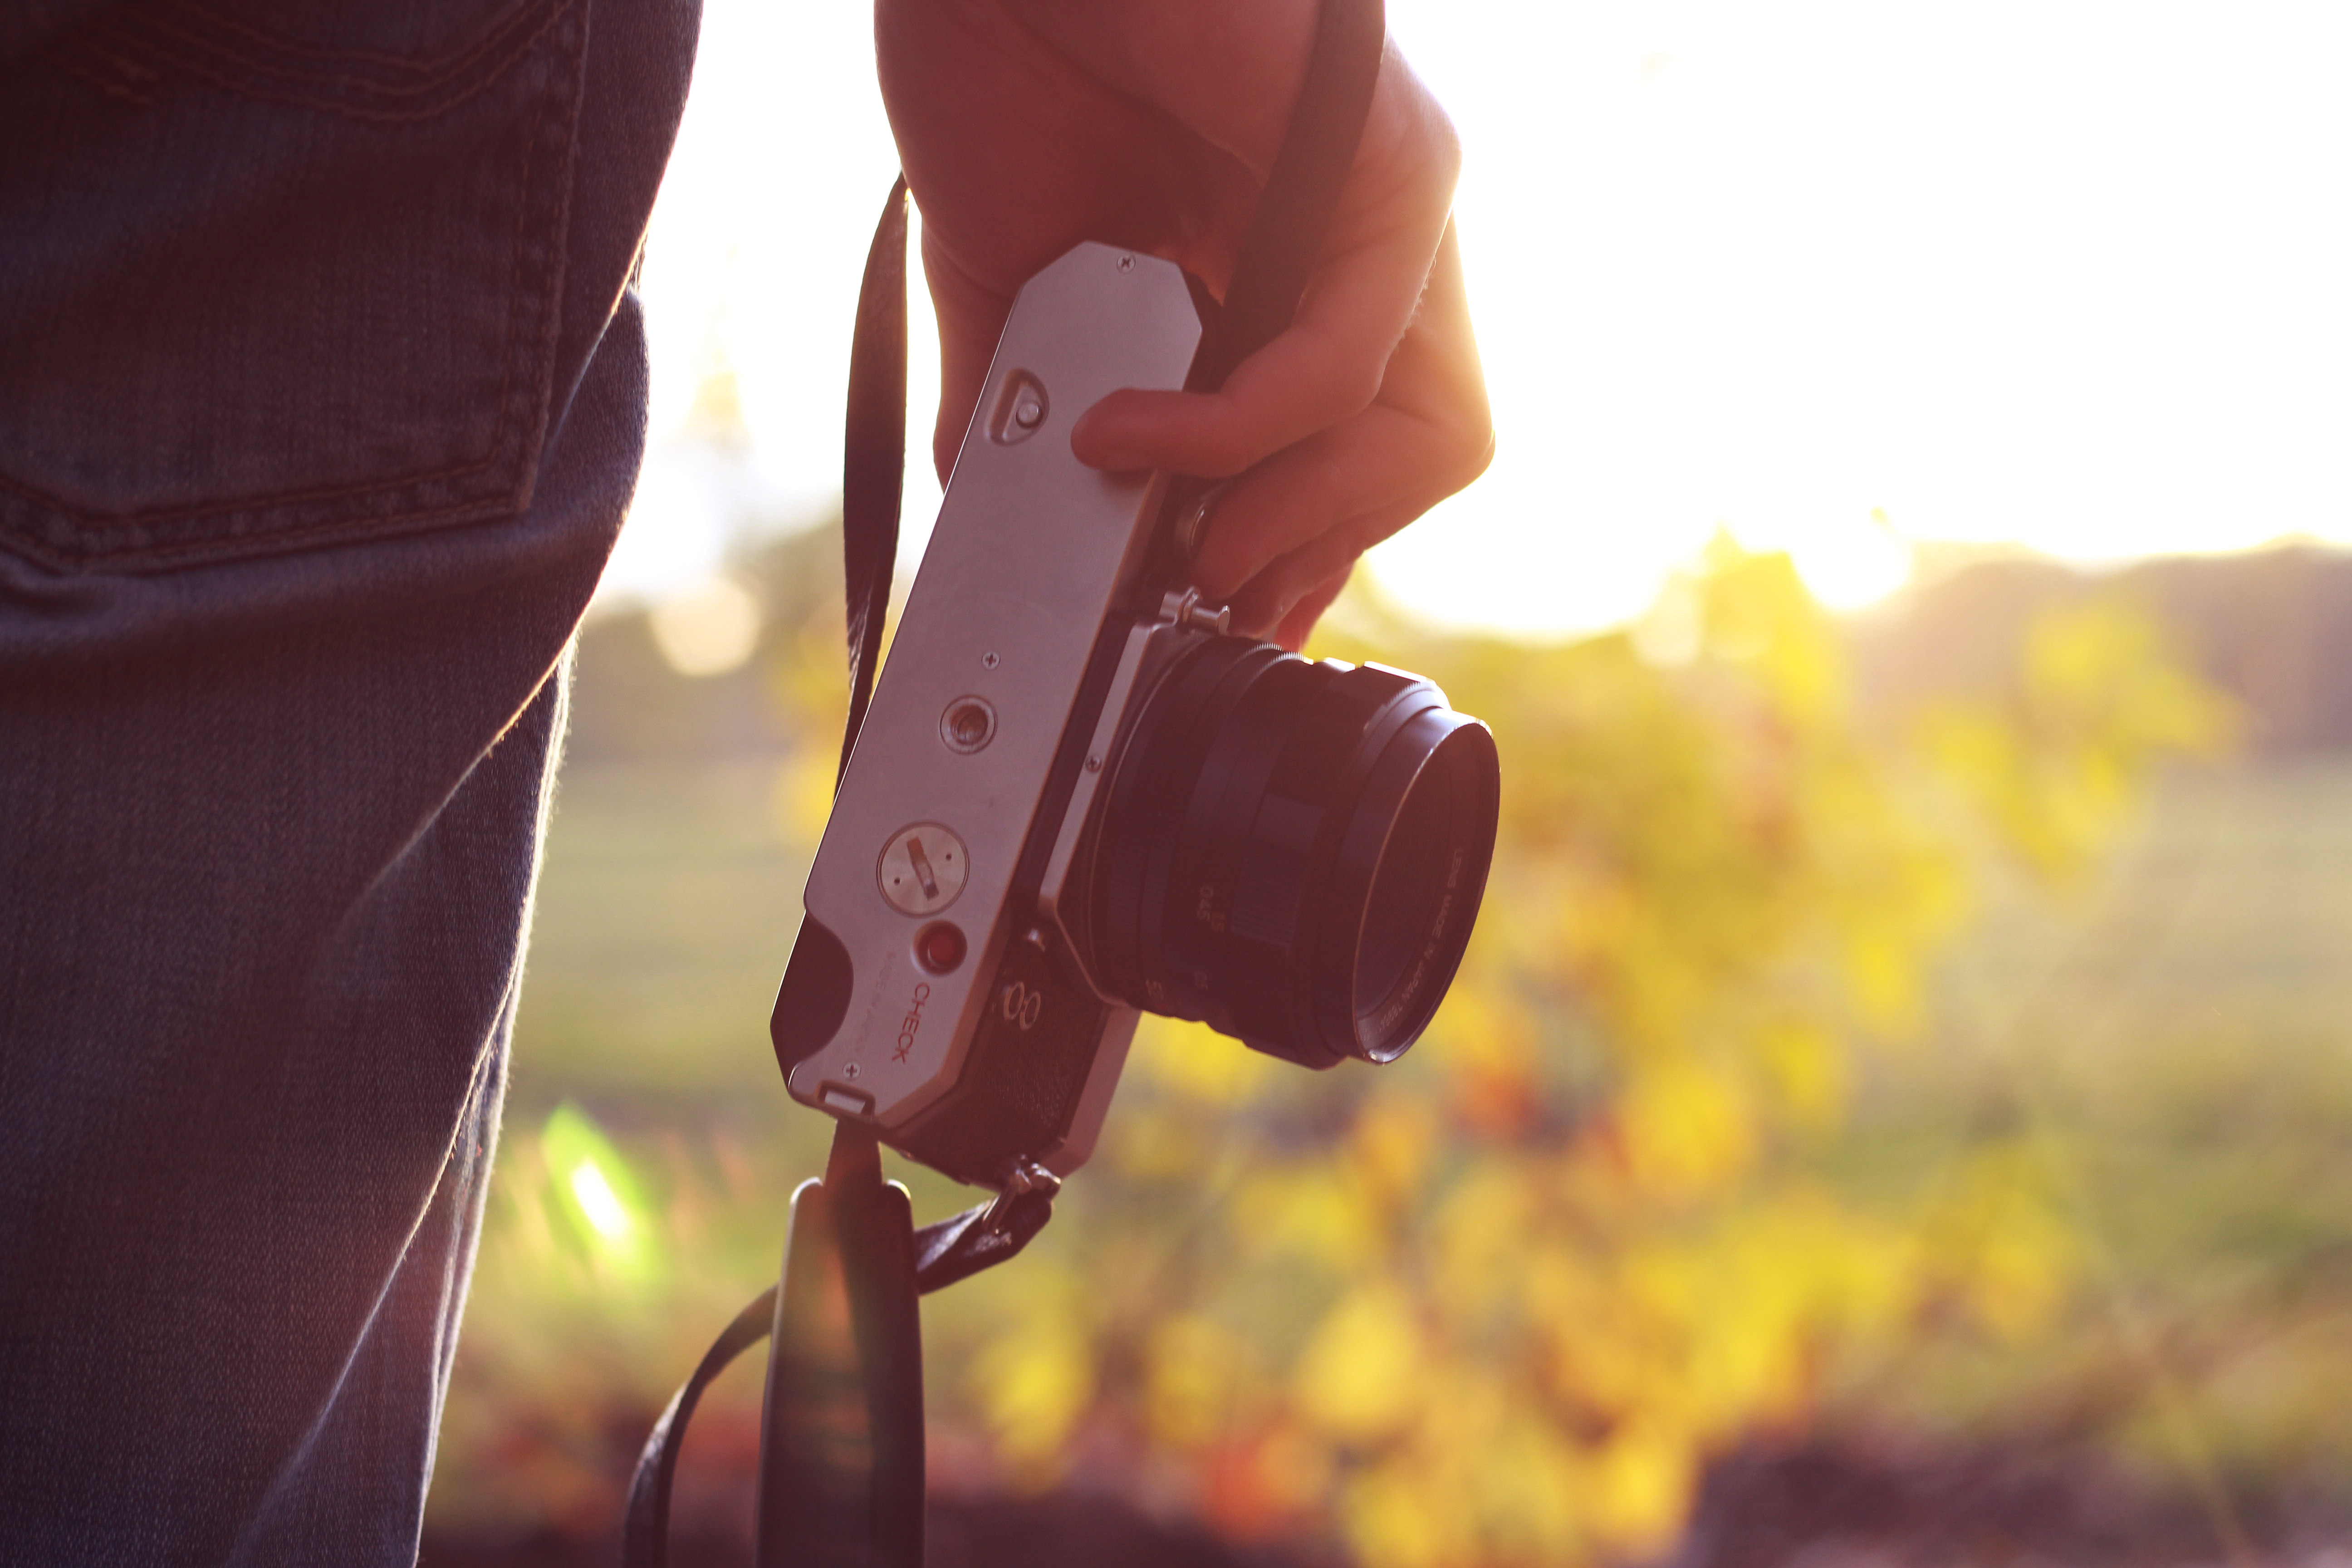
The Ultimate Guide to Wedding Photography: What You Should Know Before Taking that First Wedding Job
Are you just getting started in wedding photography and looking for a resource to walk you through the ins and outs of shooting an entire wedding day?
Or perhaps you’ve been shooting or second shooting wedding photography and want to fill in some of those gaps in your overall strategy. There’s always more to learn after all.
My goal with this wedding photography guide is to show you how to shoot an entire wedding day from start to finish. Apply these concepts and you should be on your way to consistently shooting great wedding photography while being calm and confident in your abilities.
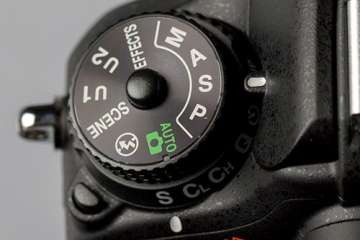
First Wedding Photography Step: Get to Know Your Camera Inside and Out
This is the number one tip I can recommend to any photographer considering taking their first wedding job or photographers in the beginning stages of their wedding photography career.
This may seem blatantly obvious, but I can remember several occasions back when I was second shooting and starting out in wedding photography that I had things happen with my camera that stumped me that shouldn’t have.
Cameras get bumped around and their settings can get changed accidentally. You can forget how to adjust little settings that you don’t frequently use but might need on specific occasions.
I once did a reset to all my camera settings before a wedding and couldn’t remember how to get my specific camera model back to the point where it would focus with the back button rather than the shutter button. This is really important for my style of shooting too.
Luckily I was able to figure it out by Googling around, but I would have saved myself some hassle and stress had I just been more prepared and done it before the wedding day.
I also once thought a fairly new camera was defective simply because my memory card had gotten switched to the “locked” position.
Sh*t happens.
And it’s easy to get complacent and think you’ve got it all figured out, when in reality something simple could throw you off.
The point is to get to know all of your gear really well before you’re on a paid job. If you think about it, anyone willing to pay you for your work deserves to have a photographer that is prepared and confident in their abilities.
Aside from the obvious settings that you absolutely need to master, like aperture, shutter speed, ISO, etc., here are some of the less obvious settings I can think of off the top of my head that are useful to be able to adjust on the fly:
- Exposure compensation (what it is and how it works) for when you’re using any type of automatic mode
- How to switch between metering modes and knowing what metering modes work well in which situations
- Knowing your autofocus modes and how to switch through them
- Knowing how to set up any settings specific to your needs (such as how to set your camera to focus with a button on the back of the camera, which I highly recommend by the way)
These are just the camera settings – you should also be familiar with all of your other equipment. Whatever flashes, triggers, modifiers, lenses, memory cards, etc., you’ve got in your camera bag, get to know them well and how they work together and you’ll be much better off for it. You don’t want to be fumbling around with equipment when you’re responsible for documenting one of the most important days of your clients’ lives.
If you’re just getting started out at a basic level in photography in general, I recommend reading my beginner’s guide. It has all the info you need to get started, like getting to know your camera, how to get proper exposures, and shooting in manual.
Wedding photography is obviously more than just getting to know your camera. There’s two things I think all photographers looking to get in to the wedding photography industry should do:
- Work as an assistant to an established wedding photographer
- Work as a second shooter
Work as a Wedding Photography Assistant
Working as an assistant for a wedding photographer was how I got my foot in the door to wedding photography.
Wedding days can be fast-paced, extravagant affairs and so they can also be intimidating/anxiety-inducing. But if you work as an assistant to a wedding photographer first, you get to see everything that goes on behind the scenes of a wedding day – without all the stress and expectations of being a second shooter.
As a wedding photography assistant, you’ll basically do menial tasks, like carrying some of the photographers’ equipment, holding a light stick for dark reception shots, holding flashes/LED lights in place for portraits or detail shots, switching out memory cards whenever necessary, etc. It may not seem important in the big scheme of things but a good assistant can make a big impact on what the photographer delivers to the clients.
So don’t feel like you’re not getting anywhere by taking a job as a wedding photography assistant. You have to start somewhere, and being an assistant can open up tons of doors in the photography industry. By being the low man on the totem pole for a while, you get to learn what wedding photography is all about (and possibly even find out that it’s not for you), and you get to pave the way for a possible future in the industry.
The good thing about being a wedding photography assistant to start out with is that it’s relatively easy work. It can be physically demanding, but you don’t have to be a genius to figure out how to hold a light stand and carry a camera bag.
Considering how fast-paced and frenetic a wedding day can be, I consider that a good thing. It lets you ease into being comfortable at weddings.
At this point, you might be wondering:
“How do I find a gig as a wedding photography assistant?”
And to be completely frank, I wouldn’t exactly say these jobs are easy to come by. Although I did it in a foreign country back before I spoke the language so it’s definitely attainable with some mild persistence.
What I would recommend doing initially is to go on Facebook and search for a photographer group in your area. Occasionally there will be photographers who put up posts looking for assistants or second shooters, so you can introduce yourself that way.
You can also make a post introducing yourself and mention that you’re looking for a job as an assistant.
Another way you can reach out to photographers in your area is by doing a Google search of wedding photographers + your city.
From here, I have some advice:
Don’t email these photographers and immediately ask to be their assistant in the first email. It’s like asking for the hard sell and it turns people off.
Instead, you’ll get far better results by just networking and basically becoming friends in your first email or two. Shooting the breeze.
I’m not going to publish a template here because any publicly available template gets abused and over used, but in your first email, just take a look at their website, and point out something that you liked about it or their style of photography. Just be natural, and compliment them. They will appreciate it.
And obviously don’t lie – find photographers whose style you actually like and admire.
In a follow up email, you can bring up the prospect of working for them.
Also, if a certain photographer doesn’t respond after the first email, you don’t have to just give up right away. You can send a follow-up email or two, as many people miss emails just because they’re busy, disorganized, etc. If they don’t get back to you after a couple follow-up emails though, take the hint and move on, don’t harass anyone.
I also recommend only sending out maybe ten emails at a time among the photographers within your city. Many photographers network with each other and are friends so you don’t want to be that guy who’s just annoying and spamming people.
After you’ve landed a job as an assistant, you put yourself in a very good position to work your way up to being a second shooter.
Ask to do Wedding Photography for Free as a Third Shooter
You might be thinking to yourself at this point, “when do we actually get to shooting a wedding?” But I think that going through these steps is imperative for insuring that you deliver good results to your first wedding photography clients.
Remember… peoples’ wedding days hold a ton of significance for them. You only get that one day to deliver so you don’t want to botch it.
Now, I’m not a fan of working for free and think photographers should charge clients what they’re worth. However, this is an instance when I would make an exception. And I’m really only talking about doing this for one wedding.
Ideally you would do this after assisting for an established wedding photographer and building a relationship with them. You’ll have built trust with them that you wouldn’t have been able to build had you just randomly asked to be a third or second shooter.
Being a third shooter is essentially the same as what a second shooter does but you’re just responsible for less if you’re doing it the way I’m outlining here. (Although I’m sure there are probably plenty of wedding photographers who work with two extra photographers but don’t designate them as second or third shooters, just photographers).
But what I did on my first gig as a third shooter (for a photographer who I assisted for previously) was basically just photographed the day as it happened while being mindful to stay out of the way of the other photographers’ way. If I recall correctly, the main photographer just gave me the one task of getting some wide-angle shots of the ceremony from up in the balcony of the church, but pretty much gave me free reign to photograph as I saw fit other than that.
The results?
…They were terrible to be quite honest.
But that’s OK – it’s perfectly normal and it’s why I recommend working as an unpaid third shooter in the first place. If I delivered an album of the images I shot that day to the clients I probably would have been sued, they were that bad.
That’s why no one should take on their first paid wedding clients with no wedding photography experience under their belt. Even for photographers experienced in other genres. You have to treat it like a completely different skill set.
So there’s one more step I think is necessary before working a paid second shooter job:
Do a review session of the wedding you shot as a third shooter with the main photographer. Scroll through each and every photo and have them show you which, if any, photos of yours they kept in the final album to be sent to the clients.
Have them point out the things you did right and the things you did wrong.
This process can take an hour or two of their time. Hopefully you’ve built up a friendship at this point so it shouldn’t feel like you’re completely mooching off them or something. Buying them a coffee or beer as you do a review goes a long way. But offer to pay them for their time if you have to.
It’ll be one of the best investments you’ll make towards your wedding photography career.
This process really was a complete mindset shift for me – I didn’t know what I was doing wrong until it was pointed out to me by an outside mentor. Had I not gone through this process I could have looked through my images and known that they sucked. But I didn’t know why they sucked.
The next wedding I did I was able to skyrocket the quality of my work simply because I listened to feedback and implemented what I was told as best I could. I shot probably thirty weddings with this same photographer and to this day he still insists that the second wedding I shot with him was the best I’ve done. Go figure.
Be a Second Shooter First
I know it’s not what a lot of photographers want to hear after being asked to photograph a friend or family member’s wedding, but I think it’s absolutely imperative to shoot multiple weddings as a second shooter before even thinking about taking your first paid photography job as the main photographer.
Back when I was trying to learn this stuff, I would Google around for beginner wedding photography tips and what not and couldn’t really come up with the information I was looking for. A lot of what I found seemed to be the same story.
It was always some inexperienced photographer in a forum asking about how they could get themselves up to speed on wedding photography in a hurry so that they could shoot their friends wedding. A lot of the same people would come back reporting how the friends or clients got upset with the photographer and I even came across some accounts of legal action being taken and friendships broken.
It all seemed so avoidable to me. And it really is.
Save yourself the hassle and get some experience under your belt as a second shooter. It’s the ideal way to build a portfolio anyway.
If you’re not able to get any traction with the outreach plan I laid out in the previous section, you can always offer a photographer in your area to do a one on one workshop with you.
Don’t hold it against any photographer who doesn’t warmly embrace the idea of bringing you on as a second shooter. Put yourself in their shoes – they could end up training a future competitor.
Prepare Your Equipment
This section could be filed under the “duh” category, but we all have our brain fart moments so I think it’s worth mentioning.
The day before the wedding day, make sure you have everything charged – your camera batteries (and you should have spares), flash batteries, LED light batteries and any other accessories you may have.
Also, make sure to go through your memory cards and upload any images you haven’t already to your hard drive or wherever you store them. Then make sure all images are deleted on your cards and are ready to go. If possible have all your memory cards available to you on any given wedding day.
You never know when you might run out, and with weddings you take a very high volume of exposures.
But enough with the preparations, let’s finally get down to the technical side of shooting weddings:
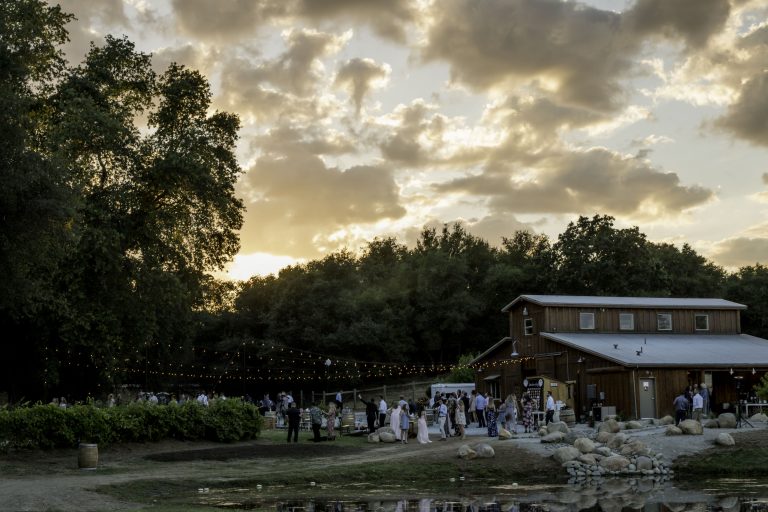
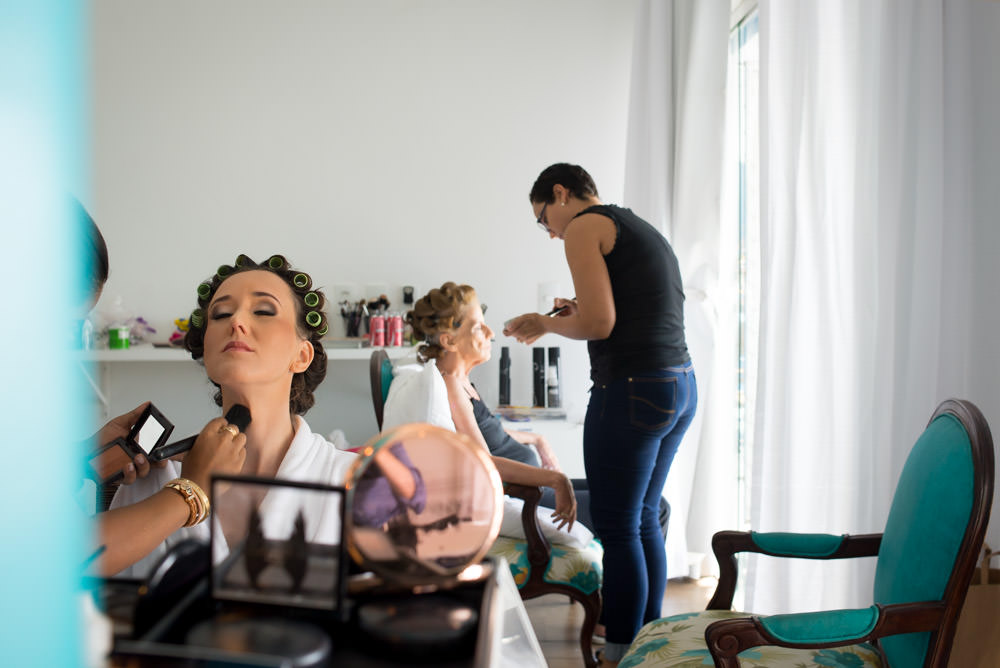
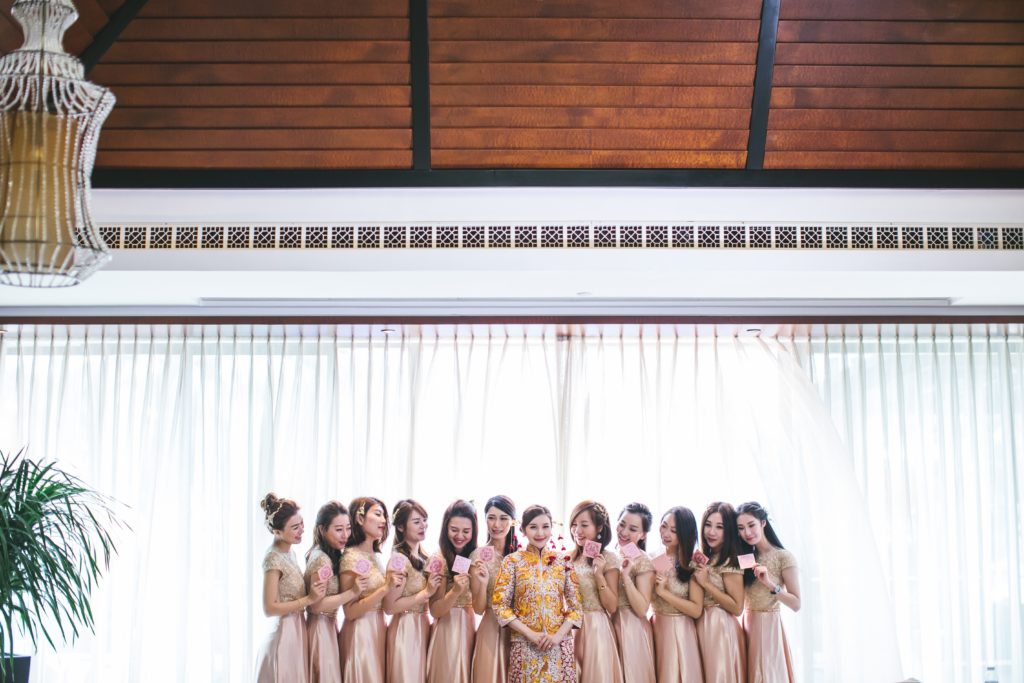
Photograph the Bride Getting Ready
This is usually the starting point for the day. Once you get to the location for the bride’s making of, take the opportunity to make a connection with the bride and also introduce yourself to the bridesmaids and the bride’s family.
Most of them will be preoccupied with getting their hair and makeup done, but it does place them in somewhat of a vulnerable position so introducing yourself to everyone, chatting a bit and getting to know people goes a long way. If you’re a male photographer, you need to be attuned to whether you should step out of the room if necessary.
Some of the coolest wedding photographs I’ve seen have been of bridesmaids or wedding planners helping the bride into her gown. Some brides are completely comfortable with the photographer shooting that but others not so much so just communicate well with the bride and have them let you know if they want you to step out at any time so that they can change.
What I like to focus on for a bride’s making of is to capture moments of the bride and her family or friends interacting with one another. That may seem obvious to some, but getting this wrong was the reason my first attempt at wedding photography turned out so bad. I didn’t photograph the bride that wedding, I shot the groom that particular wedding, but the same concepts apply.
What I did wrong at that wedding (aside from using a 50mm in a cramped hotel) was to focus on individuals rather than telling the story of everyone there. When the groom was putting on his tie or putting on his socks, I was getting up close to him and isolating him in that moment.
What I should have been doing is to frame him on one side of the image and using the remaining space of the frame to put other subjects. If the groom is putting on his tie, I can frame him but also frame his best man combing his hair, brushing his teeth, etc.
Likewise, with the brides, I often start by framing the bride to one side of my frame and then wait for a separate interesting thing happens in another part of the frame. That could mean that the bride is doing her hair while her mother is playing with a young niece or something like that. By establishing the bride in your frame from the beginning and then waiting for something interesting to come into the other portion of the frame, you’re already prepared for that moment.
When something interesting happens in the other part of the frame or someone interacts with the bride, you can just keep your camera exactly where it is but fire off multiple clicks. I might take up to a dozen shots at one time in situations like this so that I have the opportunity to decide later what I think is the best framing and expressions on the subjects’ faces.
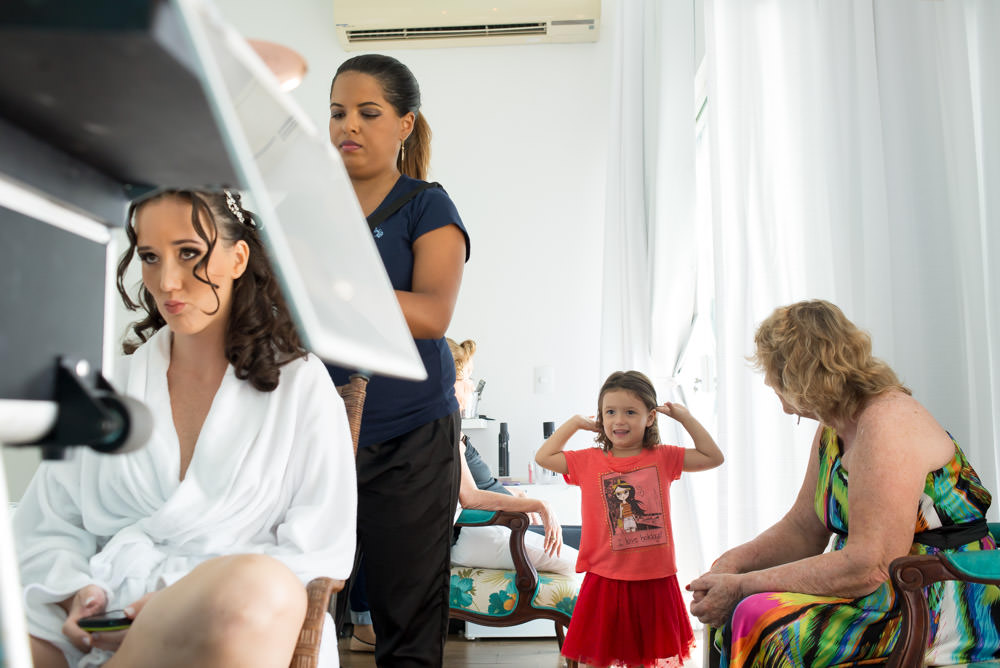
It’s really just basic layering, but it can be extremely powerful. There are lots of little stories going on at weddings, little sub-narratives if you will, and if you layer your images you’re able to a much more comprehensive story of a wedding day than if you single your subjects out.
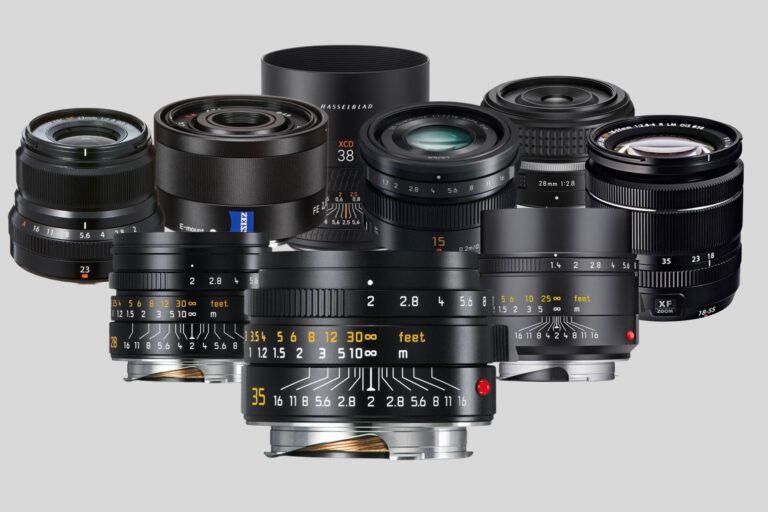
A note on lens and aperture selection: In order to do this technique properly, you need to pick your lens and aperture accordingly. For any sort of indoor shots of the bride or groom getting ready, you basically need a somewhat wide angle lens. I do this with a 35mm lens but a 28 or 24mm works great as well. This goes against what a lot of wedding photographers practice, but I shoot with smaller apertures so that when I frame multiple subjects, they’re all reasonably in focus.
Finally, once the bride and her bridesmaids have gotten prepared, it’s a good opportunity to take group photos and then some single portraits of the bride. When working with groups for group portraits, I think it’s always a good idea start with the whole group and then if you’re going to be taking smaller group shots or a solo portrait of someone do that at the end.
That way, whoever needs to do other stuff can go off and do so and you’re not keeping them.
You may not always have the most glamorous settings to work with, so in these situations I think the best solution is always just to find the simplest backgrounds possible and set your shot up several feet in front of it. Think plain walls, curtains, etc. Hotel lobbies can be much better than the hotel rooms that brides often prepare in because you have more space to work with and they usually just look more elegant in general.
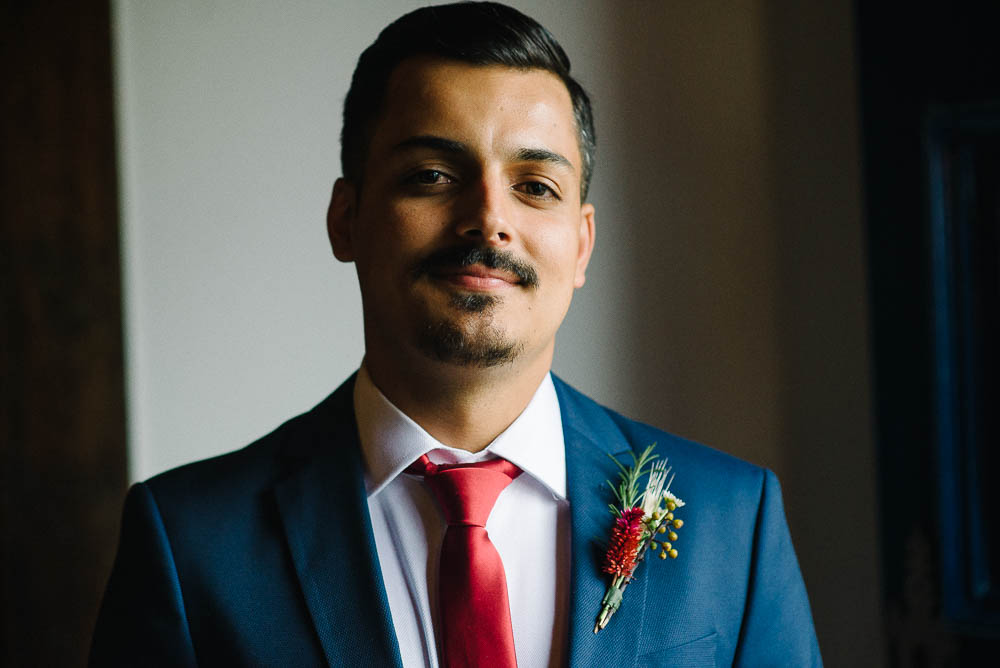
For portraits I simply recommend keeping highlights out of your background (although as you can see in the portrait above this is not a hard and fast rule) and either using lateral light at a ninety degree angle from a window or bouncing flash into a ceiling or wall. I try to make portraits on wedding days as quick and painless as possible so I don’t use big modifiers.
Doing these portraits on the spot on the wedding day is always kind of a crap shoot because you just don’t know what the setting or lighting is going to be like beforehand. So don’t feel like you have to create a masterpiece with each of the portraits you take (although if you think up a unique portrait idea then obviously go for it) – just do the best you can with the conditions you have to work with.
Do the Same for the Groom

The approach I take to photographing grooms is very much the same as what I do with the brides.
I just try to tell as much of the story as I possibly can, and I do that through layering and maybe some small detail shots and portraits.
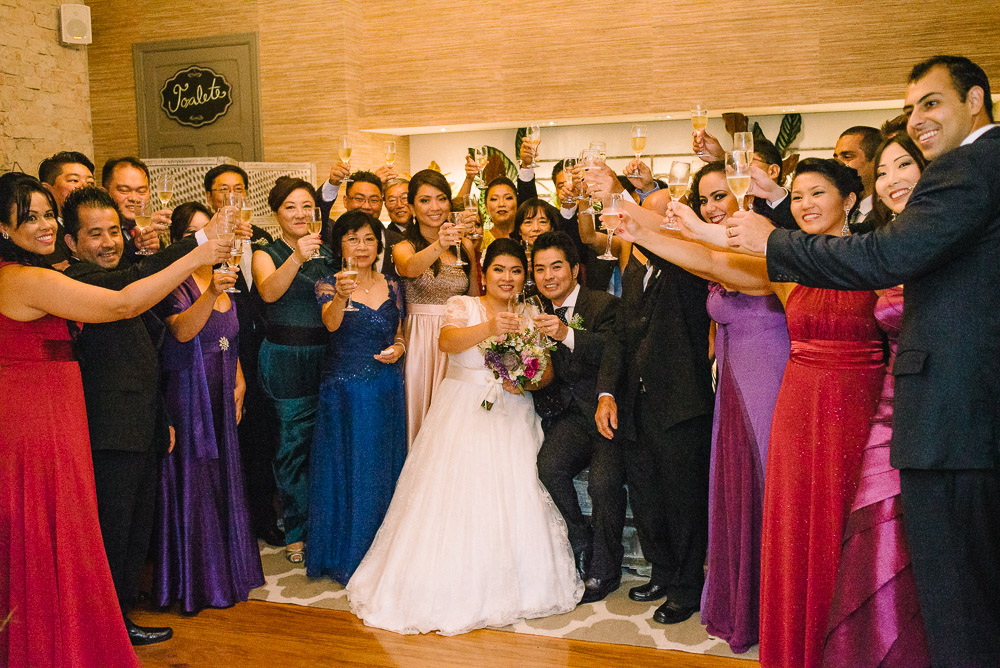
But instead of the cheers being done with champagne flutes, it’ll likely be done with beer bottles.
Aside from treating it similarly to the bride’s making of, it’s also the best time during a wedding day to photograph the rings.
The groom or someone with him usually will have the rings with them, rather than the bride. And the only other time during a wedding day that’s really possible to shoot the rings is during the reception if there’s some downtime.
It’s a much better idea to take these shots during the groom’s making of in my opinion. It’s just easier and less chaotic.
There’s all sorts of wedding ring photography techniques and there really are no rules to doing it. But I think that having a go-to type of shot is a good idea in order to have some consistency and guarantee that you’re at least going to get a few acceptable shots.
One technique that I came across a couple years ago was from this wedding photographer, Paul Keppel, who put out this great, simple quick video on how to use an LED to get great wedding ring shots no matter where you’re shooting:
On the other hand, I think it’s also a good idea to get some images of the rings from a broader perspective that maybe utilizes a background or element of the bride and groom’s wedding venue. These types of shots are more difficult and less consistent to pull off, which is why I think it’s best to do both.
That being said, I really don’t think there should be a lot of time and energy put into taking photos of the rings. Sure, you should absolutely get some professional-quality shots of the rings but it shouldn’t be your main focus for an inordinate amount of time.
Ring shots are nice to have for the bride and groom, but ultimately, they’re inanimate objects that they an see whenever they want just by looking down at their finger.
What’s more important are those fleeting moments during a wedding day that won’t ever happen the same way again. For me, images of the bride and groom and the people closest to them will always take precedence over things like ring or detail shots.
Shoot the Downtime up Until the Ceremony
Once you’re done photographing both the bride and groom’s making of, there is usually some downtime before the ceremony starts.
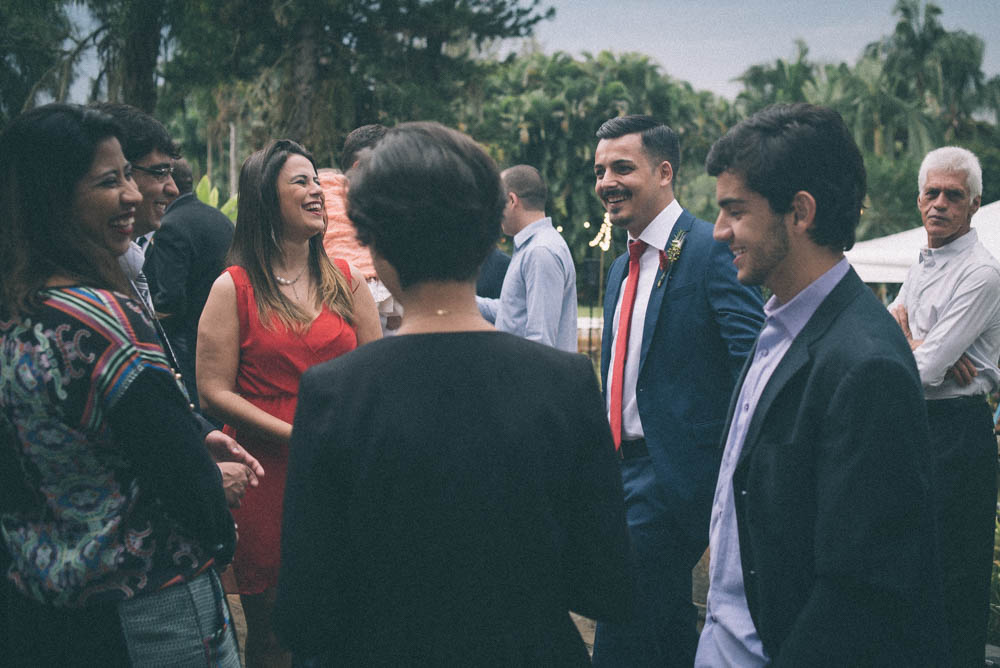
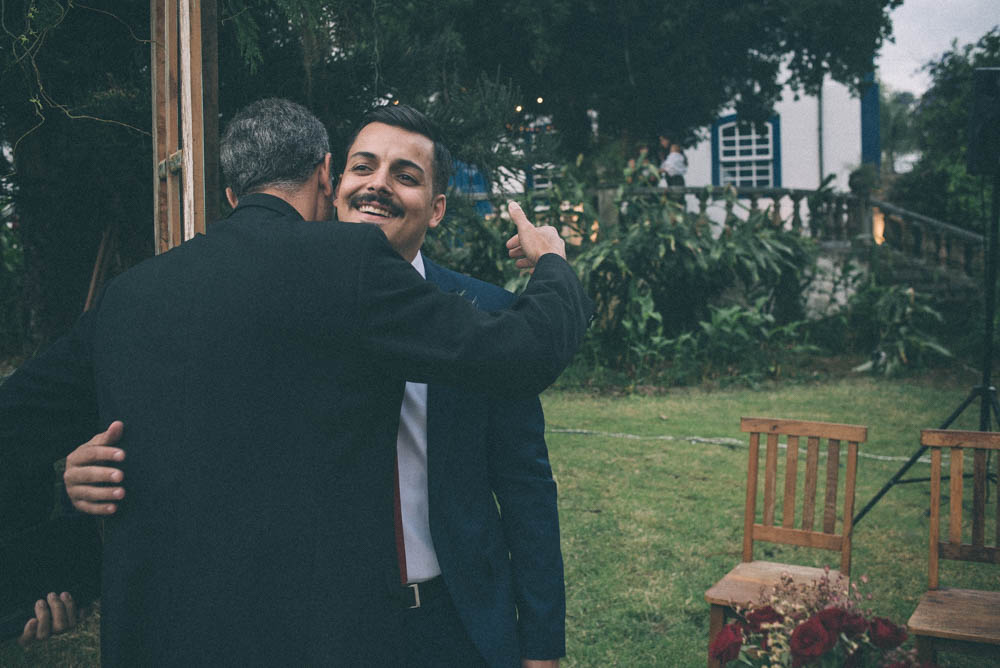
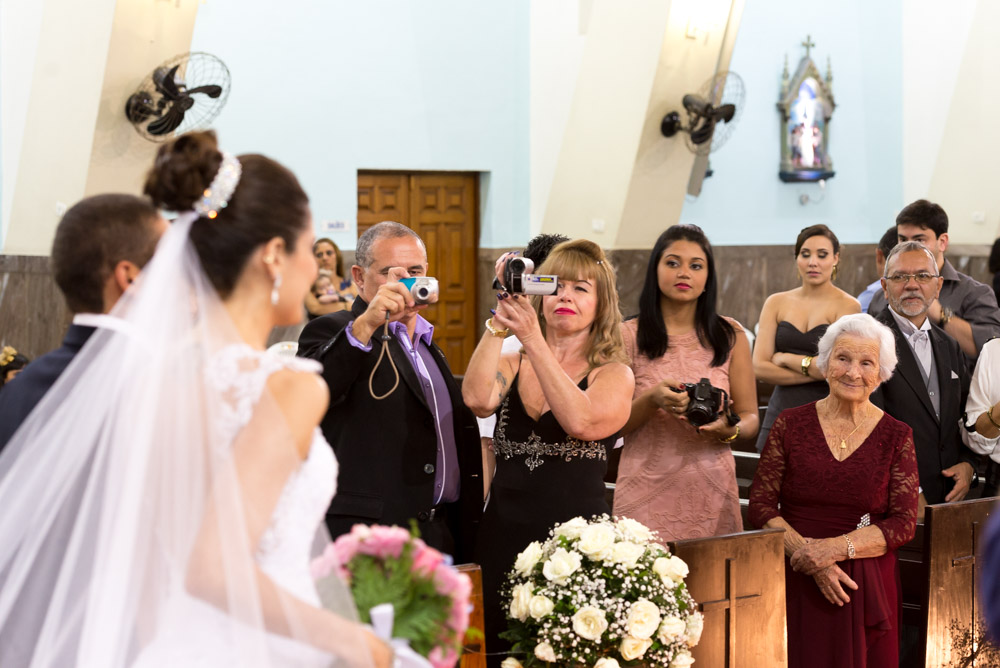
It’s fine to use this time to take a quicker breather, but I also think it’s a good opportunity to continue telling the story of the day. At many weddings, the groom will greet a lot of the guests as everyone waits for the bride to arrive.
As you can imagine, this this can be an emotional and powerful time during the day, as the groom may be hugging and seeing and catching up with family members for the first time in years. And even for the family and friends that the groom sees all the time, it’s still a very emotional day that brings tears and smiles on.
Not only that but you can also get some nice shots leading up to the ceremony of the groom getting ready to walk down the aisle with his mother or the bride doing the same with her father.
Here are a couple examples:
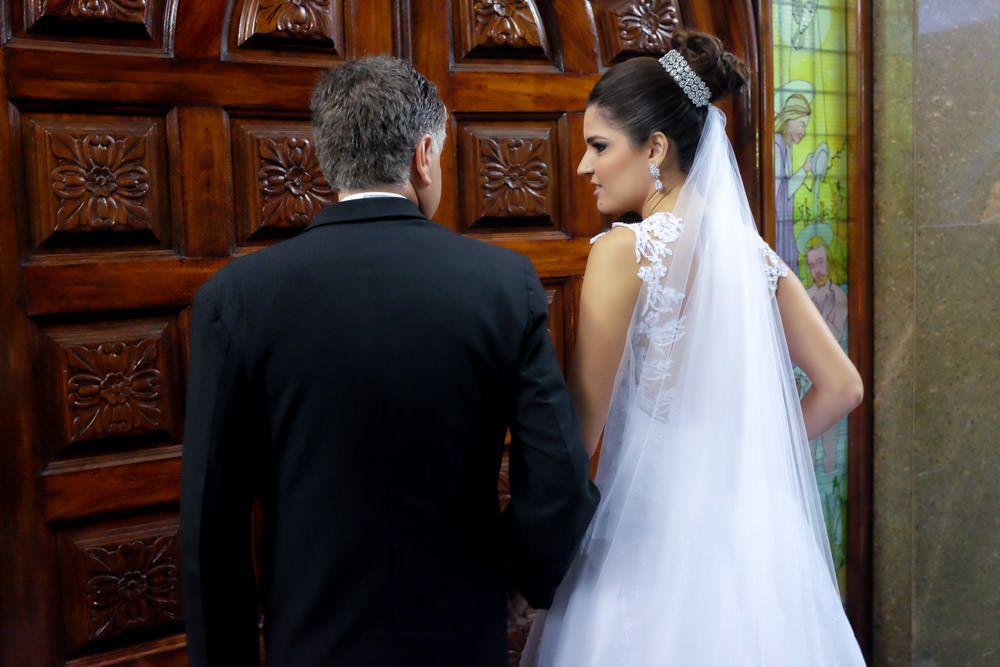

At a different wedding:
Photograph the Wedding Ceremony as Discreetly as Possible
The majority of churches and wedding venues don’t have a problem with photographers working the ceremony.
However, some have strict policies against it. Considering that could very well be the case, you should do your due diligence and find this out before the wedding day.
Don’t leave it to the bride and groom to find out if the venue/church allows photography because they might not even think to check. I haven’t personally had this happen to me before but if I did find out that a venue didn’t allow photography during the ceremony I would make sure that the couple knew that and would stress the point that it could leave their wedding album feeling incomplete.
I’d definitely say it’s worth reconsidering the venue for this reason but ultimately it’s the bride and groom’s decision.
With that said, pretty much all of the venues I’ve shot weddings at have had absolutely no problem with my presence as a photographer. I mention in the label of this section to be as discreet as possible, but you really can get as close as you need to the action, within reason.
So don’t be afraid to get close to your subjects; just use some common sense and don’t linger too long.
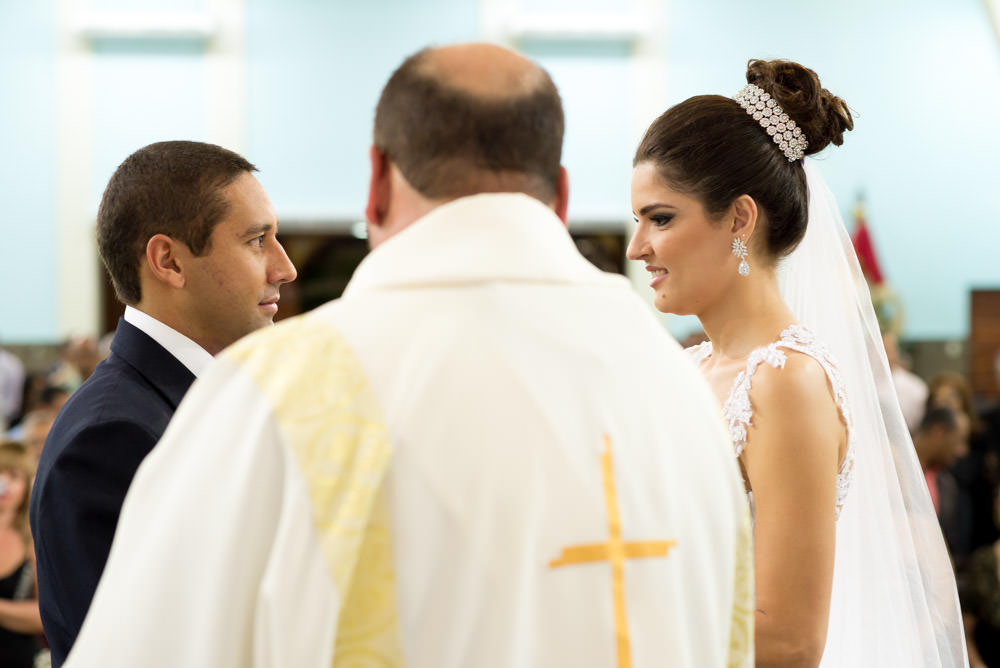
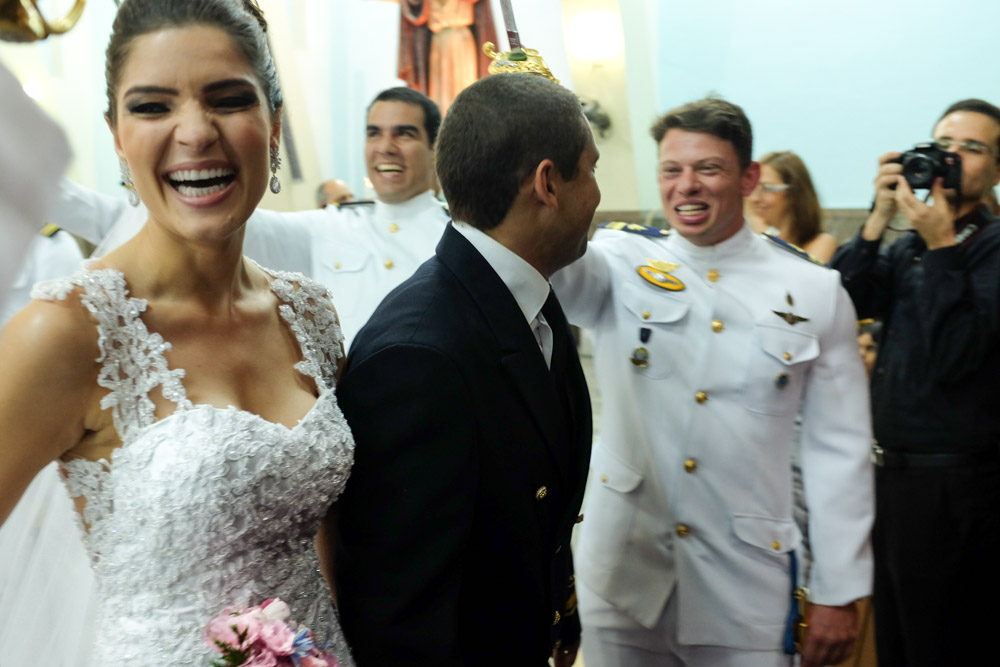
I approach the ceremony much like I do with the making of’s: I try to tell the broader story by capturing moments of the bride and groom interacting either with each other or other attendees of the wedding, often through layering.

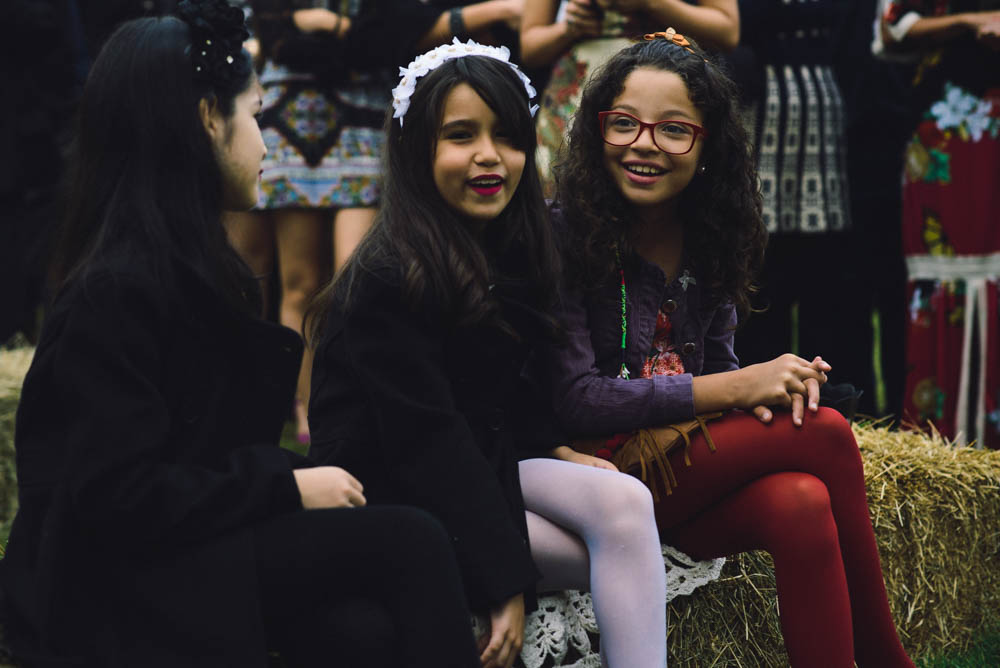
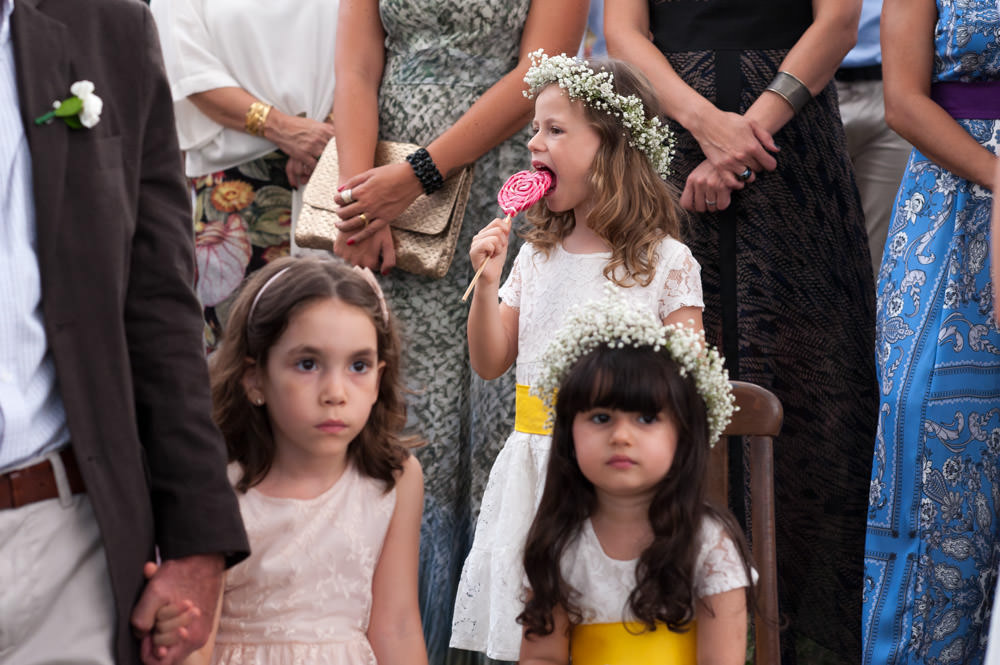
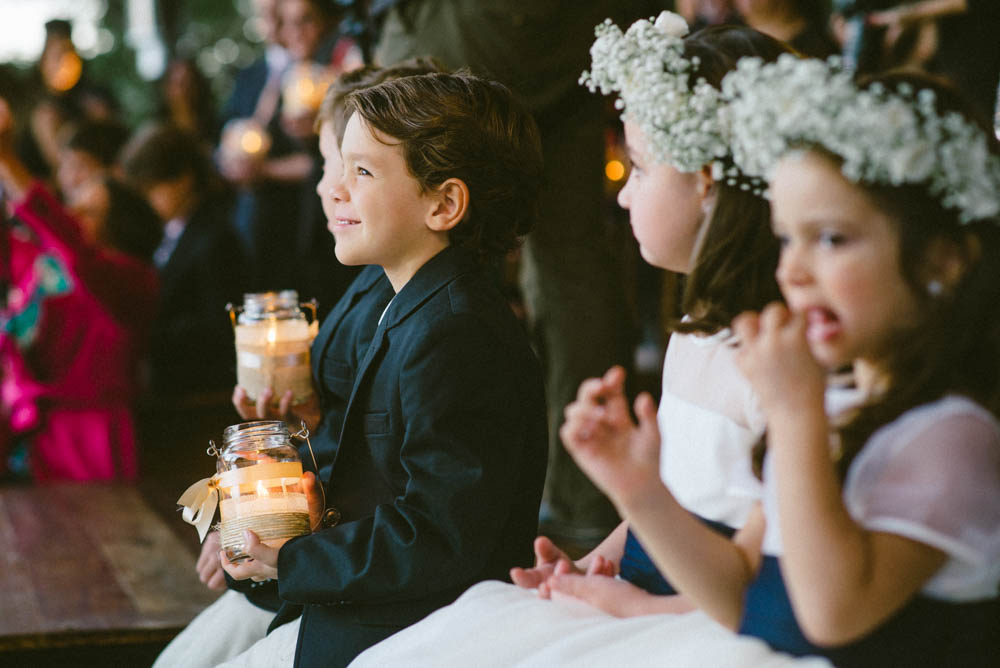
I think it’s also important to pay attention to what’s going on outside the obvious during a wedding ceremony. Not every shot has to be of the bride and groom. There are plenty of beautiful fleeting little moments that go on if you just look for them.
Kids are great subjects at weddings because they wear their emotions on their sleeve. You can often catch them running, singing, dancing and playing with their siblings and other kids.
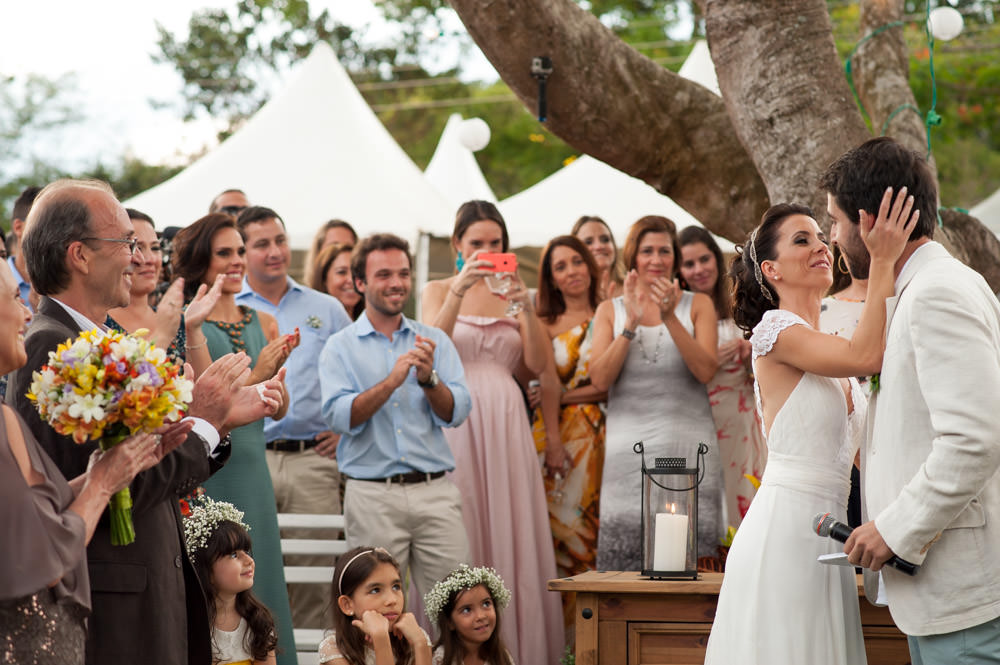
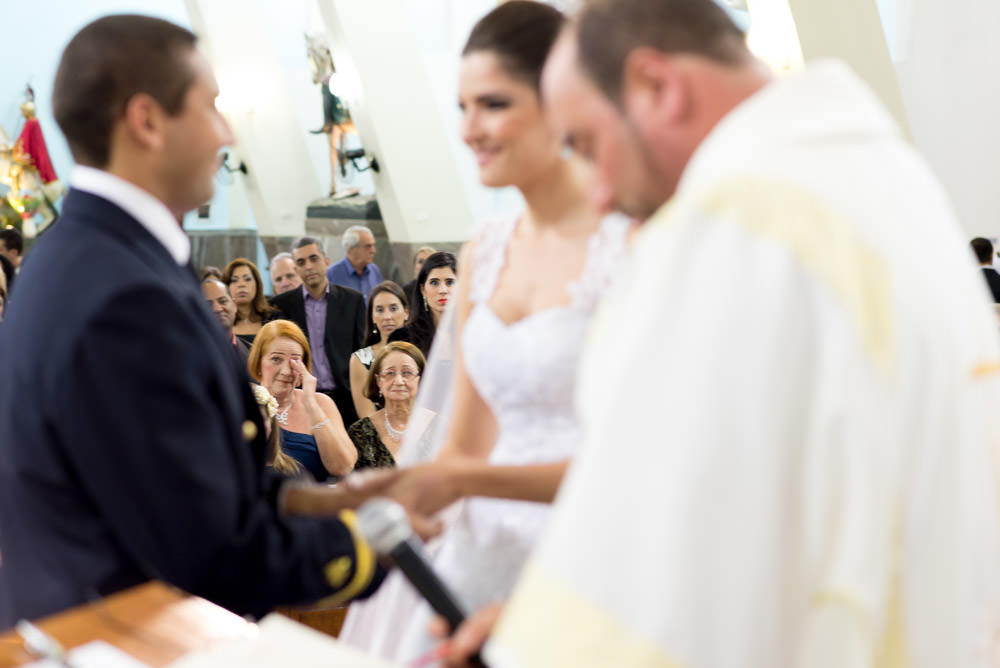
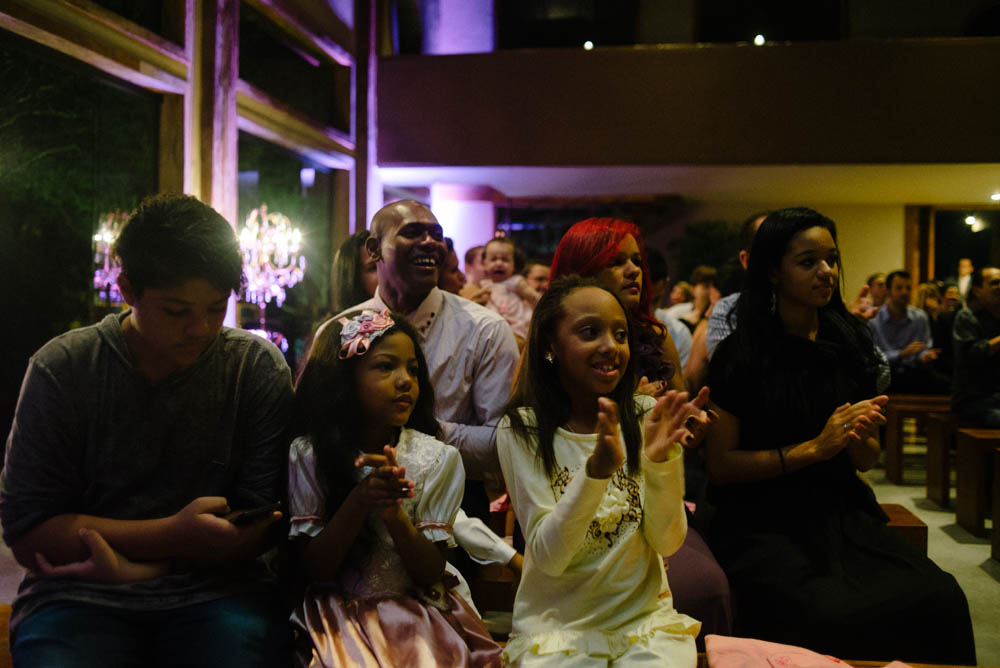
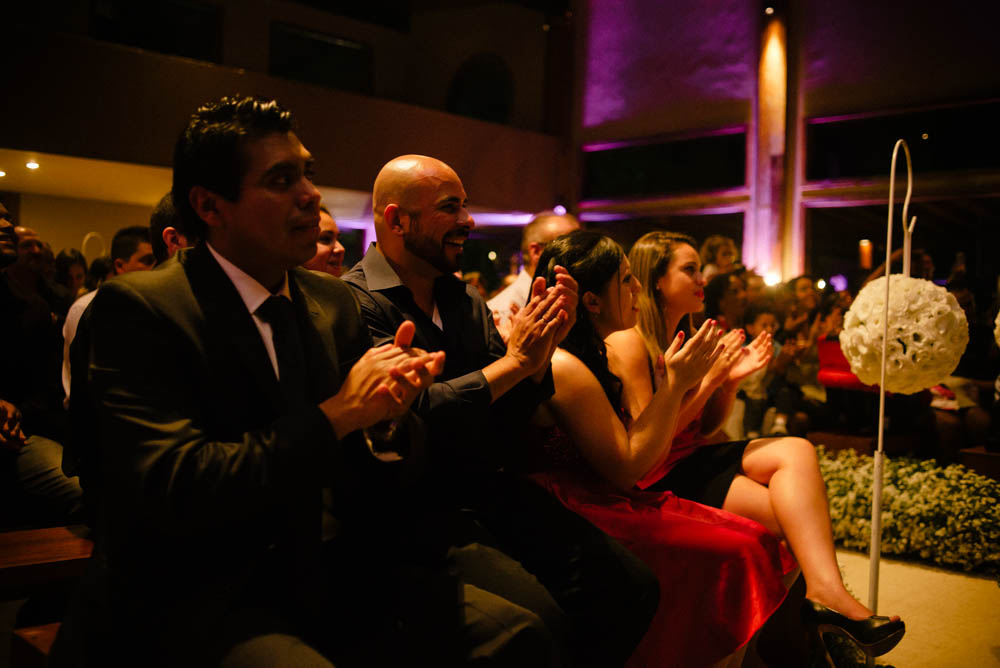
It’s also a good idea to get the reactions of wedding guests whenever it makes sense. If there’s a moment when someone is giving a speech that causes everyone to laugh, I take photos of the audience, whether that be them laughing, applauding, crying or what have you.
Your gut reaction might tell you to take pictures of the person giving the speech, but it’s not necessarily the best way to go. The best option is being able to frame the person speaking but have the focus on the audience reacting to that person.
But since that’s not always possible, the next best thing is to photograph the audience’s reaction. Photographing the person speaking is also an option, and is a good shot to include if you can get it, but a photo of a person holding a microphone is the least interesting of the options in my opinion.
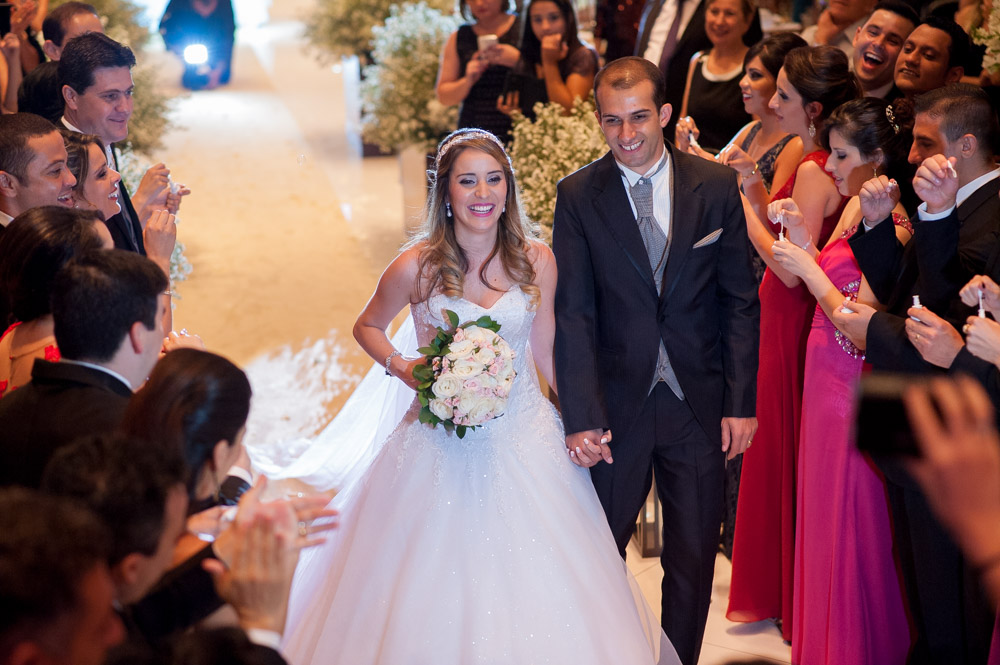
Photographing the Exit from the Wedding Ceremony
Photos of the bride and groom leaving their ceremony can turn out to be some of the most beautiful and dramatic images from a wedding.
But because you have people moving around and you never know exactly how the exits are going to go down, these shots can some of the most challenging of a wedding day to get. They’re fast, fleeting moments, and you only get the one chance to capture them.
They’re are a ton of variables when it comes to photographing the exits of a wedding ceremony so you can’t expect to come away with photos exactly as you envision them. But you can give yourself a higher chance of success by having a general idea of what you’re going for and then planning ahead.
In order to come away with some keepers from this part of the wedding day, it’s best to have a plan for both you and your second shooter and stick with it. A big part of making this work is clearly communicating with your second shooter on what you want them to do and what you’ll be doing.
The general idea is for each photographer to shoot from their own uniquely separate angles. It never makes much sense to shoot from the same angle, because you’ll just end up with very similar-looking images.
So you each take your own angle and shoot from there throughout the entire exit process.
The most standard way to do this is for the main photographer to get an angle from the side or the back of the church and take photos of each couple as they walk back down the aisle out of the church. Then, walk down the majority of the aisle and get get right in front of the bride and groom and take snaps the entire way out as they walk back out the church.
I do a slight variation on this, which is to just get about a quarter of the way down the aisle in front of the bride and groom and shoot with my 35mm and let them come towards me. Whenever they start getting close, I turn around, walk back to get some space before shooting again. I then repeat this until we’re out of the church.
I mention this because I think backpedaling down the aisle is just an accident waiting to happen.
As I said before, you don’t want you and your second shooter’s images to be the same, so some good places for a second shooter to set up at would be to the side in one of the pews shooting from a forty-five to ninety degree angle, near the back of the church, or even up in an upper level for a unique angle.
I think keeping it simple is the way to go, so for second shooters I like the first option.
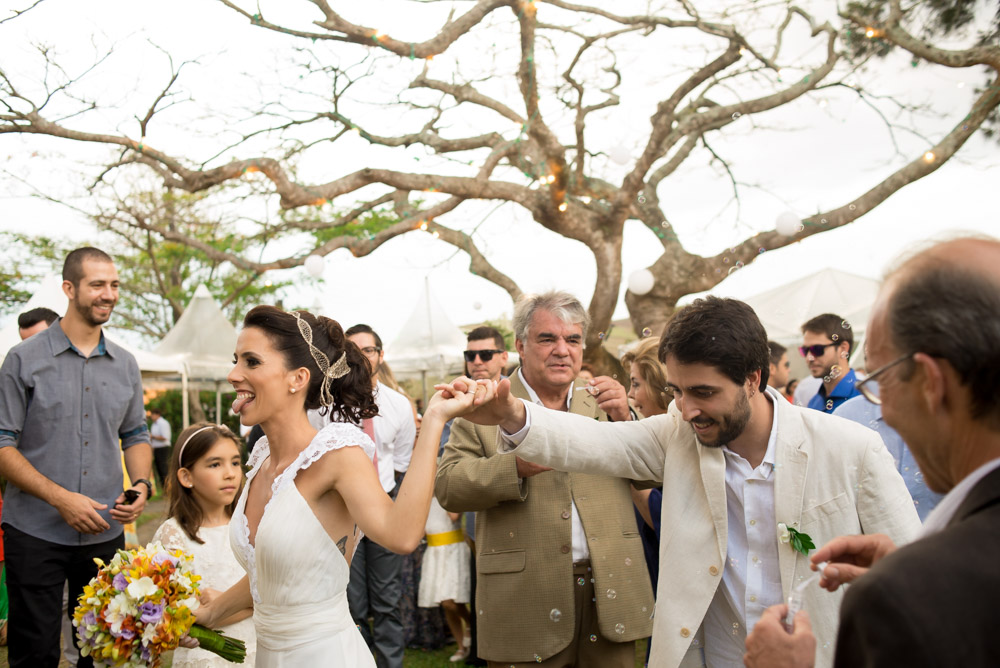
As with the other parts of a wedding day, I treat the exits similarly by trying to tell the story of the day by showing not just the bride and groom but also their wedding guests and how they interact with each other. In the above photo, what made it a keeper for me was the grandma’s look on her face of pride and happiness.
The most dramatic part of exiting the church is the actual moment when the bride and groom get outside the door. They’ll often kiss, people will be crying, and some with be throwing rice or seeds or blowing bubbles.
You only get one shot to register these moments, so the key really is just being in the right place at the right time and to keep on clicking so you have multiple options to work with in the editing process. Make sure you have as direct line of sight as possible of the bride and groom and use mostly layered framing techniques like I’ve talked about previously in the article.
You can also get some closeups of the bride and groom at this time but for the most part I focus on showing multiple subjects and their reactions to the moment.
When to Take Family Portraits on a Wedding Day
I’ll be frank here: family portraits, bride and groom portraits and wedding portraits in general are my least favorite aspect of doing wedding photography. I could go a whole wedding just taking documentary-style pictures and I think it would make for a great wedding album.
However, it’s not about me, it’s about the customer. And even if the customer agrees with me that the candid moments are more important than group shots, I would still want them to have those group shots.
Group shots ultimately end up being some of the most shared and framed pictures from a wedding day. People are just more likely to share photos that they’re in with other friends and family members, even if there are more authentic shots but with less personal appeal.
So even if your style is like mine and you do photojournalistic wedding photography, I think you should provide your clients with several family and group portraits for them to choose from.
Just as with group portraits during the making of’s, I approach these family portraits the same way: by starting with the largest group possible and working my way down from that.
Ideally you’d have two big modifiers, octoboxes or soft boxes on either side of you to illuminate the group, either on strands or held by assistants. That is possible, but it is quite a bit of work to set up for just a few portraits. This equipment is also expensive and sometimes is just not feasible to bring along, like if you’re shooting a wedding out of town or a destination wedding.
In that case, I’ll do one of two things:
- If I’m indoors, I usually just bounce my flash directly into the ceiling. While not perfect, it does give me a pretty even spread of somewhat soft light across the subjects.
- If, on the other hand, you’re at an outdoor location, the approach has to be different because you have no ceiling or wall to bounce a flash in to and direct flash is a no-no. In this instance I think it’s best to either set up a flash on a light stand or have an assistant hold an off-camera flash at a forty-five degree angle at the group.
If I’m photographing a large group of people, I’d much rather have multiple modifiers. But weddings are fast-paced affairs that are not conducive to setting up studio-style lighting, so it’s OK to ditch the complicated setups for something simpler.
If for whatever reason I can’t get a couple flashes with modifiers up in a timely fashion, I’m happy to use a single flash and get these people on their way to enjoying the wedding reception.
One last note on this: I don’t remember which book it was but in one of Scott Kelby’s (many) books, he mentions having the whole group close their eyes for a few seconds, while you count down and tell them to open them on the count of three. (I should mention he does this to ensure that he gets everyone with their eyes open)
This is a good way to do it but I prefer quickly counting down or just saying something like “can I get everyone smiling on one, two, three.” and then firing off a bunch of shots. I’m talking like ten to twenty shots each time you’ve got the group framed how you want it.
Doing it this way gives you a ton of shots to work with, i.e. plenty of chances of getting everyone in the group with their eyes open and not blinking. I also prefer to direct as little as possible and this lets me do that plus I think it results in more natural reactions/facial expressions.
After you’ve gotten through the group photos, break everyone down into smaller groups. Start out by shooting everyone, then only one side of the family with the bride and groom, then the other side, then breaking it down further into just the groom’s immediate family and then the bride’s immediate family, etc.
There’s no perfect way to go about this but I think it’s a good idea to ask the bride and groom in a preliminary questionnaire about who their family members are and then making a list of these family members/friends and putting them into groups that would make for good album photos. It just appears much more professional to do it this way and be prepared and not be flying by the seat of your pants trying to put everyone into groups on the spot.
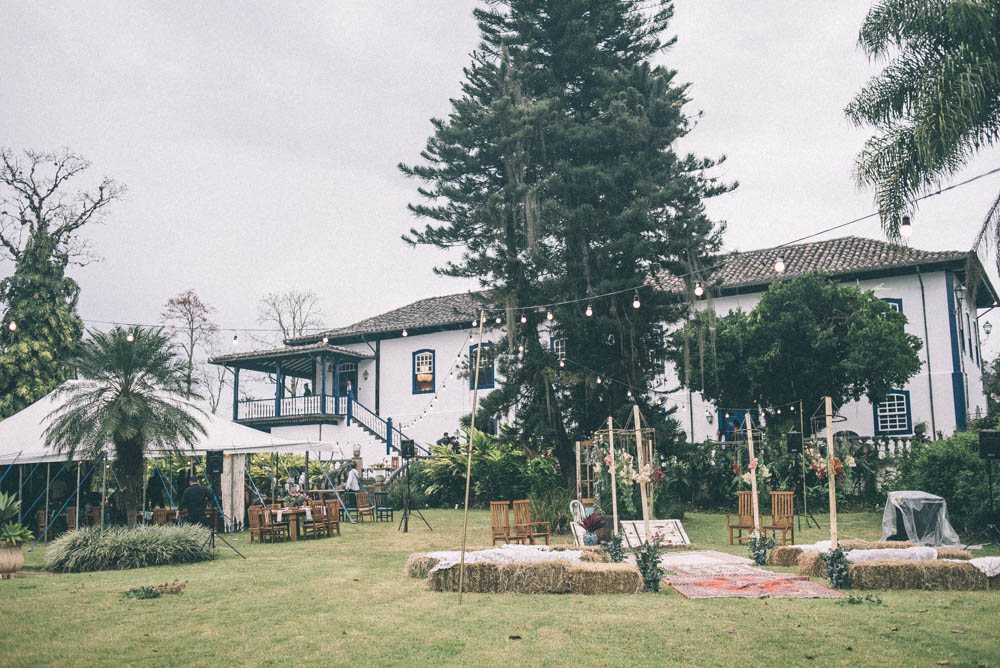
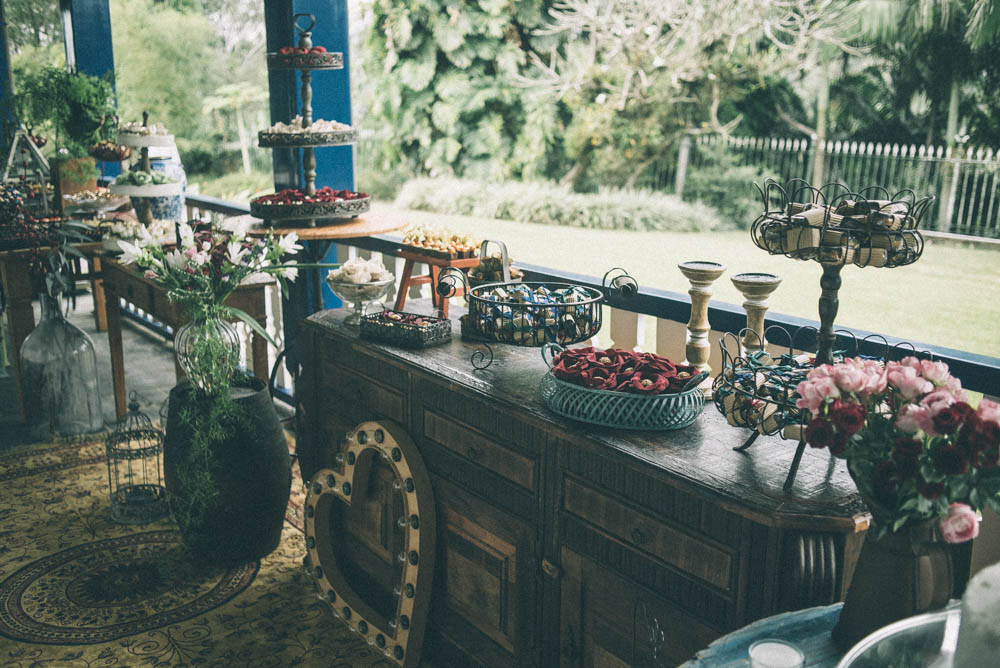
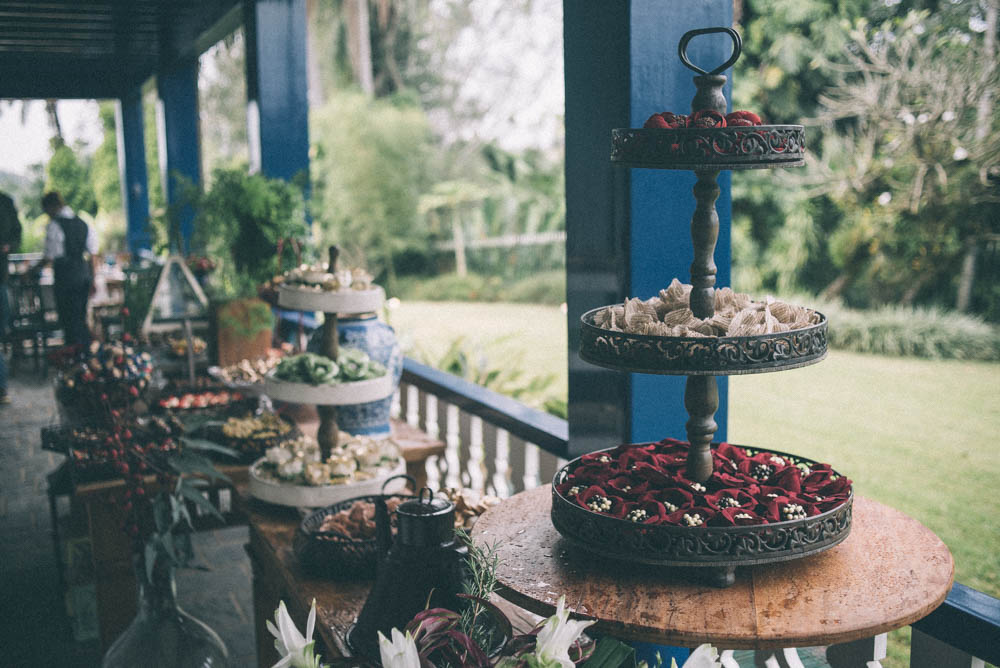
Don’t Forget the Decorations/Details
After taking these portraits, you may or may not be changing venues. It’s always nice to not have to change venues, as it gives you more time to do things like photograph the decorations, but that’s usually not the case so you have to make the best use of your time when you arrive at the wedding reception venue.
You essentially have a half-hourish time frame to shoot the decorations of the reception venue, so you have to be quick. You can’t do it if you’re fiddling around with your settings on every shot, so you need to either shoot in a semi-automatic mode (in this situation I would use aperture priority) or know the general settings you want to use in manual mode and go from there.
I like to use an aperture of f/5.6 and just choose a minimum shutter speed that I don’t want to go under so that I get sharp images and then choose an ISO based on those settings to get an exposure. Often times you’ll need to use flash to pop a little extra light onto the scene because of low light.
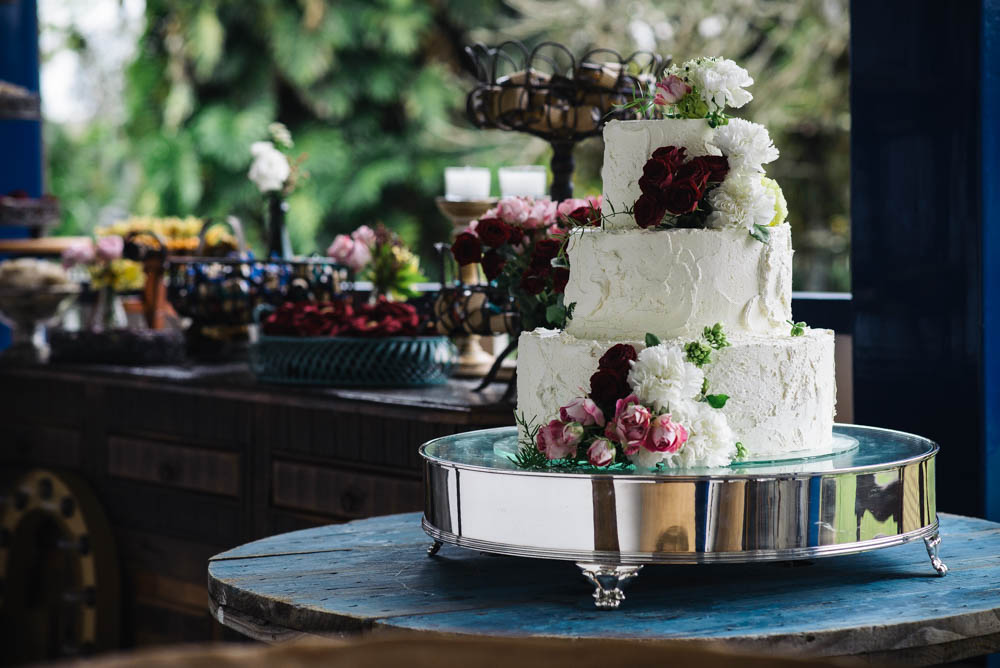
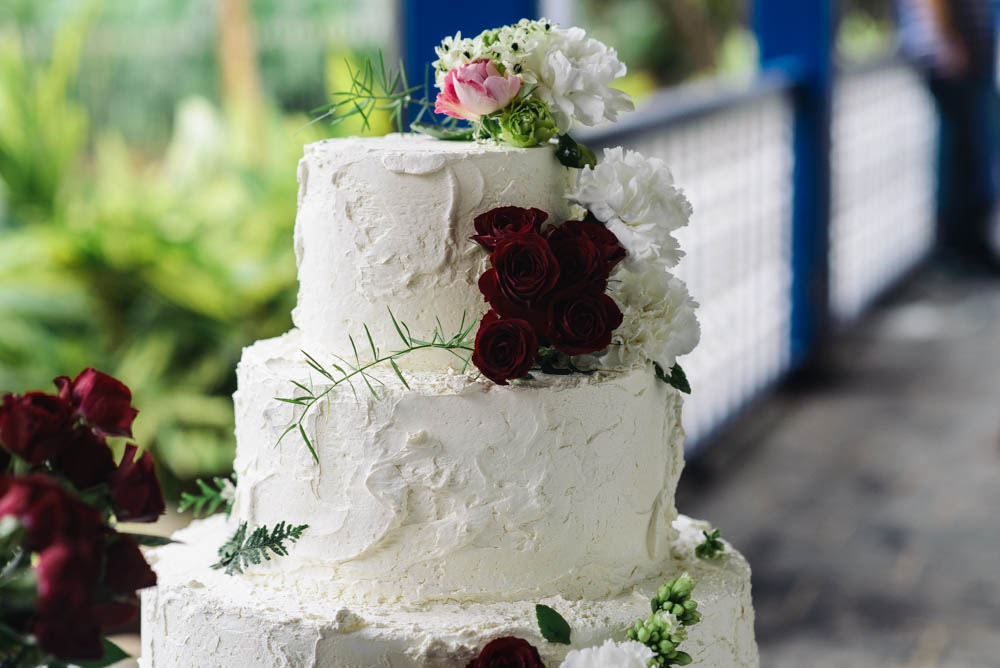
I always shoot with my flash on-camera when shooting wedding decorations and bounce it into a ceiling or nearby wall. It’s faster and easier than having an assistant hold a flash off-camera for you. I do think it’s worth it though to do some off-camera flash shots of the cake, as these are more important shots.
With detail shots, I start out as wide as possible and then work my way down, somewhat similar to my approach to wedding portraits. By that I mean that I start off by photographing the venue itself from far away, then working down to smaller things like the room that the cake is in and all its decorations and other foods, then down to the smallest details, like flowers, the cake, and maybe even just a closeup shot of just part of the wedding cake.
Doing it this way just helps me keep everything organized in my head and makes more likely that I don’t miss anything.


For shooting wedding details and decorations, I prefer to have two lenses: a wide angle and a mid-range tele/macro lens. I personally use a 35mm lens for the wide shots and then a 60mm macro for everything else down to macro.
You don’t need a macro lens for doing this part of weddings, but it certainly helps.
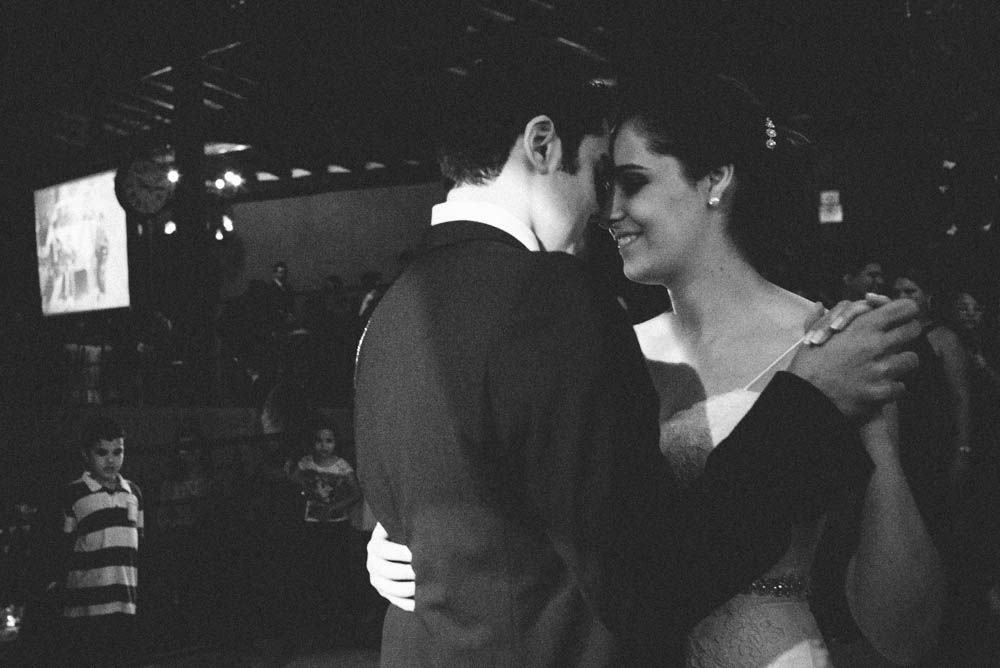
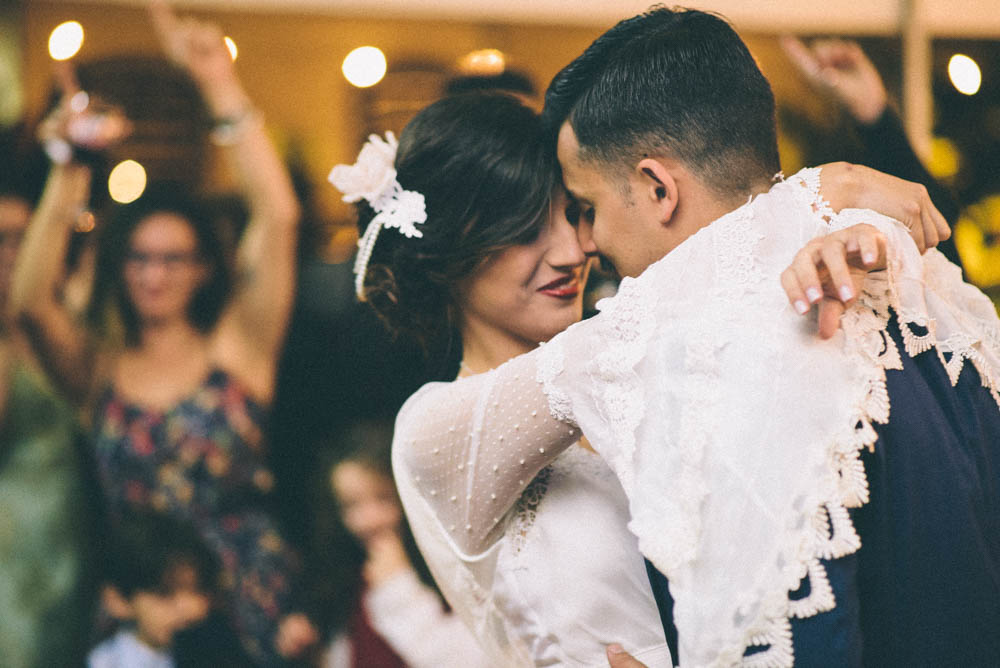
The First Dance
You have about three minutes, or the length of a standard song to come up with a few good, usable first dance shots for a couple’s wedding album. While that may sound like plenty of time, that little three-minute window can fly by if you’re trying to adjust your settings by the seat of your pants during the first dance.
The good thing is is that you usually have plenty of time before the first dance to dial in your settings by taking some practice shots either on your assistant, second shooter, or just any of the guests hanging out on the dance floor. Once you have your settings where you want them, you can just leave them as-is because the lighting isn’t going to change significantly from shot to shot.
Any shots that end up being a little off in terms of exposure you can usually clean up in post.
With first dance situations, I should note that sometimes the DJ or whoever controls the lighting will drastically change the lighting just before the dance begins, in which case you dialing in your settings to match the lighting goes out the window. Thems the breaks, so you should have a game plan in the back of your mind of what you’ll do if placed in that situation.
You have two options, the first being to just manually crank your settings until you adjust them to the point where you want them. It’s definitely an option if you’re fast with making adjustments, but not necessary. The other option is to switch to aperture priority mode (this is the mode I would most likely use in this situation) or another type of auto mode.
I’ve certainly gone down the path of adjusting my settings completely manually in manual mode in these situations because I’m stubborn about having complete control over my exposure, but I would probably benefit from just switching to an auto mode when I’m in a time crunch like this. Switching to an auto mode and putting your flash into TTL can save you critical time that should be spent photographing your subjects rather than fumbling around with your camera settings.
The reason I would choose aperture priority mode for first dances is for the control over depth of field. Like I mentioned earlier in the article, I prefer to shoot weddings with more in focus, so a lot of the time I’m shooting in the f/5.6-f/8 range so that I can get more in focus.
I think with first dances you can place more emphasis on the couple. Plus, there usually will be a large group of people surrounding the bride and groom as they do their first dance, which can make for distracting backgrounds. By shooting with smaller apertures, you can get some separation from the background. I personally like the look of shooting first dances between f/2.8 and f/4.
First dances are usually on dimly-lit dance floors, and there are a few ways you can go about shooting them:
-1. Have an assistant hold a light stick and a flash off-camera for you: In my opinion, this is the most aesthetically pleasing option that you’re going to get for first dance photos. By having your assistant stand behind you and to a 45-degree angle, you get dramatic side lighting with deep shadows. This isn’t a look for every occasion of using flash but I think it looks great for first dance images. This is also the most difficult technique to pull off because you first need an assistant, and then you also need to have good communication with them so that they hold the flash at the angle you need.
-2. Set up a light stand, or multiple light stands for a less mobile off-camera flash: This technique can get you very similar results to having an assistant hold a light stick for you, but is more constricting in that the flash is going to be stationary. You can position yourself at about a forty-five-degree angle from the flash or you can also do some cool back lighting by having positioning the bride and groom in between you and the flash in your frame.
-3. Bounce flash into a ceiling or wall from an on-camera hot shoe flash: I’d much rather have the look of off-camera flash for shooting first dances, but bouncing light from a hot shoe flash on your camera is a good option because it gives you much more mobility than you get with off-camera flash. You’re free to move around as you see fit without having to pay attention to where a light stand is or directing an assistant.
-4. Use natural light: Sometimes you get unicorn a dance floor with great lighting, but this usually isn’t the case. But when it is the case, by all means just with just natural light. You also have more leeway to use just natural light with higher end digital cameras that have very high ISO capabilities. As of this writing in late 2017, I’m assuming many of my readers don’t have the budget for that type of equipment (nor do I and it’s not necessary to be successful in wedding photography to have the best of the best gear).
First dance examples:
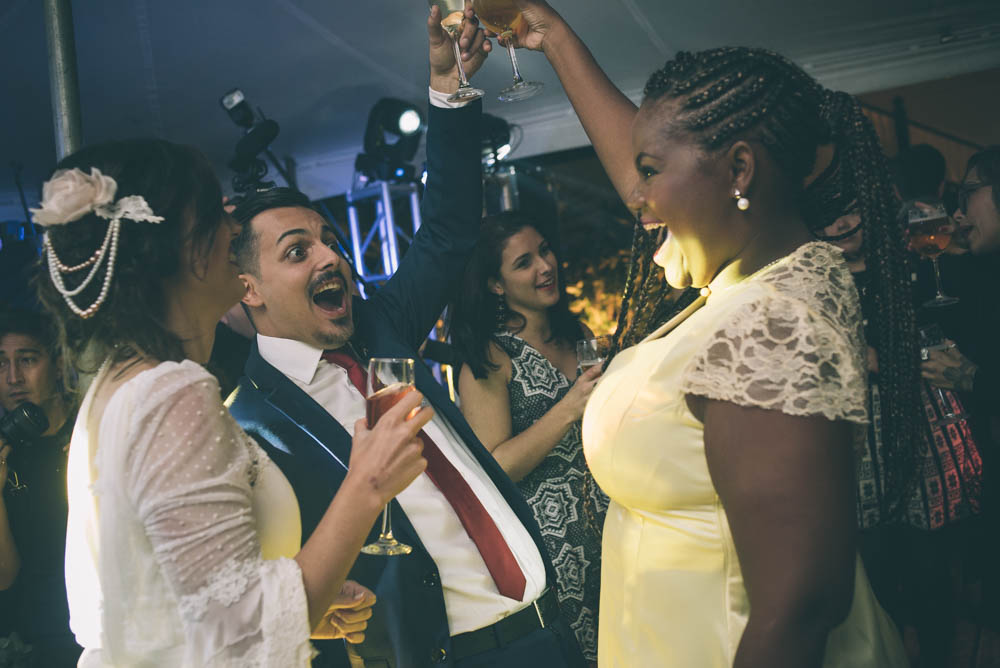
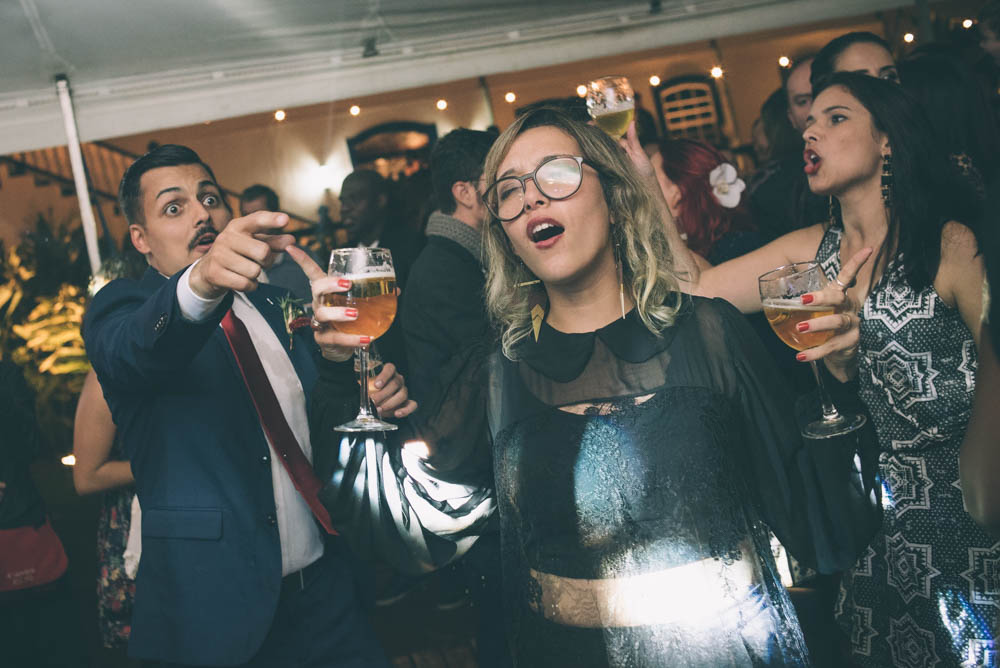
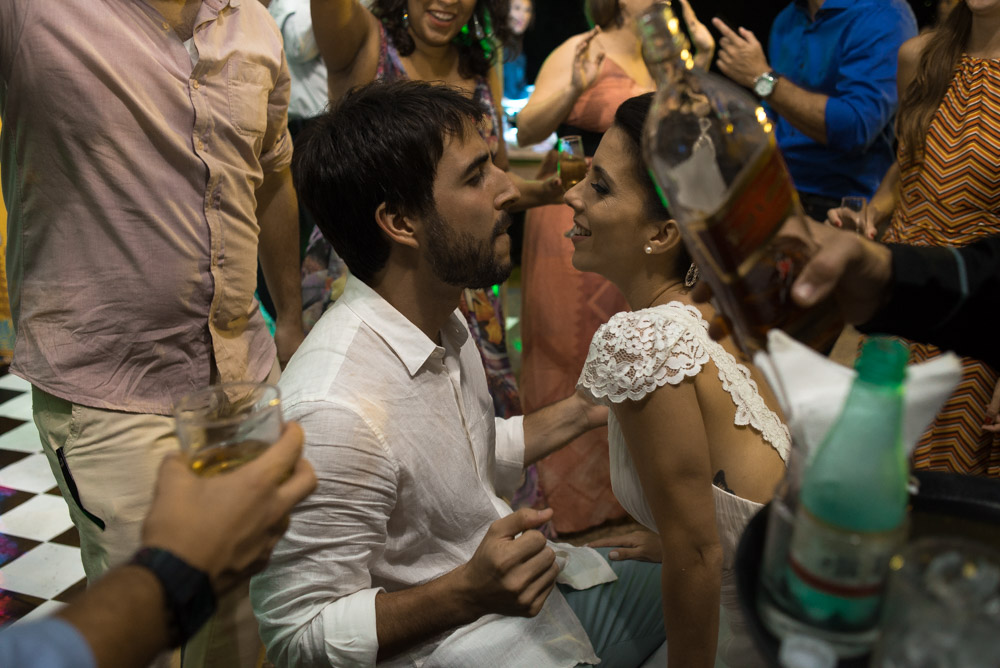
Dance Floor Shots
Many wedding photographers discount the importance of dance floor photos at wedding receptions. Photographers tend to think of this part of the wedding day as just one last part of the day to get through rather than an opportunity to deliver some great, emotionally-charged images to your clients.
If you put the camera down or your leave early you can miss out on some great moments.
Sure, the guests may start getting a wee bit intoxicated, but that means that people start wearing their emotions more on their sleeve and you can catch the bride and groom and guests having a blast and dancing. It’s all in how you look at it.
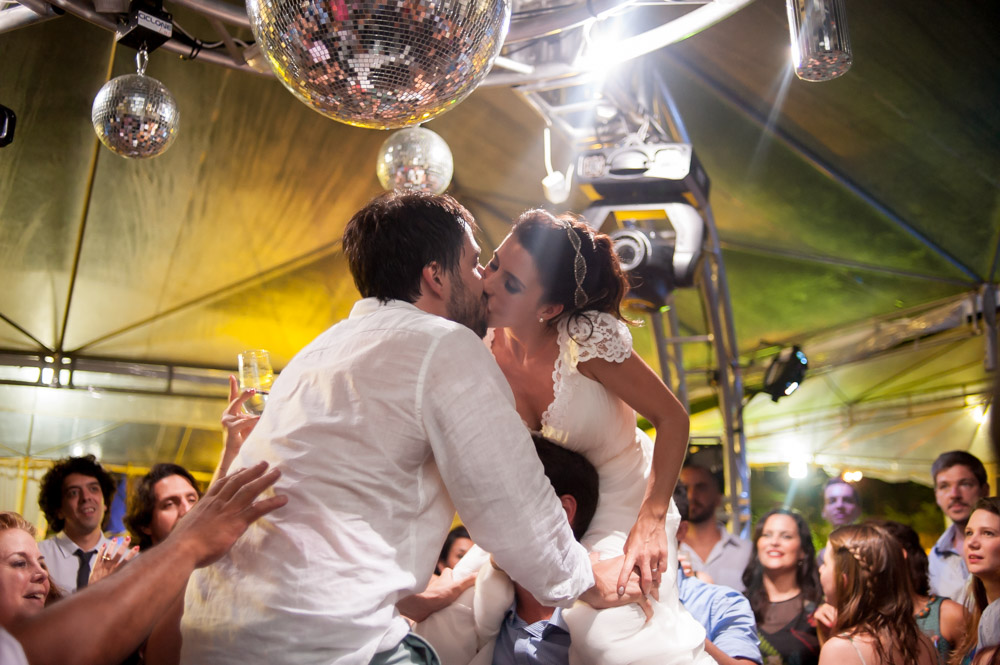
My approach to dance floor photos at weddings is similar to how I approach first dances. I generally stick with techniques 1 and 3 from the previous section.
Dance floors are pretty much always going to be dimly-lit with some form of stage lighting. So I’ll always be using flash, whether that be having an assistant hold an off-camera hot shoe flash for me at an angle (and since they can move around to different angles and what not you can have them do back lighting of the bride and groom or other guests as well) or bounce light directly from your hot shoe into the ceiling or a wall.
One thing to note is that some reception venues will be outside or have a translucent glass ceiling, making it difficult or impossible to bounce flash. It pays to do your research on the venues before the wedding day rolls around and plan accordingly.
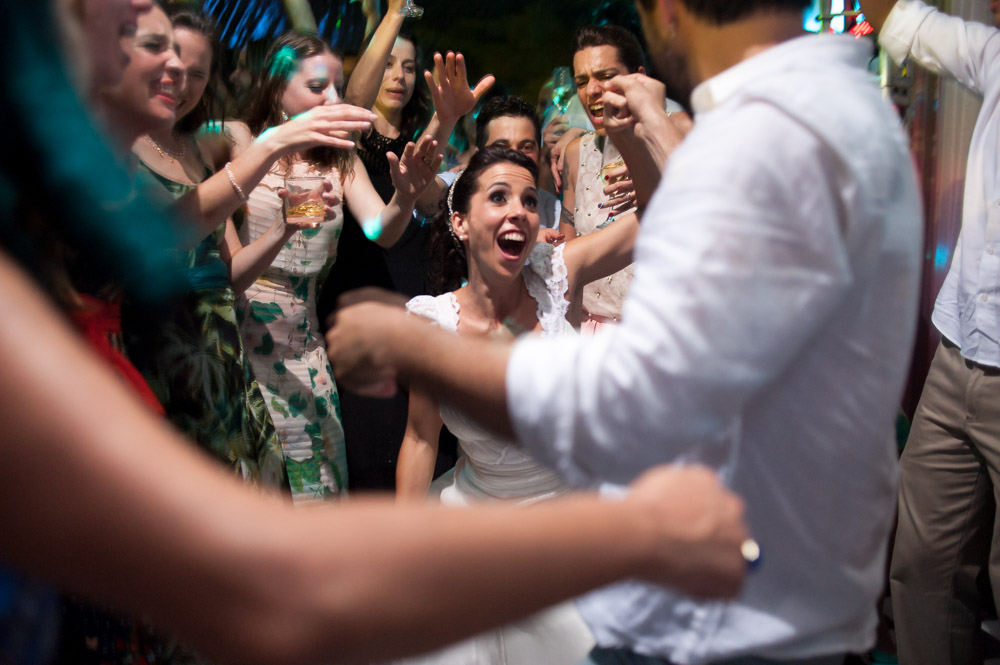
For wedding dance floor photography, I stick close to the bride and groom the majority of the night. I photograph a combination of candid shots of them together and also try to get shots of them while incorporating other guests and family members as much as possible.
I try to space out compositions as evenly as possible, but which is difficult because with so many people and lights and everything it’s easy for things to turn out too busy. Regardless of how I photograph a dance floor, I’m going to end up with a lot of exposures that just don’t work out in terms of composition and lighting. So my strategy has always been to take a lot of shots which you can hen go back through later in the editing process and have some shots of substance to choose from.
This does take time and you do end up tossing a ton of shots but the remaining few are worth it. It’s like mining for gold.
Closing Thoughts
Building a wedding photography business is not a get rich quick scheme. You need not only the skills I’ve tried to lay out in this wedding photography guide but also some savvy marketing skills and at least some sort of budget to work with.
While I don’t touch on the business side of things in this article (which deserves an article in its own right), I sincerely hope that this guide has been of help to you in learning the technical side of wedding photography. It’s by no means entirely comprehensive but I do believe if you apply the wedding photography concepts laid out here that you have a solid foundation of wedding photography knowledge with which to grow from.
What do you think? Do you feel this guide has provided you with a working base of wedding photography information or are there still gaps in your understanding? Let me know in the comments below.