Beginner Photography: How to Take Pictures Like a Pro
When it comes to starting out at the beginner photography level, the amount of information you need to learn can be overwhelming at first.
It can seem that there is so much to take in that you don’t know where to start in regards to how to take pictures properly.
And there really are quite a few concepts that you have to learn to get to the point where you know how to take pictures on a consistent basis – good ones that is.
But here’s the thing:
If you start with the fundamentals of beginner photography and really get them down from the get-go, all the other photography concepts will come to you a lot more easily. When you’re learning photography, it’s really best to focus on learning to walk before you learn to run.
I know this from experience:
When I started out at the beginner photography level, I jumped around to all sorts of different photography concepts before I really got the fundamentals of photography down. I was trying to learn a bunch of advanced photography concepts and techniques before I was really ready for it.
Photography fundamentals are the foundation of your photography knowledge – and you’ll be much better off and learn photography much faster if you take the time to really get them down.
Don’t be like me at the beginner photography level – study and practice how to do photography at the basic level before moving on to the advanced photography concepts!
But like I said, I know where you’re most likely coming from. Learning a new skill can seem intimidating. And that’s why I created this guide to beginner photography – and my goal here is to break down all the concepts into simple terms that are easy to understand even if you’ve never picked up a camera before.
My goal with this guide is to get you to the point where you feel absolutely confident with the fundamentals of photography.
Read on – and you’ll see that photography isn’t as complicated as it seems at first! Also, if you’re unfamiliar with any of the terms used in this beginner photography guide, it may help to take a look at our photography glossary as well.
A Note on Camera Selection
You may already have a camera and you’re ready to go, but if not I’d like to take a minute to talk about what a good beginner photography camera looks like.
There’s no easy answer as to what specific camera, or even category of camera you should start out with as a beginner photographer.
There’s loads of acceptable options when it comes to buying your first camera.
The very fact that you’re reading this beginner photography guide tells me that you’re looking to take your photography beyond just an iPhone or your standard point-and-shoot.
The long-standing choice for beginner photographers over the last ten years or so has been to go with a DSLR as your first camera.
DSLR stands for digital single lens reflex and basically is a type of camera which uses a mirror to show you as the photographer through the camera’s viewfinder what the camera’s digital sensor is seeing through your lens.
And it’s definitely a good choice if you’re just beginning digital photography.
DSLRs are great because they produce good image quality, have interchangeable lenses and most importantly, have fast and accurate autofocus systems.
Mirrorless digital cameras were created after DSLRs and haven’t had quite as much time to develop. And while they’ve come a long way in recent years to catch up to the capabilities and focus speed of DSLRs, they’re still not quite at the level of DSLRs.
Regardless, there’s still plenty of excellent mirrorless cameras to choose from that are currently out on the market. And mirrorless cameras are on their way to reaching the level of image quality and focusing speed of DSLRs.
It’s just a matter of time.
The main advantage of mirrorless cameras over DSLRs are their compact size and low weight. The fact that it’s not necessary to cram a mirror into mirrorless camera bodies means that camera manufacturers can make their size and weight much smaller.
Additionally, lenses of mirrorless cameras are smaller in general too, so their overall packages are just much more controlled in terms of size and weight.
Another thing to take into consideration is sensor size.
Because you can get instant feedback and don’t have to wait until your film develops to see if you’re getting your exposures right, at the beginner photography level, I recommend starting with digital rather than film.
When you’re just starting out learning how to take pictures, the importance of being able to see your results right there on the back of your camera can’t be stressed enough. It’s just a much faster process of learning how to photograph than shooting film photography.
In simple terms, there are a few digital sensor sizes I recommend you to consider before you start learning how to take pictures.
Full-frame, APS-C and micro four thirds.
APS-C and micro four thirds sensors are also known as “crop sensors”, because they are cropped down from the full-frame size.
Full-frame sensors are the same size as 35mm film. In terms of digital camera sensor sizes, full-frame sensors are on the large side and because of that, are capable of beautiful image quality with wide dynamic range (the ability to reproduce a scene’s natural colors, including both the extremely bright or dark areas of the photo).
Crop sensor cameras are smaller sensors than full-frame ones, the most common of which are APS-C sized sensors. Going even smaller, you have micro four thirds sensors.
Their size is further “cropped” down from the 35mm format.
There are cameras out there with larger sensors but for our purposes here my advice is to stick to one of these sensor sizes, which is pretty much the whole camera market anyway.
As a general rule, the bigger the sensor, the better the camera’s image quality will be. So if you have the budget and think that you’ll be taking photography seriously once you learn how to take pictures, go with a full-frame sensor size.
It also depends on what type of photography you’ll be doing and how concerned you are with size and weight. With the larger sensor sizes also comes larger camera bodies and larger lenses so keep that in mind.
This is a personal choice and is ultimately up to you. APS-C sensors are very capable and are a perfectly fine choice if you’re on a budget or want a smaller camera.
To take full advantage of this beginner photography guide, the one requirement when it comes to your choice of camera is a camera capable of shooting in full manual mode. Manual mode gives the photographer complete technical and creative control over exposure.
While there are other camera modes – and we’ll talk about them later, it’s best to learn full manual mode first so that you learn the basic concepts of exposure in photography. That way, when it comes time to use auto, ‘P’ mode or any other of the semi-automatic modes, you’ll know what results to expect and will be able to get your desired results consistently, rather than just random results that you don’t have control over.
Which brings us to our next section:
Defining Exposure
Sometimes photographers say ‘exposure’ to talk about an image or photo itself.
A photographer may show another photographer a picture and their response may be something along the lines of “wow – that’s a great exposure! Nicely done.”
But technically speaking, when we talk about the concept of exposure we mean something very simple:
The amount of light that falls onto a light-sensitive material such as film or a digital camera sensor.
That’s it.
Obviously there are several technical settings we choose as photographers to get to proper exposures though, which is what we’ll be talking about in the exposure triangle section, but because we’ll be learning how to take pictures right here if you’re following along with your camera, I’d first like to briefly touch on a very important topic in the following section.
RAW or JPEG?
Just as a quick disclaimer, this section is meant to be a practical overview of the differences between RAW and JPEG files for when you’re just starting out. If you’d like to know more about the jargony mumbo jumbo regarding the topic, there are plenty of free resources out there with this information. When starting out as a beginner in photography, you just need to know the basics.
There are two different file formats in which you can shoot your digital images:
RAW and JPEG.
There are significant differences between the two, so I’d like to break them down and give you my recommendation on which file format you should use as you start your photographic journey.
First off, let’s talk about what RAW files are.
RAW files are unprocessed files that come straight from the sensor of your camera.
You can think of them like the negatives that you get from film cameras, and indeed are often referred to as “digital negatives”. Film negatives are exactly as your camera saw them and not modified in any way, just like RAW files.
For those of you who are unfamiliar with film photography, you can also compare them to the ingredients you put together before cooking a meal. Before frying, baking, roasting or any other form of cooking your food, you’ve literally got “raw” ingredients that you need to prepare before eating.
It’s a similar thing with RAW image files. They present you with all the information you need to shape them (cook them?) to your liking.
When you shoot images in RAW, your camera actually creates a JPEG image embedded into the file to allow you to preview it, which is what you’ll see on the back of your camera on your LCD screen.
Everybody and their grandmother has heard of JPEGs. But knowing what our cameras do when processing our exposures into JPEGs is usually another story. Let’s take a closer look at what they are.
JPEGs
When you take pictures with your camera in the JPEG setting, the images are processed and compressed right there within your camera.
It differs from manufacturer to manufacturer and even camera to camera just how the images are processed and rendered. Some adjustments that cameras generally make to JPEG image files may include:
Sharpening, noise reduction, contrast and increased blacks.
As a result, straight-out-of-camera JPEGs are pretty much ready to use in whatever way you want, whether it be sharing them on social media or printing them out. They are generally going to look more polished than RAW image files.
That’s only part of it though.
JPEGs are what’s known as a “lossy” format, as some information from them is discarded during the compression process. Essentially JPEGs give you a trade-off between getting a more manageable file size for reduced image quality.
The information from the file that’s thrown out is non-recoverable, which is the big downside of shooting in JPEG.
One of the main things JPEGs lose is what’s called “dynamic range”, a fancy way of saying the range of colors within an image between dark and light. JPEGs are capable of containing 16 million different colors in one image.
Sounds like a lot, right?
Well, you’re actually removing a ton of colors out of the tonal range, as images shot in RAW are capable of registering 68 BILLION different shades of colors.
That’s a HUGE difference.
While JPEGs may look more presentable out of the camera, they lose a ton of information that you can’t get back – information that not only enriches your images but also gives you much more leeway in the editing process.
Here’s a brief few reasons why you should shoot RAW files over JPEGS:
1. We’re not perfect and neither are our cameras. We’re gonna screw up exposures every once in a while. Especially if you’re shooting in unpredictable lighting conditions.
Shooting in RAW allows you to adjust your over/underexposed images with a ton more wiggle room than you have with JPEGs. Took a picture and everything turned out too dark and shadowy? You can brighten the image in post without losing a ton of detail in the shadows.
The same goes for overexposed images that have too many highlights – just to a lesser extent than underexposed images because when highlights go pure white there’s not much you can do.
2. As stated before, you get a TON more colors within your images.
3. White balance. This is a huge one. While you CAN edit the white balance of a photo shot in JPEG, the quality of your adjustments to the white balance of RAW files is WAY better and more natural-looking.
4. If an issue ever arises where you need to prove that you’re the rightful owner and photographer of your images, that information is included right within your RAW files. PLUS, RAW files can be admitted in a court of law as evidence. Think about it – you could be the missing link that helps to crack the big case! Be a hero and shoot in RAW.
5. The sharpening applied to JPEGs looks alright, but what looks better is the far more sophisticated sharpening done by computer programs such as Lightroom and Photoshop. Sharpening added in-camera to JPEGs cannot be removed.
These are just a few reasons to shoot in RAW (there are several more but these are some of the more important ones that come to mind).
That being said, that doesn’t mean there’s not a time and place for shooting JPEGs as well.
Due to the processing applied to JPEGs, they can be used straight out of the camera with very little additional editing required. They’re also much smaller in size, which has a couple of clear benefits:
1. They take up less space. That means more room on your memory cards and hard drives.
2. Digital cameras have what’s called a ‘buffer’, a limit to how many pictures you can take consecutively without the camera slowing down or stopping altogether. Shooting JPEGS relieve your camera’s buffer and on some camera models even allow you to shoot at a faster frame rate. This can come in handy for shooting fast action or sports where you need to fire off shots in quick succession.
3. You technically don’t have to post-process JPEGs, so you can save time in your workflow after shooting them.
RAW and JPEG each come with their own pros and cons. There’s occasions where each could be preferable over the other.
If you’re taking some quick snapshots to sell something on Ebay for instance, there’s no harm in shooting JPEGs.
But let’s not kid ourselves here; RAW files are clearly the superior file. I recommend shooting them in the vast majority of cases. And with storage as cheap as it is these days, there’s really no excuse for not shooting them.
If you really like the look and simplicity of JPEG files, you can always set your camera to shoot RAW + JPEG and just edit from the RAW files when you really need them – like when you (inevitably) screw up an exposure.
So set your camera to shoot RAW (it may take a bit of searching to find but you can change this setting within your camera menu. Look it up in your manual if you have to), and let’s take some pictures!
Switching to shooting in RAW is one of the first big steps in digital photography. And before you know it, you’ll be out of the beginner photography stage.
Now that you know the benefits of shooting your photos in RAW, we also have a guide on how to name and organize your photos.
The Exposure Triangle
An image’s exposure is a result of three different components:
1. Aperture
2. Shutter speed
And
3. ISO
Let’s take a look at each one of these important factors of the exposure triangle individually and break down what effects they have on your exposures.
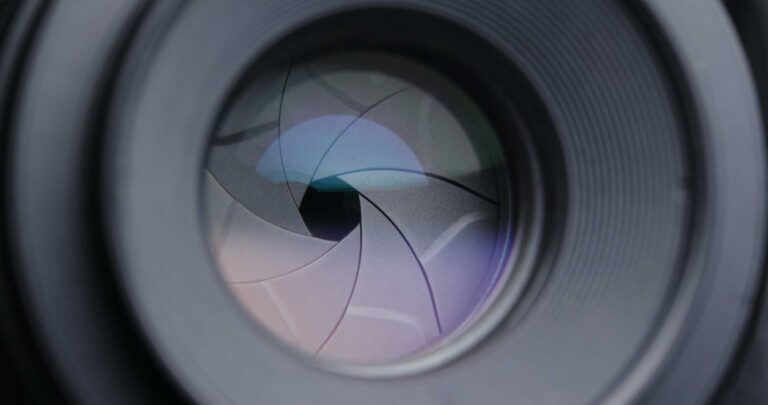
Aperture
Aperture in photography refers to the hole in your camera that allows light to pass through to the camera’s digital sensor or film.
You can adjust the size of your camera’s aperture opening, making it larger or smaller depending on various factors, but the most significant being how much light your exposure requires (there are other effects that changing your aperture will have on the outcome of your images but we’ll get to those later).
On most cameras you adjust the aperture using the wheel on the front of the camera. With your camera in manual mode, see if you can find that wheel and make adjustments back and forth. If you see a number with an ‘f’ in front of it changing, that’s your aperture changing in size.
Photographers refer to making your aperture smaller in size as “stopping down”. Likewise, when you make it bigger it’s often referred to as “opening up” your aperture.
Each aperture opening size has a corresponding number that goes along with it, also known as “f-stops” (this is where the term “stop down” comes from).
Still with me?
Here’s where things get a little tricky:
As you stop down further and further making your aperture smaller, your f-stop number will actually increase. So f/22 is a much smaller aperture opening than f/1.4, for instance.
From largest aperture opening to smallest, the most common aperture range you’ll see on modern camera lenses fall somewhere in the range of:
f/1.4, f/2, f/2.8, f/4, f/5.6, f/8, f/11, f/16, f/22 and f/32.
Keep in mind that there are lenses that have larger and smaller f-stop ranges than this and your lens/lenses may differ, which is normal.
A lot of modern cameras will give you the option of adjusting your f-stops in one-third increments but for our purposes we will just focus on the full stop variety of f-stops.
Each time you go from one of these f-stops to the next, you’re dividing the amount of light that reaches your sensor in half. And likewise, if you make your aperture opening larger from one stop to the next, you’re doubling the amount of light that reaches your camera’s sensor.
So for example:
If you change your aperture from f/1.4 to f/2, you have cut in half the amount of light that will get to your camera’s sensor and your exposure will be darker than if you had left the aperture at f/1.4.
And likewise:
If say, you changed your aperture from f/8 to f/5.6, you’re reducing the amount of light to reach your sensor by half and your exposure will get darker.
Just like with f-stops, the same concept of dividing the amount of light in half and doubling the amount of light that your camera’s sensor is applied.
Shutter Speed
Like aperture, on most cameras there is a wheel for adjusting shutter speed, but on the back of the camera.
A general range for full stops for shutter speed consists of:
1s, 1/2s, 1/4s, 1/8s, 1/15s, 1/30s, 1/60s, 1/125s, 1/250s, 1/500s and 1/1000s.
This goes from slowest to fastest in terms of the time allowed to lapse in which light is able to reach your camera’s sensor.
So a one-second shutter speed allows one second to pass where light is coming through your camera’s lens and reaching the camera’s sensor.
On the opposite end of the spectrum, 1/1000s refers to the fraction of a second that your camera’s shutter is allowed to open and gather light. Much less light is let in to the camera, a difference of 10 full stops.
Because they’re in fractions of a second, they’re a bit easier to understand at first; every time you increase your shutter speed by a stop, you’re halving the amount of light that will reach your camera’s sensor.
Going from 1/125s to 1/250s reduces the amount of light to enter the camera in half.
Every time you slow your shutter speed by a stop, you double the amount of light allowed to enter the camera.
Example:
By going from 1/1000s to 1/500s, you double the amount of light that will enter the camera.
Like with f-stops, camera and lens manufacturers these days are offering one-third stops of shutter speeds in modern cameras/lenses in order to give you more control over your exposures. It’s not necessary to have a camera/lens that offers one-third stop increments, but it does allow for more precision.
So just know that when you see shutter speeds in between the full shutter speed stops listed above that you’re most likely seeing the stops divided into one-third stops.
As an example, you’ll see:
1/60s, 1/80s, 1/100s, 1/125s, 1/160s, 1/200s, 1/250s, 1/320s, 1/400s, 1/500s and so on.
The final element of the exposure triangle that effects your exposures is ISO.
ISO
Making adjustments to ISO generally varies from camera to camera. A lot of cameras have you hold down a button for ISO and then make adjustments up and down using what’s normally the shutter speed wheel on the back of the camera. Other cameras you have to go through the camera’s menu system.
If you can’t figure it out, consult your manual.
ISO stands for International Standards Organization, which is the organization responsible for determining the measurement of sensitivity of film or digital sensor settings.
It’s not important for you to know about this organization in this context.
What’s important is you know what ISO means in terms of digital photography:
Your camera’s sensor can be thought of as your digital film, and your ISO refers to how sensitive your camera’s sensor is to incoming light.
When your camera is set to its lowest ISO setting, also known as your base ISO, your camera is less sensitive to light. As you increase your ISO, your camera’s sensor becomes more and more sensitive to the light entering your camera.
In very simplified terms, during the day or in other bright situations, it’s more likely that you’ll be shooting at a low ISO. At night or in other dark situations, you’ll be more likely to use a high ISO.
Just like with aperture and shutter speed, as you go from your base ISO onwards in full stop ISO increments, the amount of light that is gathered by your camera’s sensor doubles.
Here’s a pretty typical range of ISO of today’s digital cameras:
ISO 100, ISO 200, ISO 400, ISO 800, ISO 1600, ISO 3200, ISO 6400.
The higher your ISO, the less usable it becomes (we’ll talk about why later in the guide) and so the higher end and newer cameras will have ISO ranges that go beyond the range listed here.
Most cameras have a ‘native ISO’ range in which your images will be usable – they have ‘expanded’ ISO ranges that you can use as well but it will be at the expense of image quality.
Just like with aperture and shutter speed, many modern cameras give you the option of making ISO adjustments in one-third stops, so if your camera comes with that option enabled, you’ll see ISO values in between the ISOs listed above.
So far, as far as exposure is concerned, we’ve only talked about how each aspect of the exposure triangle effects how much light the camera’s sensor takes in. But there’s more to it than that – which we’ll talk about in the next section.
But first:
Let me give you a quick analogy of how ISO works that comes from Bryan Peterson’s great book on exposure in photography called Understanding Exposure:
Imagine for a second that your ISO is a representation of how many worker bees you have.
Now, I know what you’re saying:
“Worker bees?! What’s this got to do with photography?”
But just bear with me here.
So let’s say I set my ISO to 400. In effect, I have 400 worker bees whose job is to gather as much light as possible and bring it through my camera lens. This light will then be used to construct images.
So now let’s say that you set your ISO to 800 and now have 800 worker bees working for you.
Then let’s say we both set our aperture to f/8.
Whose camera will need more time to record an image, yours or mine?
Mine will, as I have half as many worker bees bringing in light to my camera.
Now let’s say that we’re hanging out on my front porch. Having a couple beers if you will. Maybe just a lemonade if that’s more your thing.
We’re sitting right next to each other so we’re pointing our cameras into the same scene, the lawn and street in front of my house.
My camera takes its reading, I dial it in above the ‘0’ in the meter and it tells me that the correct exposure is 1/500s. I take a photo and it looks good; the image is just right – not too light or dark.
What will your shutter speed be in this situation?
1/1000s, as you have twice as many worker bees as me, so in order for them to not gather TOO much light for you, your shutter speed has to be twice as fast.
Now that you have an idea of how the give and take of aperture, shutter speed and ISO affect your exposures, let’s take a look at some other ways these three components affect your photos.
How Aperture, Shutter Speed and ISO Effect your Images
Each adjustment you make to either of the three elements of the exposure triangle has a side effect that goes beyond just adjusting the amount of light you allow to reach your camera’s sensor. They’re all important, so in this section of the guide I’m going to cover all of them.
Aperture and Depth of Field
When you focus your camera on a certain point in your frame, there’s always an area in front and behind that point (regardless of how miniscule the area is) that will be in focus. This area of focus in front/behind the chosen focal point can be very small and barely extend past your focal point or it can extend infinitely to where everything within your photograph is in focus.
So essentially depth of field refers to the areas within photographs that are in focus.
Now that we’ve got depth of field defined, let’s take a look at how it’s related to aperture selection.
Ever notice those dreamy-looking beautiful portraits where the model’s face is in sharp focus (maybe even their eyes are in focus but their ears aren’t), but everything behind them is blurry/out of focus?
Photos like this have what’s called a shallow depth of field, i.e. very little is in focus. They also result in what photographers call bokeh, Japanese for blur, which refers to the quality of the out of focus areas of a photograph.
They’re also most likely shot at a large or wide aperture:
The larger your aperture, the smaller, or shallower, your depth of field will be.
Every time you stop down, aka decrease the size of your aperture, the more depth of field your photos will have.
If you stop down to the smallest aperture your camera/lens is capable of (a general standard is f/22) and focus a few feet in front of you, you’ll see that all of your picture will be in focus.
Now that we’ve talked about how aperture size affects depth of field, let’s talk about shutter speed’s effect on sharpness and motion blur.
Shutter Speed and Sharpness/Motion Blur
When you need to get more light in to your camera, one of the ways you can do that is to slow your shutter speed down. While that may get us to the exposure needed to capture a scene, it also leads to a side-effect:
Motion blur.
If you’ve ever seen a photograph where a stationary object is in focus but something moving at a fast pace, such as a car or motorcycle, is out of focus, what you were seeing was motion blur.
Sometimes motion blur is a stylistically/aesthetically pleasing choice, but obviously, we don’t always want it. And we want that to be a deliberate choice as to whether there’s motion blur in our images.
The opposite of motion blur is having extreme sharpness.
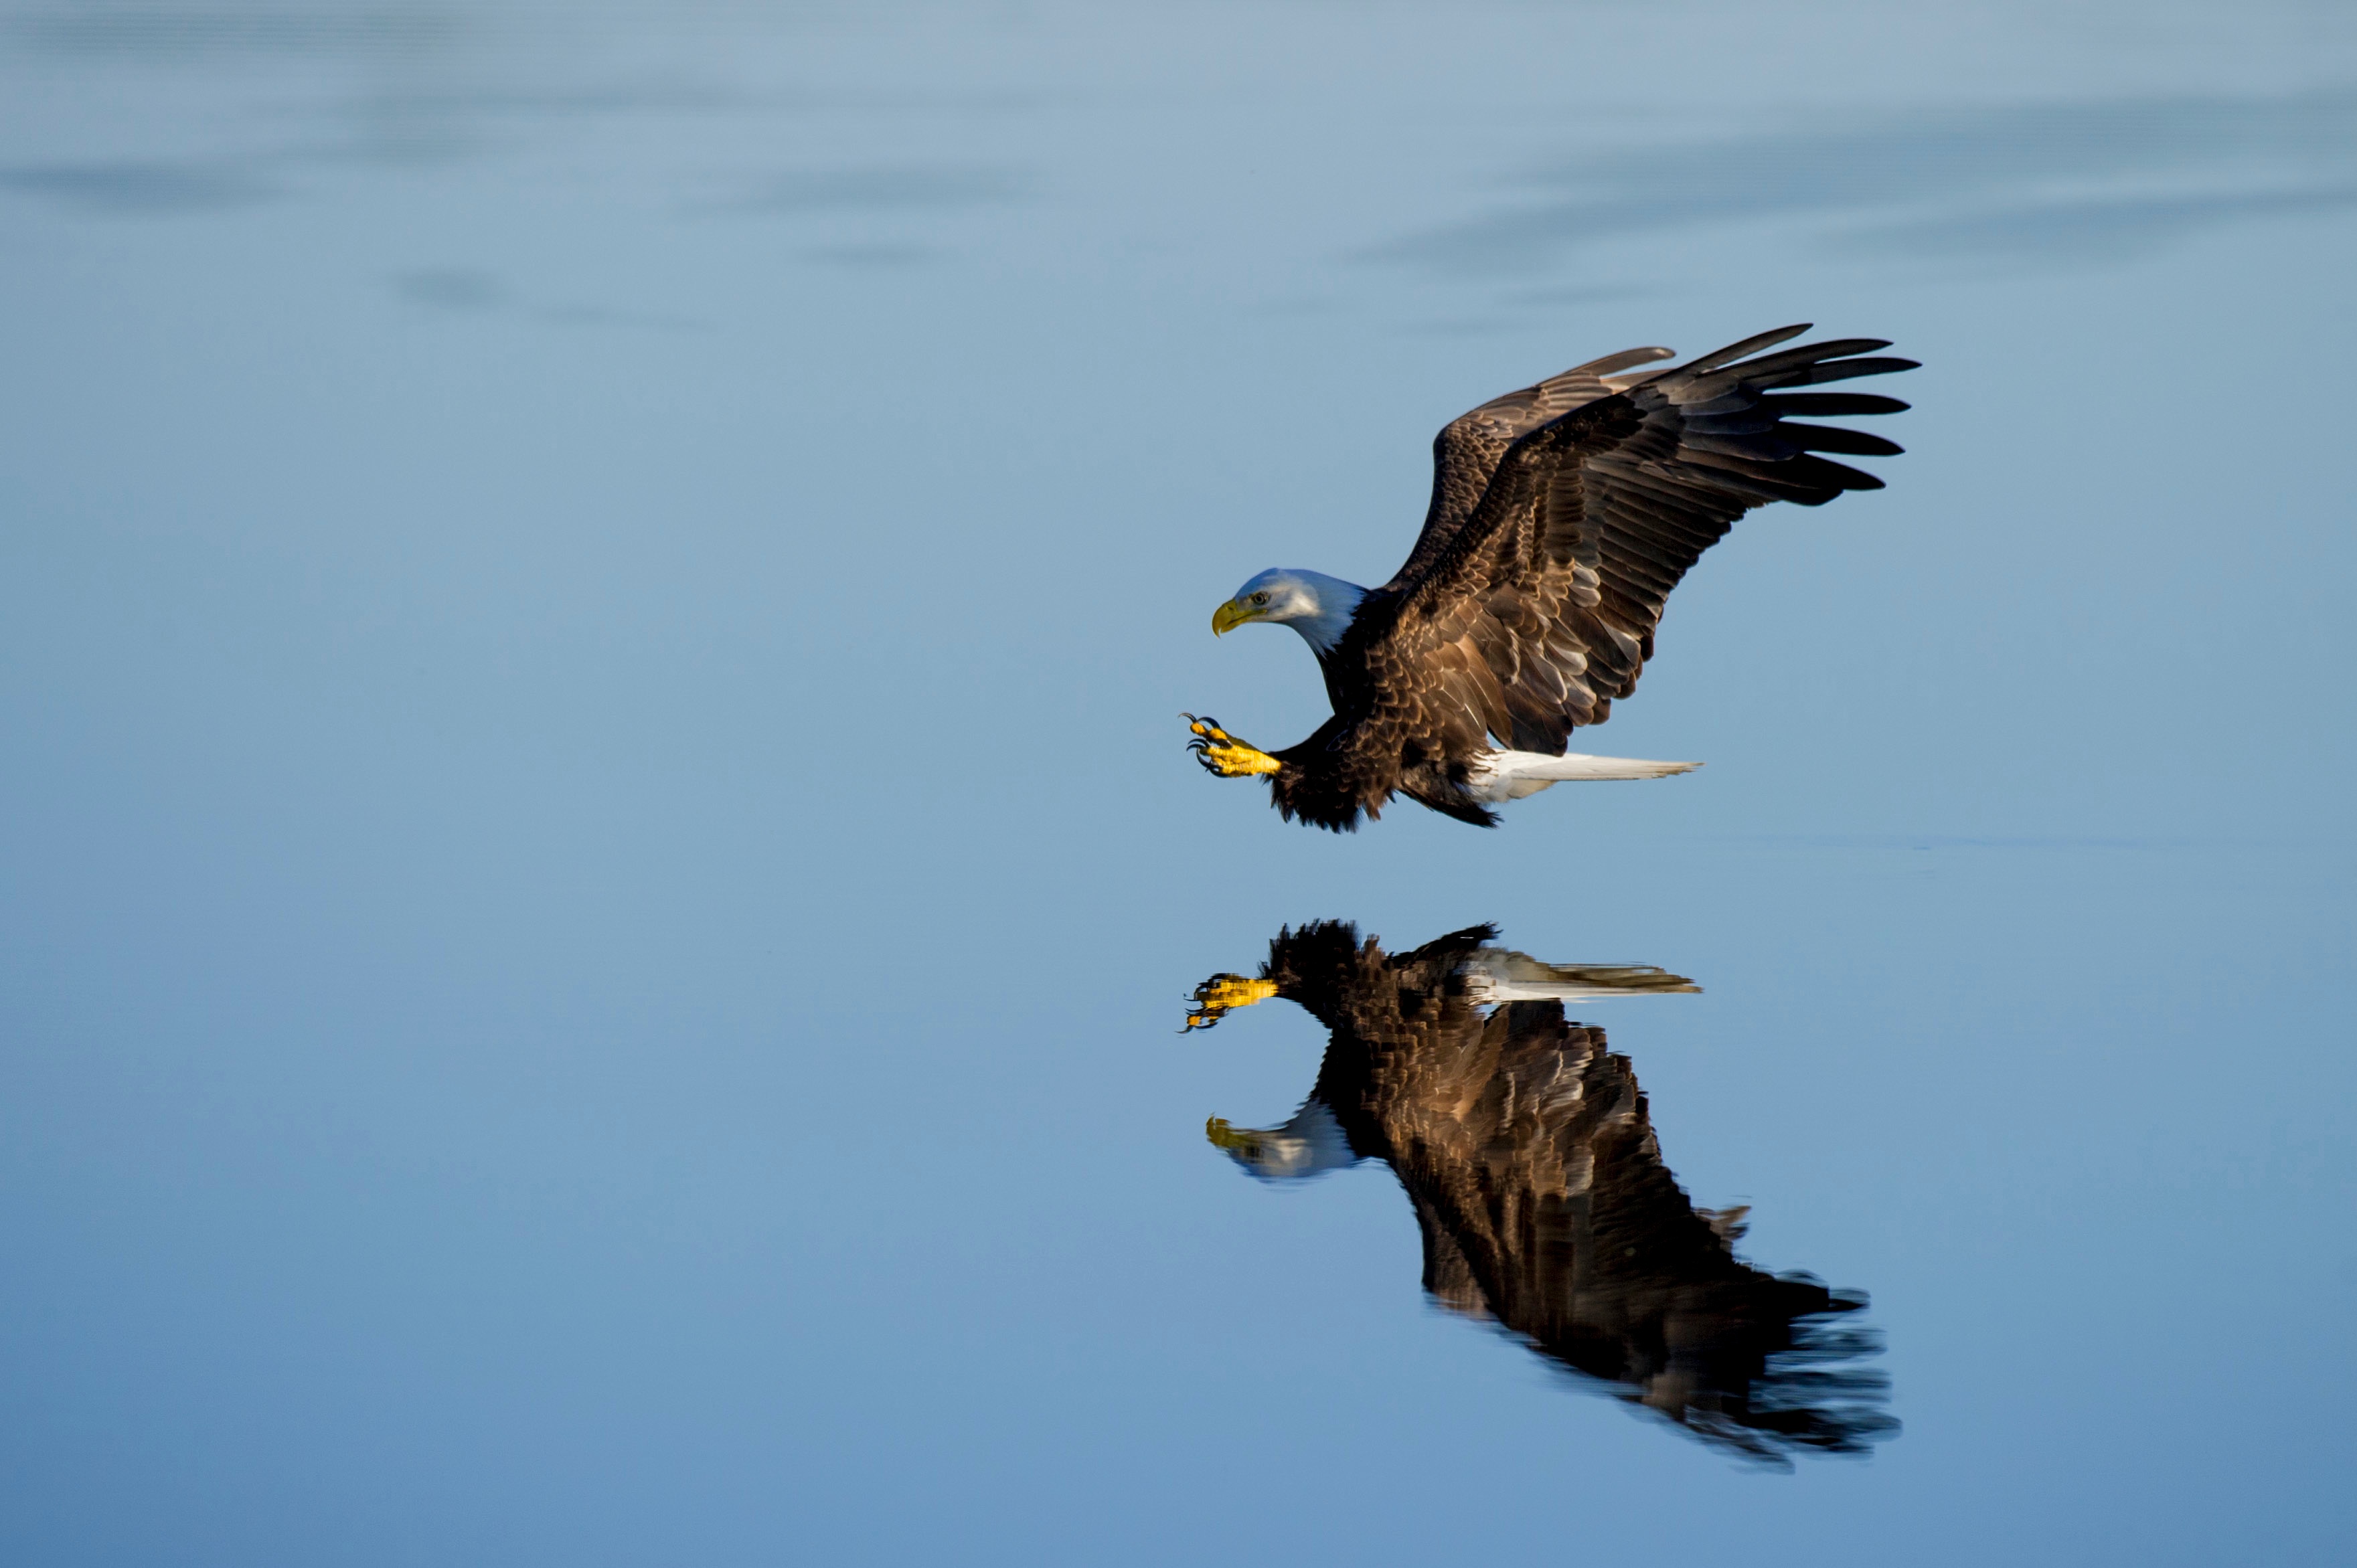
If you shoot your camera at its fastest shutter speeds, you’ll be able to freeze action in its tracks. If you want to freeze action, the faster your subject moves, the faster you’ll want to set your shutter speed.
If you’re shooting, say, a fast moving bird in flight, it’s preferable to shoot at 1/1000 of a second or faster. If you’re shooting say, a party or a wedding, i.e. something where you’re taking photos of people naturally moving around, you’ll want to try to keep your shutter speed at a minimum of 1/250th of a second.
Keep in mind that when you shoot at high shutter speeds in order to freeze action, you have to compensate for that in your choices of aperture and ISO:
You may have to make your aperture opening larger to allow more light in or, and/or you have the option of increasing your ISO.
Increasing your ISO also has an unintended consequence on your images as well, which we’ll talk about in the next section.
ISO and Digital Noise Levels
We already know that increasing your ISO increases your digital camera sensor’s sensitivity to light, resulting in the brightening of your images.
But there’s a tradeoff with raising your ISO:
The introduction of digital noise.
Or in other words, you make your photos grainier every time you increase your ISO.
Digital cameras have come a long way since they were first introduced. If we could travel back in time just fifteen or twenty years ago and tell photographers that we’d have digital cameras with the capability to go up to ISO 400,000, they’d probably laugh at you in disbelief.
And while modern cameras have provided us with amazing technology and controlled levels of noise at high ISOs, you can still expect a significant level of noise at your camera’s higher ISOs.
So to get to the proper exposure without introducing too much noise to your images, you may need to lower your shutter speed or open up your aperture.
So once we set one component of the exposure triangle, say if we set our aperture to f/8, how do we find the correct settings for our ISO and shutter speed? Or say we set our aperture again to f/8 and our ISO to ISO 400, how do we get the proper shutter speed?
That’s where a very important component of our digital cameras comes into play:
The light meter.
Let’s take a look at how this little tool helps us as photographers to measure how much light we need to let into the camera to get us to a good exposure.
The Light Meter
When you first start taking control of your camera and learning how to take pictures in manual mode, the light meter can seem intimidating.
But it’s not, I swear. And I’m going to show you just how simple it really is here in this section.
The light meter is a device within your camera that measures reflected light, which means that it measures light in the direction that your camera is facing.
There is another type of light meter called an incident light meter that measures light from the opposite direction, but for our purposes we’ll just keep it simple and discuss the light meter that comes with your camera.
Light meters differ from camera to camera, but at the bottom of your camera’s viewfinder or LCD, you’ll see a series of tick marks, numbers and other information.
You’ll also see a triangle (it could be another shape depending on your camera’s manufacturer) that hovers above or below those little tick marks.
If you put your camera to your eye and look through the viewfinder and move your camera around, you’ll find that that little triangle moves from left and right, hovering over the different tick marks. While it may seem random, that’s the light meter in your camera telling you how many stops (usually in one-third stop increments) how far away you are from what the meter thinks is the proper exposure.
This is a very basic example, and again, cameras will differ but regardless of what camera you have, they’ll all include the information shown here.
When you get that hovering triangle over the ‘0’ of the light meter is when you have a correct exposure.
If the triangle is hovering over one of the negative numbers to the left of zero, that means that what your light meter is seeing is underexposed. In other words, your photo will be too dark.
If you’ve ever taken a photo and it turned out darker than you’d like or even black, your photo was underexposed.
Conversely, when you take a photo with that little triangle indicator hovering over one of the positive numbers to the right of zero, your photo will be overexposed. Or in other words, too bright and maybe even pure white.
When you take those photos that look way too bright, or the colors seem “washed out”, then the photo was overexposed.
What we want is to get that triangle to hover over the ‘0’ in the light meter display – which we can get to in a number of ways. And as you get more used to using it, it’ll become intuitive as to what component, or multiple components, of the exposure triangle you need to adjust to get to that neutral ‘0’ mark.
First off, I’m going to show you an underexposed shot and how we can adjust our settings to get to a proper exposure.
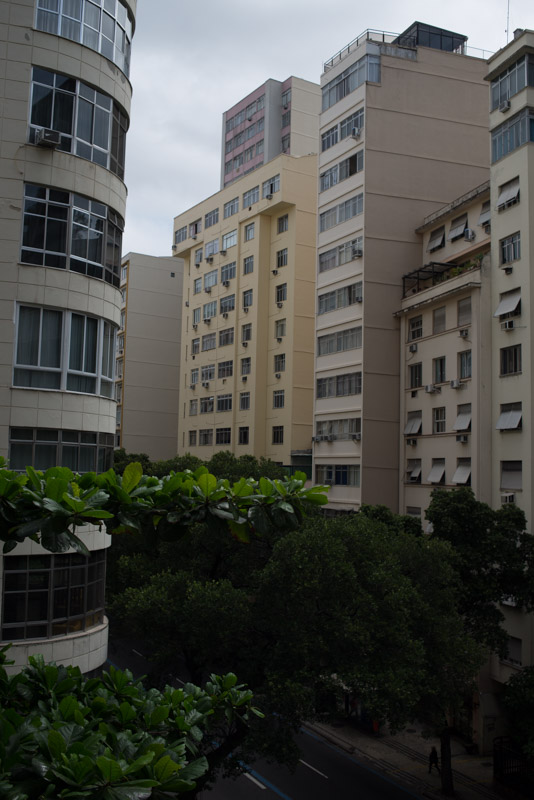
It was a pretty bright day when I shot this, so I chose to shoot it at a low ISO that would give me the best image quality with no grain. I chose an aperture of f/5.6 and set my shutter where I was 2 stops under a proper exposure.
So with the underexposed image we have above, we didn’t let enough light enter our camera.
What can we do to fix this? What can we do to let more light into the camera so that we get a brighter picture?
Let’s see what happens when we leave our aperture and ISO as they are but lower our shutter speed:
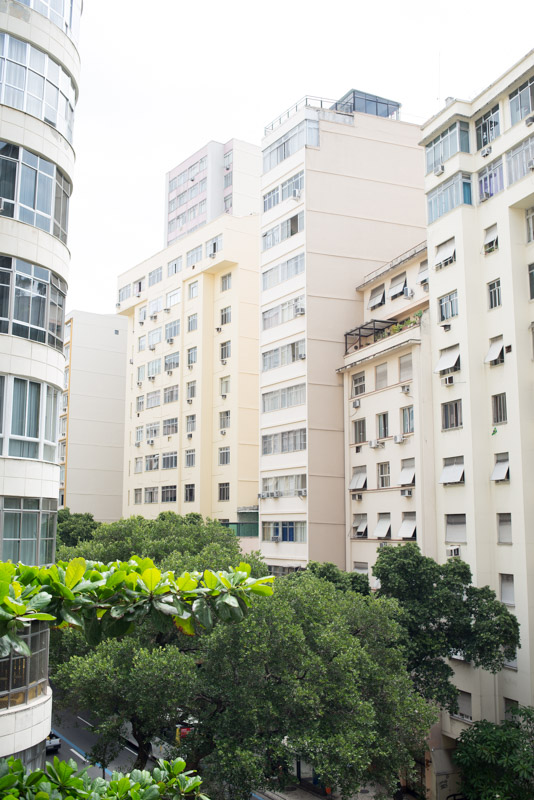
Whoops!
By bringing the shutter speed from 1/1000s down to 1/50s, now we have an overexposed image. Not good.I lowered the shutter speed by too much – instead of stopping when the triangle indicator (triangulator?) was hovering over 0, I overshot by two stops and went to +2.
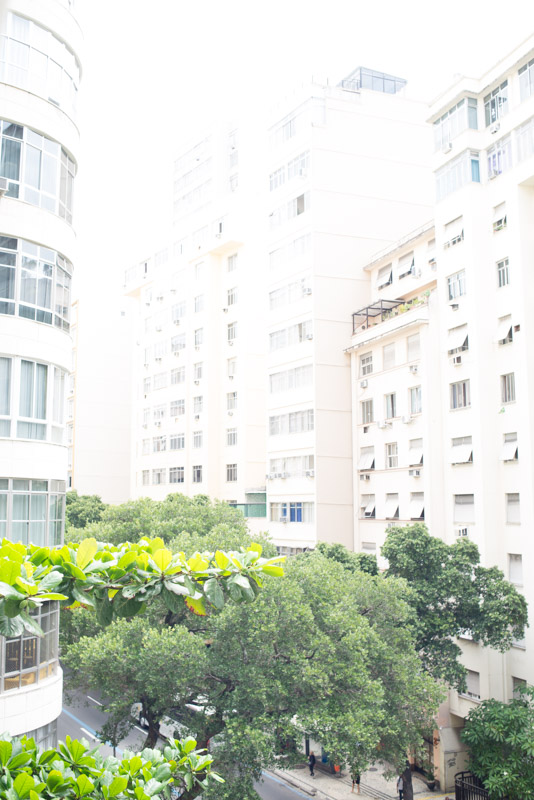
So let’s speed that shutter back up a couple stops and see what happens
There we go! This image is actually a bit too overexposed for my taste but it’s much closer to showing the scene as it really was than the other two.
By leaving the aperture and ISO where they were originally at and adjusting our shutter speed back up to 1/200s, we were able to get the exposure indicator balanced and over the ‘0’ marker.
This is the exposure we get when we take an exposure at settings that the camera’s meter tells us is correct.
It’s important to note that there’s more way than one to get to a proper exposure. We could have gotten to a balanced exposure by adjusting the other two components of the exposure triangle as well, i.e. by changing the ISO or aperture. We could also get to a balanced exposure by adjusting a combination of all three.
Just as a quick example, we could have left the shutter as it was and increased our ISO to make our sensor more sensitive to light or we could have widened our aperture to let more light into the camera.
So what’s the point of learning manual mode? Why don’t we just put the camera in Auto mode and shoot away?
When you’re first starting out at the beginner photography level, learning how to adjust all these settings and being aware of their respective effects may seem like a ton of work and a lot to remember. I know when I was starting out I couldn’t keep all the information straight at first.
But once you take control of your exposures and realize how much power it gives you, it’s totally worth it.
And here’s why:
Your camera’s meter has no idea what you’re pointing it at. It’s not a human brain.
And definitely not a genius one like yours :). It doesn’t matter whether you’re taking portraits, landscapes, sports, whether you want to make a silhouette or anything else.
All your camera meter sees is a big blob of light and it tries to measure it to the point where it reflects reality as accurately as possible. And it reflects that by trying to get that triangle to zero.
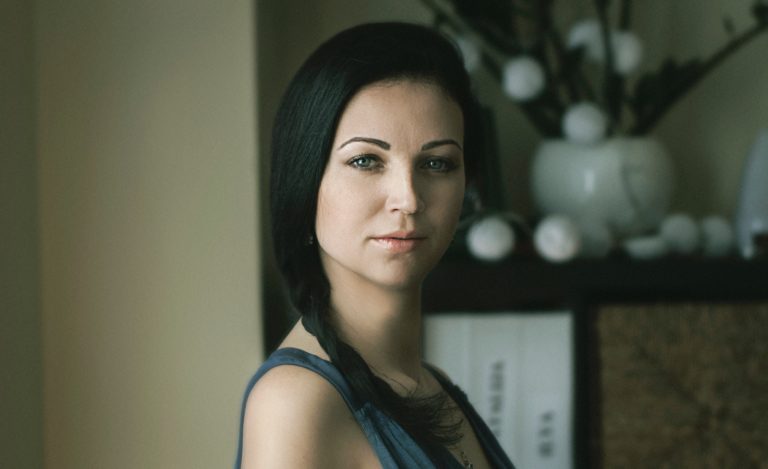
To drive the point home further, here’s an overexposed portrait:
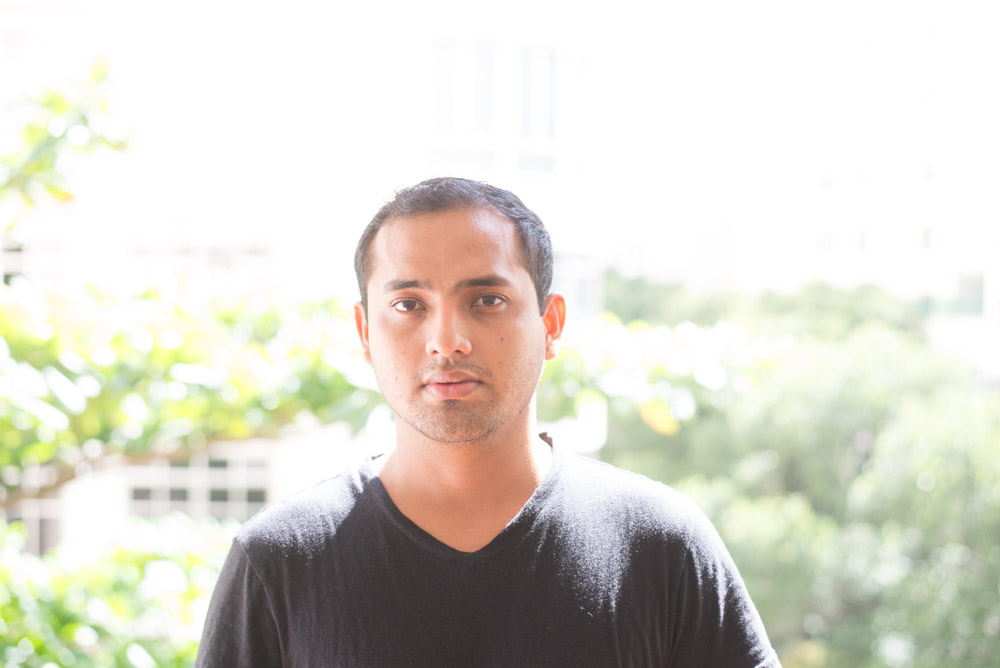
Notice how the model’s skin is washed out and the highlights look pure white? (Note: when you overexpose images there’s much less chance of you recovering the detail lost in those highlights so we want to avoid that as much as possible.)
In order to get to a good exposure, I could adjust a combination of all the settings or just one or two of them.
There are several reasons why we don’t want to shoot a portrait like this in Auto mode or any of the other available semi-automatic modes.
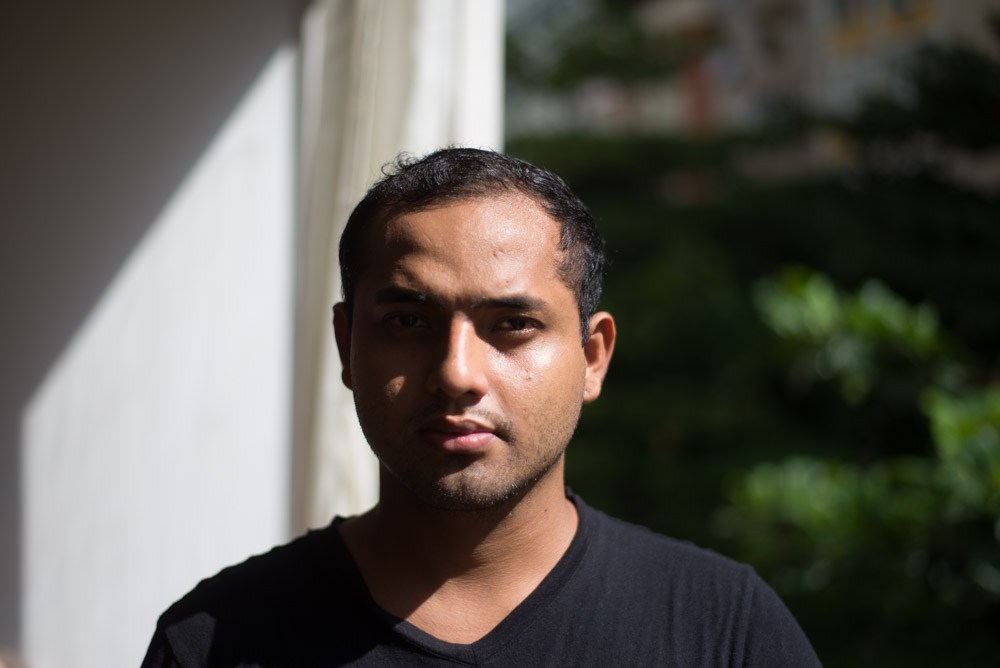
First of all, I’d like to shoot this portrait wide open so that I get a shallow depth of field. I want a nice blurry, non-distracting background.
So even though I had my model Andre move and I shot him at a different angle, here’s what I got when I got the exposure correct by leaving the aperture at f/1.8 but adjusting my shutter speed and ISO accordingly:
If I put the camera in Auto or Program mode, I wouldn’t know what aperture the camera would choose. It could choose a small aperture that would make the background be in focus.
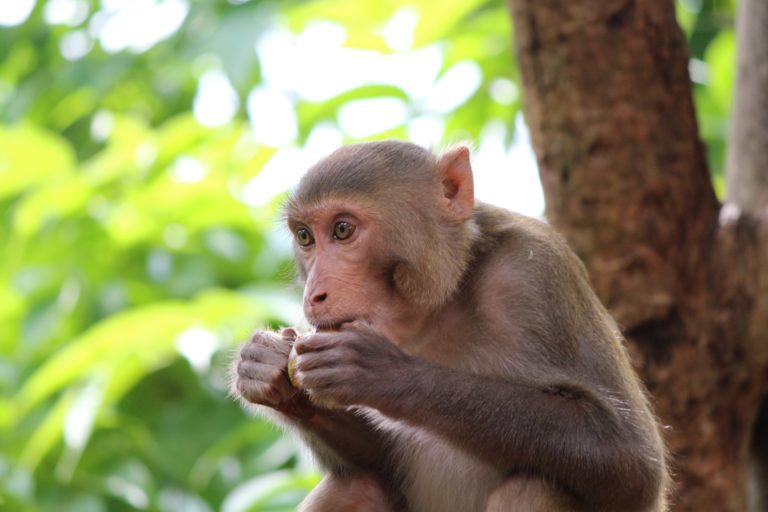
Here’s an image of what that might look like:
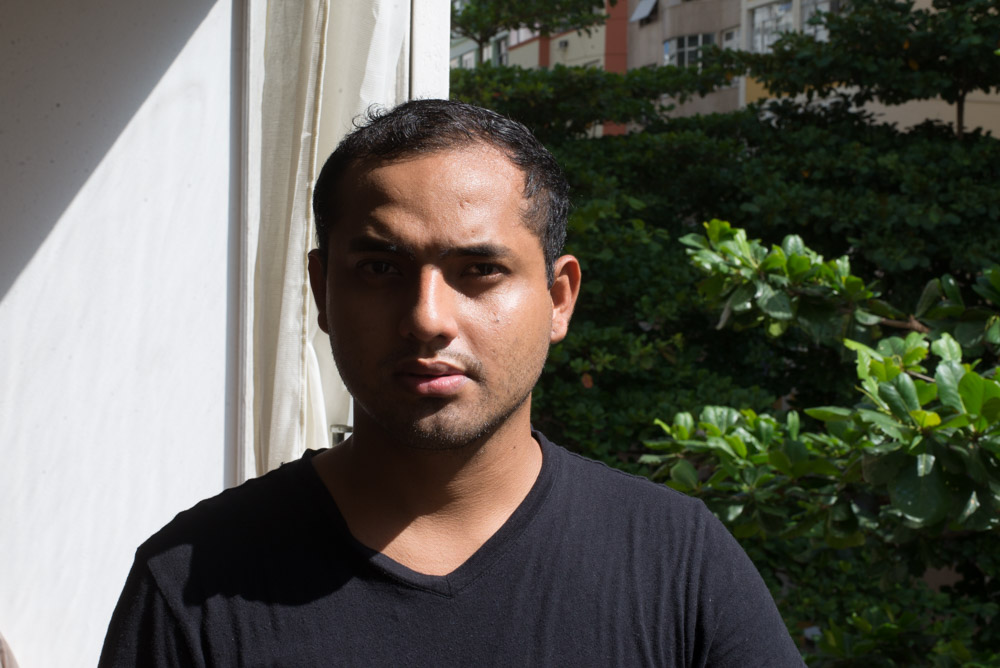
I got this effect by stopping down my lens to f/16 and adjusting my shutter speed and ISO accordingly. Notice how the leaves and the rest of the background comes much more clearly into focus and is far less appealing in this portrait setting.
Additionally, I want to make sure that my shutter speed is fast enough that there will be no motion blur. I handheld the camera for this shot (and keep in mind that you can’t hold your camera 100% steady like you could with a tripod), so I want to keep my shutter speed as fast as possible. The lowest shutter speed you use is dependent on the focal length of your lens – and in this case with the lens I used, 1/125s was as slow as I wanted to go to ensure that I wouldn’t get motion blur in the photo.
Finally, I want to keep my ISO as low as possible. If the camera chooses one of the it’s higher ISOs, you’ll get grainy photos.
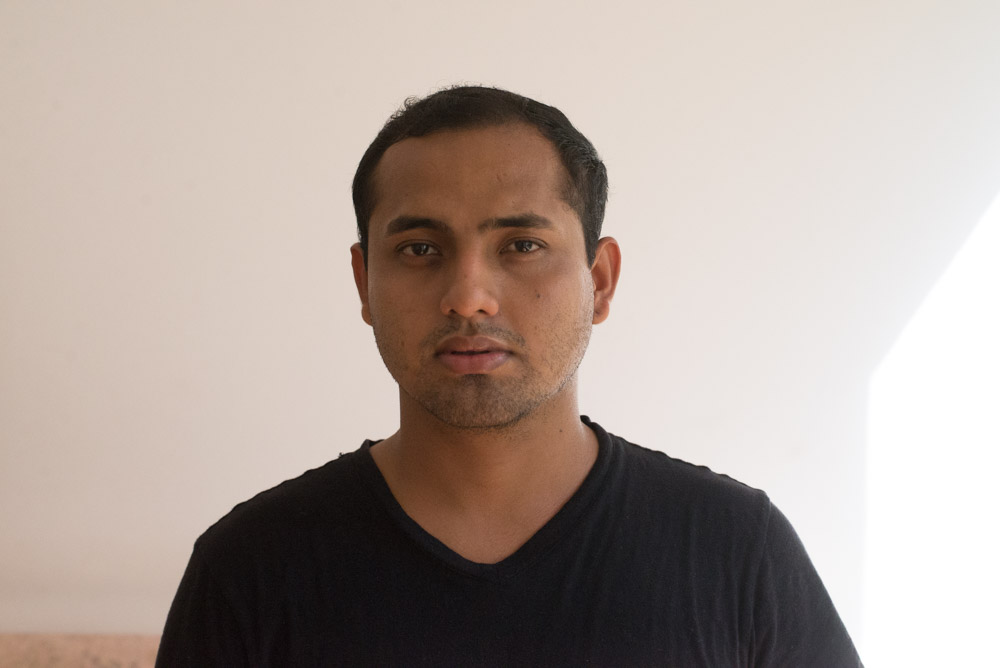
Notice how in terms of light everything is illuminated pretty much the same but there’s a huge different in terms of the smoothness of the image? There’s been a ton of grain introduced.
It’s knowing how each component of the exposure triangle affects your exposure and shapes your images.
Beginner Photography Quick Notes
Keep in mind when learning how to take pictures that these are all just guidelines that are likely to help you get better results but are not rules:
- If you’re shooting portraits, choose a wide aperture (a lot of photographers like the look they get from shooting completely wide open), and make adjustments to your shutter speed and ISO until you get your meter’s indicator hovers over zero. This will get you a shallow depth of field and ‘bokeh’, the blurry characteristic of the out of focus areas.
- If you’re shooting landscapes, stop down to f/16 (with a lot of lenses if you stop down further than this you’re lens will suffer from diffraction, which has a negative effect on image quality). Then make corresponding adjustments to your other settings while keeping your ISO as low as possible. By doing this, you’ll get everything in your frame in focus, which looks good in a landscape setting.
- If you’re shooting sports (or some other fast-moving subject, such as your kids playing), choose a fast shutter speed (1/250s or faster), your camera’s widest aperture, and adjust your ISO until you get to ‘0’. This will freeze the action and make your subjects pop out from the background.
Types of Metering Modes
Before we go on I’d like to define a couple of important metering modes that will make a significant difference in the results you get in your exposures when you’re learning how to take pictures.
Both of the modes I recommend using have their merits and limitations. As such, there are instances when it’s preferable to use one over the other. Neither of these modes can do it all – both of them are effective in their respective uses but unfortunately neither are versatile to use in all situations.
But it’s good to know what they are when you’re at the beginner photography level. Later on down the line you’ll get more comfortable in knowing when to switch between the two.
The two metering modes I’m referring to are called evaluative (also known as matrix metering for Nikon cameras) and spot metering.
First, let’s go into what evaluative metering is all about, which is the metering mode that your camera is probably set to as its default metering mode.
Evaluative Metering
Evaluative metering, like many things in digital photography, varies depending on each camera and manufacturer. In evaluative metering, the camera divides a scene up into individual zones, takes light readings on each of them, puts them together and comes to a meter reading based on that information.
It’s not as complicated as it sounds:
In evaluative metering modes, the camera takes a scene and measures the light within the entire scene, rather than just one part of it.
It’s probably the easiest metering mode to understand and use. Most cameras come with evaluative metering as the default mode that they’re set to.
There are some other types of metering modes but the only other one I’d like to mention is called spot metering.
Spot metering is tied to where your autofocus point is and only takes a meter reading of that small little area within your focus point. That means that you as the photographer have a lot more control in regards to your exposures.
A great example of when spot metering is useful are in instances where your subject is strongly backlit, meaning there’s a strong light source behind them, such as the sun. In evaluative metering modes, if you try to take a portrait of someone in a heavily backlit situation, your camera will most likely underexpose and your photo will come out very dark.
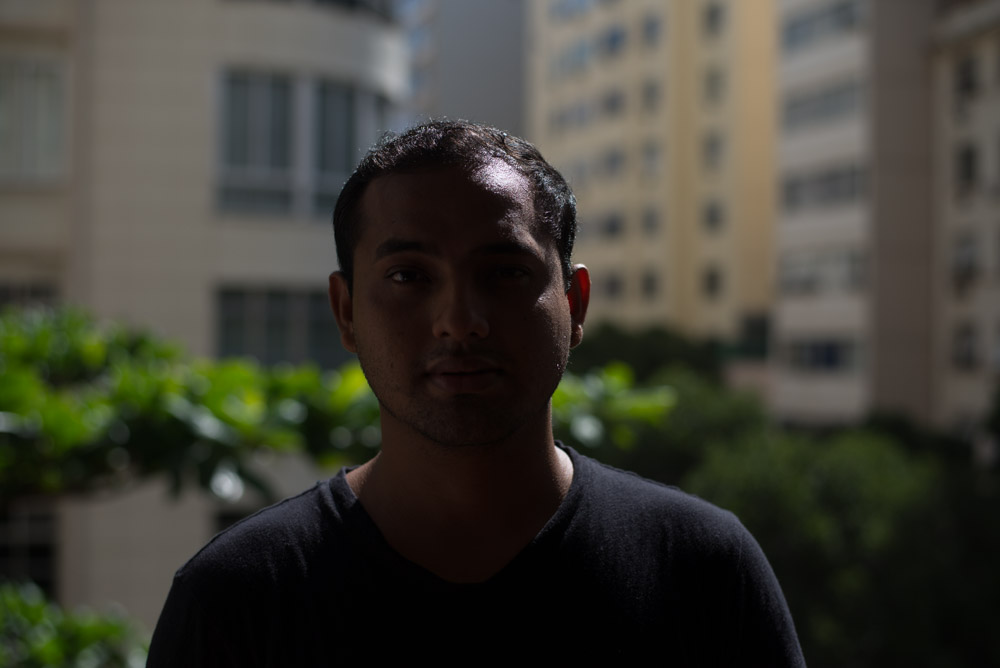
That’s because your camera’s light meter just sees a really bright scene and tries to compensate for it. But it doesn’t know that what you really want to meter for is the subject, i.e. the light falling on the person. By spot metering on the subject’s skin, usually the cheek, you can get the exposure you normally want.

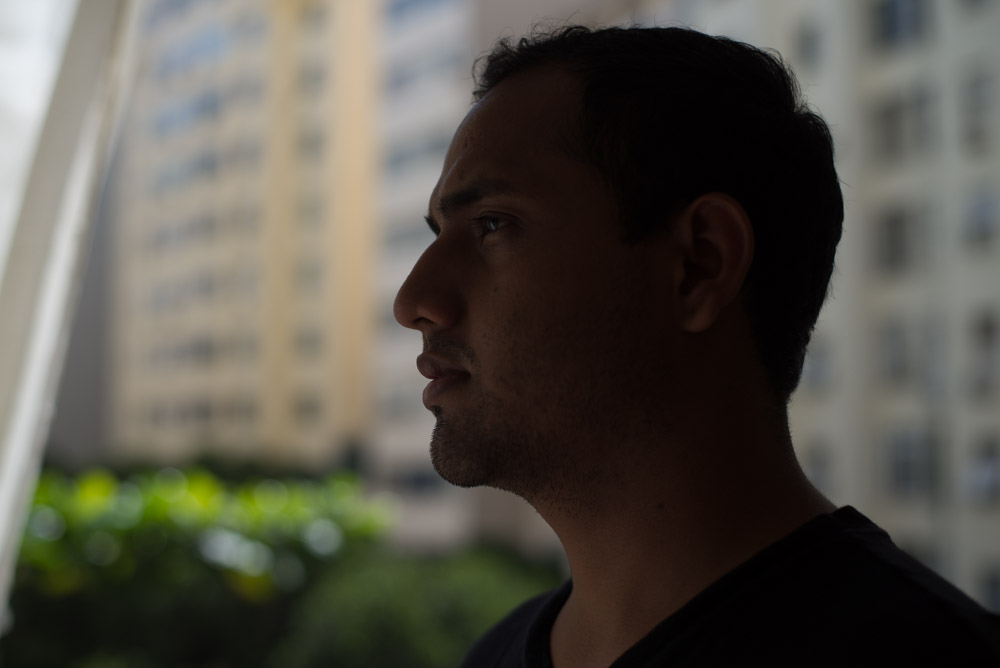
Spot metering also gives you a bit more creative control, as just as in our backlit portrait example, you can do the opposite and spot meter for the bright areas of the image and get more of a silhouette of the subject.
White Balance
The subject of white balance is hotly debated among some photographers, but it doesn’t need to be. We’ll get to why at the end of this section, but first, let’s delve into what white balance is and how it affects your photos.
White balance is the process of your camera matching the colors in your images to what the colors really looked like naturally in real life.
Most light sources aren’t pure white. Meaning they have a certain “color cast”.
Where the light falls within the color spectrum is what we call its color temperature.
For example, the light in a shaded area or the light on an overcast day takes on a blue color cast. On the opposite end of the spectrum, candlelight produces light that looks more on the red side.
Direct sunlight in the midday hours falls in the middle of the color spectrum and so is considered neutral color temperature.
In essence, all your camera is trying to do with white balance is to balance all the colors in an image by making white colors in your images white.
Where our cameras run into some trouble is the fact that it’s harder for them than the human eye to make these assessments of color casts. If you’ve ever noticed a photo that looked really unnaturally blue or orange, that was a photo where the white balance was off.
But here’s the thing:
In modern cameras, the auto white balance does a really good job of picking white balance for you. And not only that, but if the camera chooses a white balance that you deem inappropriate, then you can easily fix it in post-processing in Lightroom without damaging your photo. This is called a “non-destructive” change.
So whether you’re starting out as a beginner in photography or an experienced pro, I recommend putting your camera in auto white balance and focusing your energy on getting good exposures by adjusting your aperture, shutter speed and ISO. It’s one less thing to worry about.
Just set it and forget it.
And when on the rare occasions that your camera gets it wrong, you can easily fix it in a program like Lightroom.
But just to be thorough, here are some of the standard ISO modes that come on most cameras:
- Auto: The camera chooses a white balance for you, and usually does a very good job of it. I’m concerned with focusing my efforts on lighting and composition – so I don’t waste time and energy fiddling with my white balance. I shoot in auto white balance (and in RAW) 99.9% of the time.
- Direct Sunlight: For shooting outside in strong sunlight
- Flourescent: For when shooting indoors in areas lit with fluorescent lighting
- K: A mode that allows you to manually change your white balance based on the numeric scale assigned to colors, the Kelvin scale.
- Preset: This mode lets you get the color cast you want by shooting a white card.
- Cloudy: The only other white balance shooting mode that I shoot in, the cloudy setting, is a good option if you like your images on the warmer side. As mentioned before, shadowy areas or cloudy days tend to produce cool color casts. By setting your camera in Cloudy white balance mode the camera compensates a bit for that so your images will come out on the warm side. It’s great if you’re pale like me and you want a nice bronze photographic tan 😉
How to Change Your White Balance in Lightroom
Haven’t heard what Lightroom is?
Lightroom is an editing program made by the same company as Photoshop, Adobe.
You could say that it’s a simplified version of Photoshop. It’s still incredibly powerful but has a much easier-to-use interface than Photoshop.
So I highly recommend you get Lightroom. It’s important.
Got it downloaded and ready to go? Good.
So pull up any photo in Lightroom. It doesn’t matter what photo you choose.
Go into the Develop module and then click on the Basic panel.
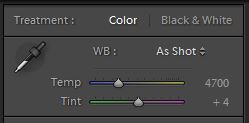
From here there are a few ways you can adjust your white balance to your liking. I’ll give you the first two and then show you the option that I prefer.
The first slider you’ll see in the Basic panel is for the temperature of your photo. Sliding this back and forth allows you to adjust the warmth/coolness of your images. Slide it to the left for cool blues, slide it to the right for warm orange tones.
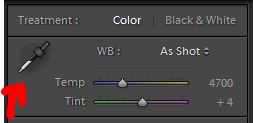
There’s another slider just under it:
The Tint slider.
This slider is used less because cameras are less likely to get the tint wrong in-camera than the temp colors. Tint has to do with the green and magenta tones in your photos. If your photos have a weird purple or green color cast to them, you can balance that out with this slider.
Greens to the left, magentas to the right.
But here’s what I recommend doing:
What Lightroom calls the White Balance Selector. It looks like a dropper so Lightroom should have called it The Dropper but whatever.
It’s in the Basic panel too.
Select the dropper and hover it over your image. As you’ll see, whatever areas under where you hover the dropper will be enlarged so you can see exactly what color you’re hovering it over.
To the left of the photo under ‘Navigator’, you’ll see a small preview of what the image will look like as you hover the dropper over the different colors throughout your image. This will give you an idea of what the image will look like and you can move your dropper around until you like what you see there.
The general idea with using the dropper is to hover a white or gray area of the image and click there. The dropper does a pretty good job of balancing out the color cast of your images to get them to a neutral point if you do this.
You can also use the dropper to get a general idea of the color cast you want and then make fine adjustments to your temp and tint from there.
Here’s a bonus tip on how to adjust your white balance after the fact:
In Lightroom, you can pull up an image in the Library module.
Under the ‘Quick Develop’ panel on the right-hand side of the program, you’ll see that it says ‘white balance’ and then ‘custom’ with a couple of up and down arrows to the right.
If you click on that, it’ll show you a list of white balance options, as if you had shot them that way in-camera: As Shot, Auto, Daylight, Cloudy, Shade, Tungsten, Fluorescent, Flash and Custom.
Click on any of these to get an approximation of the way your camera would have rendered the images had you had the camera set to any of these white balance settings.
These are the basics of adjusting your white balance but it’s pretty much all you need to know when you’re starting out as a beginner in photography. Once you’ve gotten the hang of editing your images, you’ll start to get better at making quick white balance adjustments.
You’ll also develop your own style and get a better idea of how you prefer your images, whether that be on the warm or cool side.
Choosing your white balance is not an exact science. It’s more a matter of personal style (within reason of course).
Now that we’ve established how to shoot in manual mode, let’s take a look at the other shooting modes available to us and when we may want to deviate from shooting in manual.
Automatic Mode
Pretty much everyone knows what Auto mode is, whether you’re just starting out learning how to take pictures or not, so I’ll just touch on it briefly. When shooting a camera in Auto mode, the camera chooses the aperture, shutter speed, and ISO to arrive at what the camera thinks is a proper exposure.
While Auto mode can be great for snap shots, it doesn’t give you any creative control over the outcome of your images.
An important thing to note about having your camera in Auto mode is that if you have a built-in flash, which most cameras suited to beginner photography do, the flash will fire. Even if you have a popup flash, the camera will force it to popup and flash in this mode.
And while it may be acceptable in instances where you’re shooting a very dark scene and have no other option, normally we don’t want that on-camera flash to fire. I’ll explain more on this later in the article but for now just know that rather than using Auto mode, we’re much better off using the next mode in this section, Program, or P mode.
Program (P) Mode
In a lot of cameras, P mode can differ a little bit but it’s easiest to think of it this way:
P mode is the exact same thing as Auto mode, but without forcing your camera’s flash to go off.
Again, the camera does it’s best to choose your aperture, shutter speed and ISO for you. Just without adding in flash to the mix.
This isn’t the case with all cameras, but some allow you to choose a set ISO within P mode, and the camera will make adjustments to the aperture and shutter speed accordingly.
It’s a great mode because you can tell your friends that “P mode stands for ‘Professional’ mode and blow them away with your amazing imagery!
Aperture Priority Mode (A) or (Av)
Aperture priority mode is a semi-automatic mode that works by you choosing an aperture and the camera does the rest by choosing your shutter speed and ISO.
Aperture priority mode and other semi-automatic camera modes are a great way to learn how to take pictures while at the same time learn how adjusting each setting affects your outcome.
Aperture priority mode is great for when you want to control your depth of field, i.e. how much of your photo is in focus, but you’re in lighting conditions that are changing frequently. That could mean if you’re going back and forth from shooting indoors to outdoors. Or if the sun is going down and you’re losing light rapidly every few minutes.
Shutter Priority Mode (S) or (Tv)
Are you seeing a pattern here?
In shutter priority mode, you choose the shutter speed you’d like and the camera chooses your aperture and ISO for you.
A time when I’ve found shutter priority mode to be extremely handy is when I’m shooting in low light conditions and I don’t want motion blur in my shots. In these instances, I’ll set my shutter speed at 1/125 of a second and fire away.
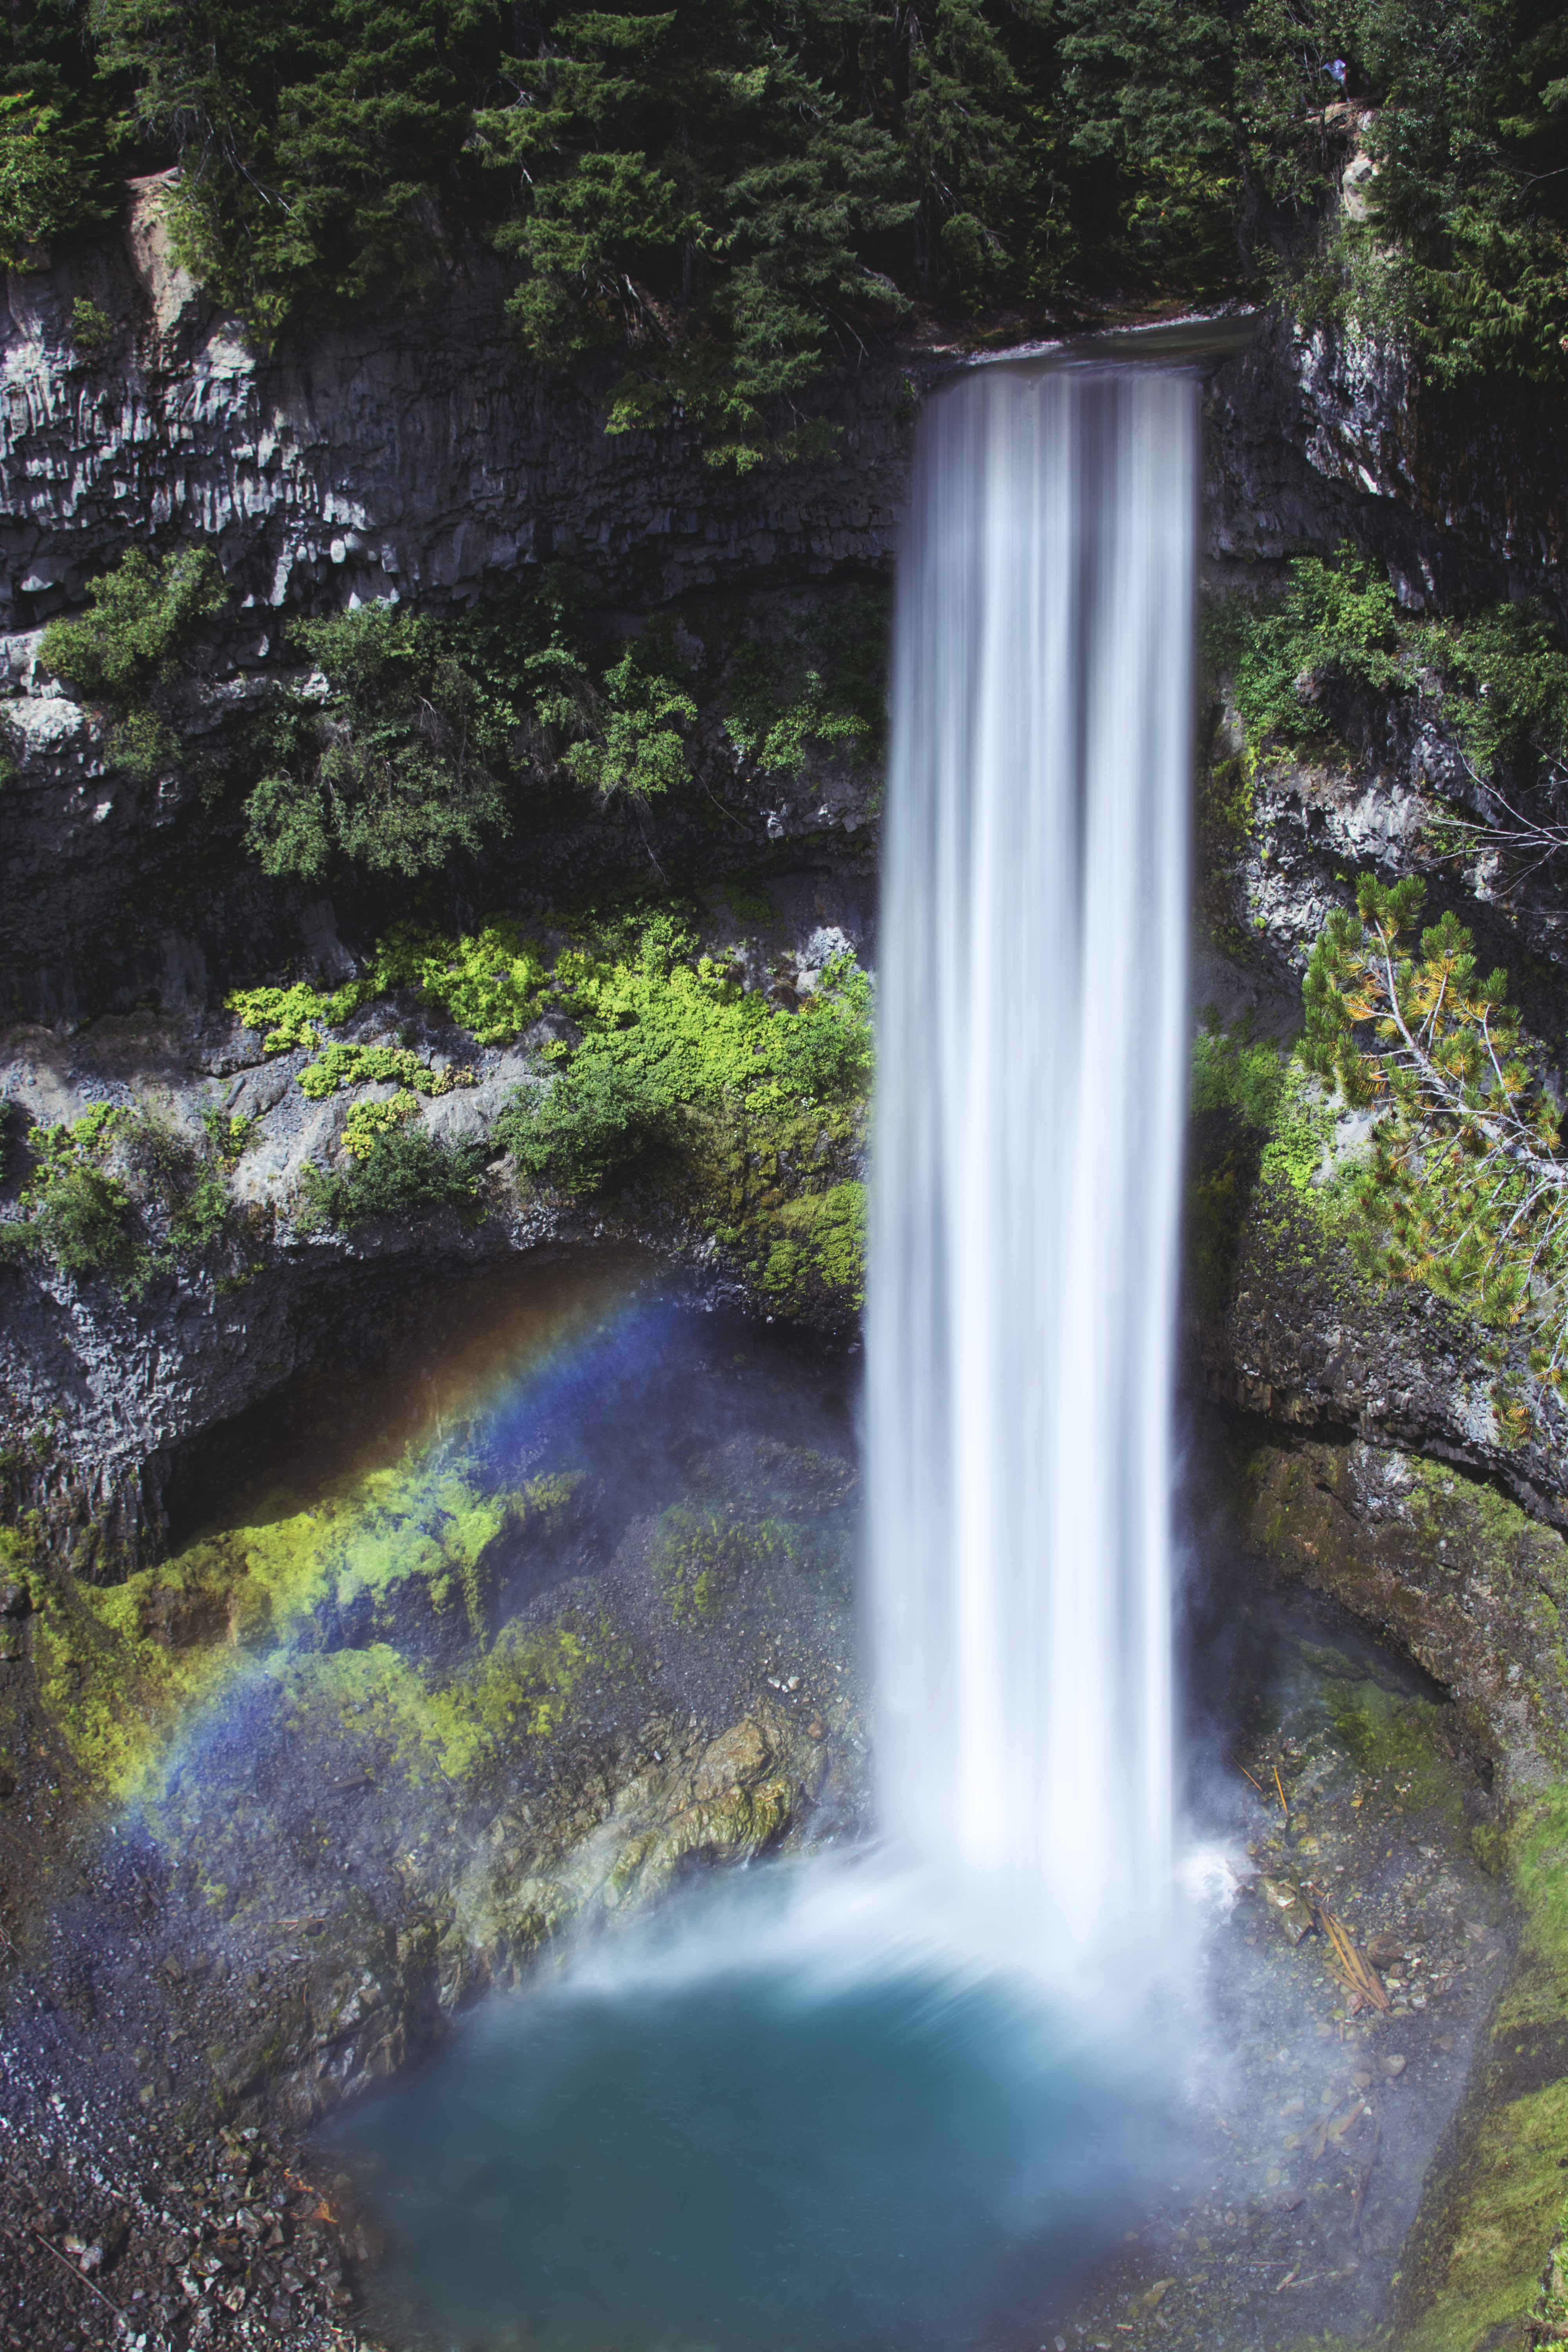
You can also use shutter priority mode in specific instances when you DO want motion blur in your shots. Some examples that come to mind are when you want to take a photo of a waterfall or water washing up on the ocean to get an effect where the water is fluidly moving and not frozen in motion.
Video Mode:
Pretty self-explanatory but worth a mention. The majority of cameras these days produce pretty good quality videos – even many cameras geared more towards beginner photography.
Other modes on your camera may include:
Portrait mode, Landscape mode, Sports mode, Night mode and Macro mode. As you might imagine, in each of these modes the camera does it’s best to shoot in the settings that it thinks ideal for shooting in these situations.
The only mode here I really recommend is Macro, as it’s great for getting in real close to your subjects. But this only really applies to fixed-lens cameras and point-and-shoot cameras.
If you use a DSLR, for instance, you won’t have a macro mode – for that you’ll most likely need a dedicated macro lens, in which case you don’t need to put the camera into macro mode; a macro lens will focus up close regardless of what mode you have the camera in.
Exposure Compensation
When I first started out as a beginner in photography, I made exposure compensation out to be more complex than it really is.
And then as I got more experienced in photography and learned how exposure compensation works, I really underestimated the value of this useful little function. For quite a while I thought it wasn’t even worth using and I found it silly to even implement into a camera.
But I was just wrong.
Exposure compensation is a camera function you can use while shooting in the automatic/semi-automatic shooting modes that were just discussed in the previous section. All the function does is allow you to tell the camera to expose your pictures lighter or darker, depending on what you want.
Exposure compensation buttons vary, but normally are characterized by +/- labels printed on them.
With some camera models, you press up on the respective plus and minus symbols to alter the exposure compensation. With Nikon and Canon DSLRs, there’s usually just one exposure compensation button that you hold in and then adjust up and down with the wheel on the back of the camera normally used for adjusting shutter speed.
Exposure compensation usually gives you options for altering your exposures in third-stop increments. And the range usually goes from -2 to +2 EV, meaning two stops underexposed to two stops overexposed.
So just press “+” to brighten your photos and “-“ to darken them.
Here’s a brief overview of how exposure compensation works under the hood in Program (P), Aperture Priority (A) and Shutter Priority (S) modes.
In P mode, your camera chooses an aperture and shutter speed based on the meter reading it takes from a scene (and ISO if you set your camera to auto ISO). So when you use exposure compensation in P mode, your camera will make according adjustments to the three components of the exposure triangle to make darker or lighter photos, depending on what you tell it.
Similarly, in A mode, you choose the aperture, so when you use exposure compensation to brighten your photos, it will lower your shutter speed to let more light in. When you lower your exposure compensation, the camera will increase your shutter speed to let less light in and underexpose compared to what the camera’s meter thinks is a proper exposure.
And in shutter priority mode, you choose the shutter speed you want so when you make adjustments through exposure compensation, the camera will open and close your aperture accordingly.
Understanding Depth of Field in Photography
Remember how we talked earlier in the guide about how your aperture selection affects depth of field?
The smaller your aperture, the more will be in focus in your photos. Make your aperture wider and less will be in focus.
But there’s more to it than just that.
There are two other things that affect depth of field:
1.Focal length
and
2. Distance from your lens’s sensor to subject
This is another hotly debated topic and if you want to get technical about it, we’re actually talking about background blur rather than depth of field.
But for all practical intents and purposes, both the focal length of your lens and how close you put your camera to your subject will affect your depth of field.
I’ll demonstrate with an example:
Let’s say we have a waist-up portrait shot at 85mm.
Then let’s say we have another waist-up portrait (i.e. shot at the same perspective) shot with the same camera and everything, just with a different lens, a 35mm.
Which one of these portraits is going to have a shallower depth of field?
The 85mm shot has less depth of field, i.e. there’s less area of the image in focus.
This is due to compression and the fact that when we shoot something with a long lens (like the 85mm in this example) to get the same perspective we stand further away from our subjects than we do when we shoot with a wide angle like a 35mm.
All that technical jargon is not essential for you to know.
What’s important is:
If you shoot with a long telephoto lens you’ll get more shallow depth of field, subject separation, and bokeh.
Shooting with a wide angle lens results in images with more in focus.
Flash
Flash photography is a complex subject that can take some time to master. I know this guide is a lot to take in so I’ll just cover the flash photography basics but there’s a couple pieces of information that are really important to know when you’re learning how to take pictures using flash.
The most important thing when learning how to photograph with flash is to get your flash off the camera. The only cameras that don’t have a pop-up flash built into them are generally professional level cameras that cost a fortune.
The thinking is probably that the photographers buying those cameras are highly unlikely to use built in flashes in favor of hot shoe and other types of flashes that provide much more aesthetically-pleasing results.
As this guide is for people just starting out, I’m assuming that your camera is one with a flash built in to it. And while it’s handy in certain situations to have a flash like that, as you learn photography, you’ll probably realize that you should barely ever use it.
Why?
Direct flash from on-camera flash generally results in harsh and unflattering lighting on your subjects.
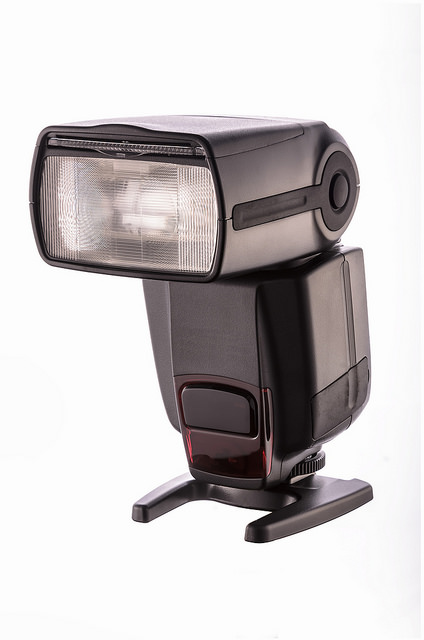
To get soft, beautiful light that will make your subjects look great, it’s much better to use a flash off-camera. To do this, I recommend starting out with what’s called a hot shoe flash, also commonly called a speedlight. Here’s what they look like:
In addition to the speedlight, you’ll also need a pair of wireless flash triggers (you can do this with a flash sync cable as well but with plenty of good cheap wireless flash triggers on the market from brands like Yongnuo, I don’t see why not go with the setup that will give you the most freedom of movement.)
You can get someone to hold the flash for you facing your subject at a 45-degree angle or you can use a light stand. Having an assistant follow you with a speedlight on the end of a long pole is a great way to get beautiful directional light for events with poor lighting conditions, like wedding receptions for example.
Every setting will be different, so you always have to dial in your settings according to the light in your surroundings but I highly recommend shooting all manual when shooting your camera with off-camera flash. It’s possible in automatic modes but you’ll get more consistent and precise results by dialing them in manually.
To get a proper exposure, my recommendation is to start off with your speedlight turned completely off at first and getting a meter reading on your subject. But instead of getting a “proper” exposure by exposing where the camera says ‘0’, underexpose by a full stop, at -1.
This gives you a good baseline exposure from which you can start to add your flash. From there, you can start adding in a bit of flash until you like what you see on your LCD. Start with your weakest flash power setting and work up from there.
You’ll get even better results if you use a flash modifier such as a softbox. Diffusers effectively make your light source larger (i.e. your flash), which softens the light coming from it, resulting in more flattering light on your subjects.
If you really want to learn photography using flash, you should get to know your flash and how to dial in the settings to get exposures that you like. But there’s also an automatic flash mode called TTL that will get you pretty good results.
TTL stands for Through The Lens metering and just means that your camera meters for the light that you point your camera at and then the flash makes flash power adjustments accordingly to get the right exposures.
When using your camera in manual mode and have your flash in TTL, your exposure compensation button will act to raise and lower your flash power accordingly.
Another very effective technique you can use is to put your speedlight on top of your camera’s hotshoe, but instead of directing it straight forward, you can bounce light by pointing the speedlight in directions where it will bounce off a wall or ceiling and back on to your subject. This technique works best when you have a white or light-colored wall to bounce off of.
The reason why this works so well is that you’re effectively changing your light source from your little flash to a much larger surface area, a wall or ceiling. As photographers, that’s usually exactly what we want, to enlarge the surface area of our light source, as it gives us soft, beautiful light that make our subjects look great.
This technique works excellently if you don’t have an assistant or even a lightstand as all you need is your camera, flash and a wall. For the best results, try pointing your flash behind you and to the left or behind you and to the right.
The main point here with getting a speedlight flash is that you can get directional light even if it’s on your camera. With speedlights, you’re able to angle them at all sorts of angles, from pointing straight upwards to directly behind you.
Not so with the on-camera flash that your camera probably comes with; you only have the option of pointing it directly at your subjects.
There are a couple of exceptions to this rule, but for the most part you really want to get that flash off your camera.
Composition
Composition is another complex and multi-faceted subject when you’re first learning photography but if you’re armed with a couple of the basic composition concepts you’ll be well on your way to getting good at composing your shots.
The most common photographic compositional technique you’ll hear about is:
The Rule of Thirds.
The rule of thirds is the most widely used composition guideline in photography because it’s easy to understand and put into practice. Plus, it just works.
The concept is simple:
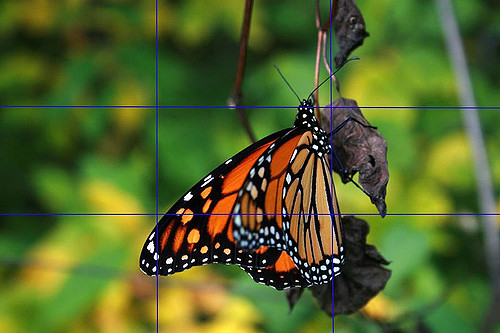
You divide up your compositions into nine sections using two vertical and two horizontal lines. Along the lines and where the lines intersect are where you should place the most important subjects of your images.
You can do this by just visualizing the lines in your mind or plenty of cameras have a rule of thirds overlay that allow you to actually divide your compositions with these lines directly in your viewfinder or on your LCD. But the majority of the time, you adhere to the rule of thirds in your editing process, by keeping your images that line up well with the rule of thirds lines.
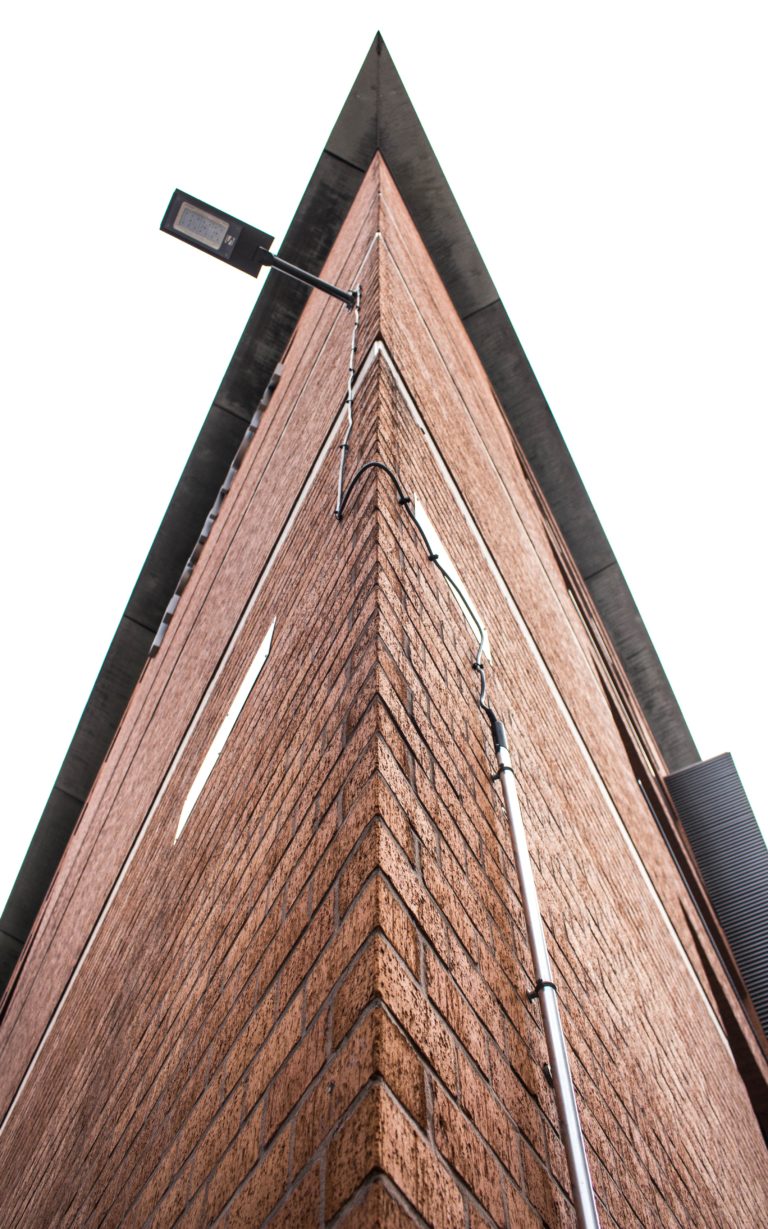
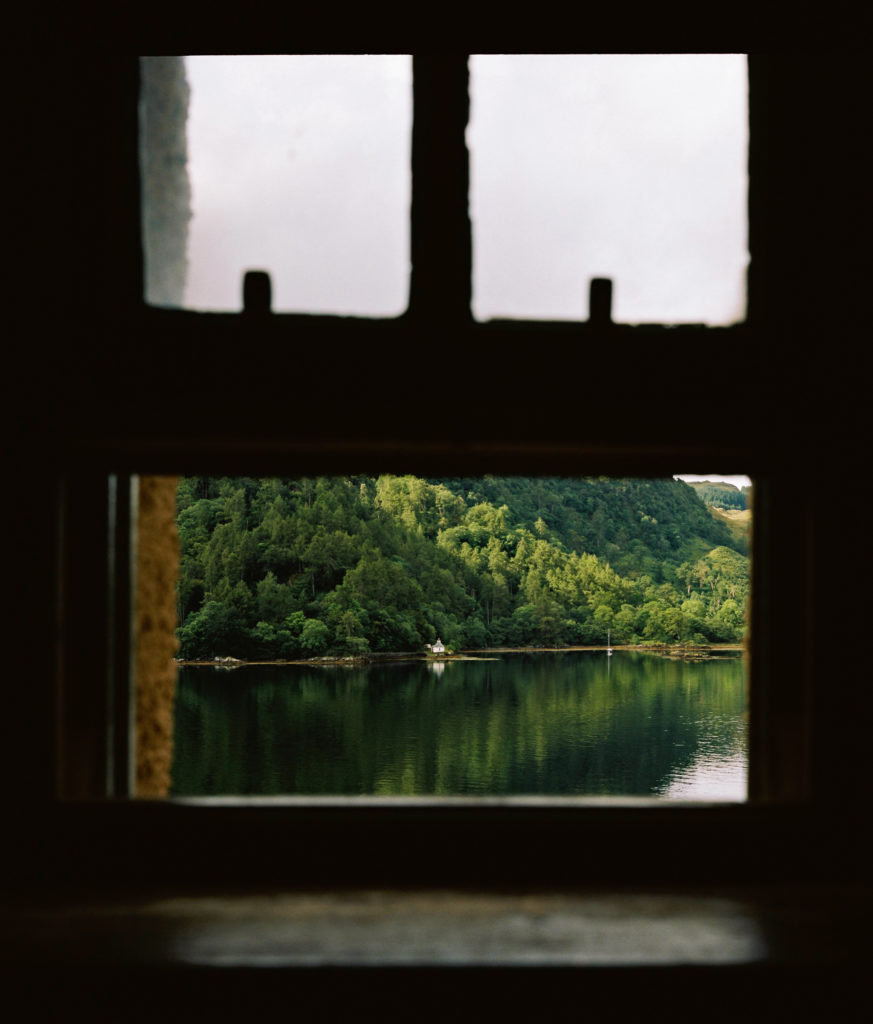
Natural Framing
A great way to add interest to your compositions is to include a frame, or frames, within your frame.
Leading Lines
Our world is filled with all sorts of lines:
Straight, curvy, diagonal, zigzag, and so on.
You can use leading lines to take your viewers on a journey through your image, leading them from the first point of interest to the last. Or you can place your subject within a part of your image that has a lot of leading lines going to it.
Symmetry
It doesn’t matter what your subject is, whether it’s a person or a building or a landscape, images with strong symmetry from side to side can be very pleasing to the eye.
As you learn photography, you’ll realize that just like a lot of other concepts in photography, the “rules” were made to be broken in photographic composition. And indeed, I don’t think there are any hard and fast rules in composition, just guidelines that help the photographer make good images more consistently.
Some of the rules here even directly contradict each other.
The important thing is to study the rules, take them into consideration, recognize the situations in which they can be used successfully in your photos and discard them when they don’t work.
Keep in mind that a lot of these composition concepts don’t need to be used in the field while shooting per se but rather they’re referenced to in the editing process, when deciding on what photos to keep and which ones to discard.
Conclusion
So what comes next?
Practice – and lots of it!
There are a lot of concepts here in this beginner photography guide. And, like I’ve mentioned before, I know it can seem like a lot to take in when you’re first taking up photography.
So take it slow and don’t get too down on yourself if you don’t get it all at first. With time and a little practice, all these beginner photography concepts will seem like second nature to you.
It’s best to break them down into small digestible chunks and master one at a time. Learning how to take pictures is a process.
If you learned something from this article, you may be interested in these as well: