Best Camera Settings for Stars
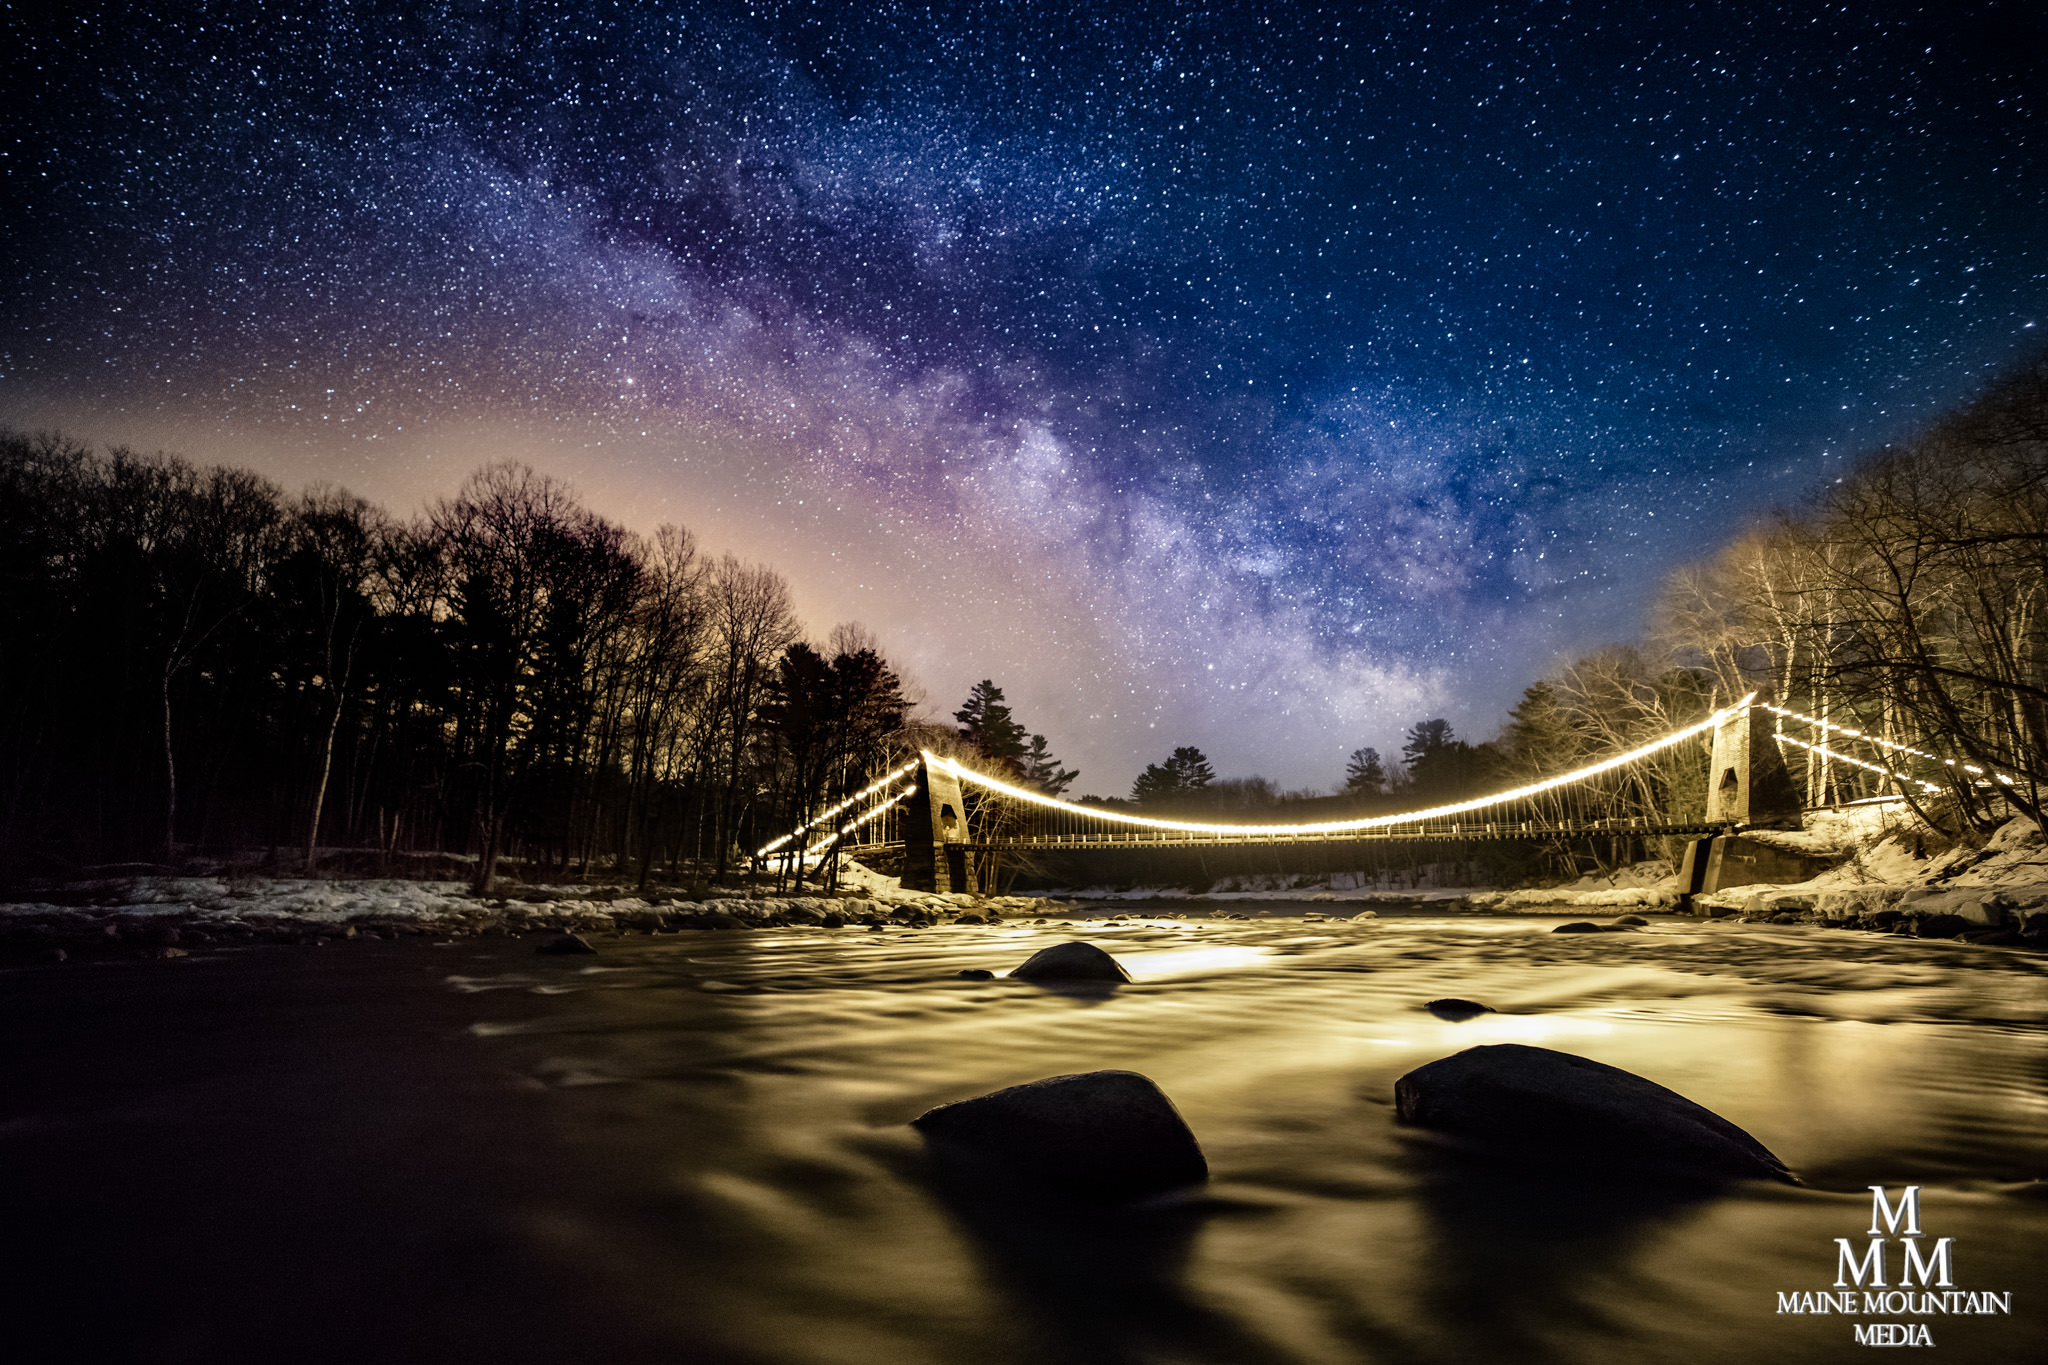
When done right, a photograph of a starry night sky is awe-inspiring and is capable of reminding the viewer of the infinite nature of space and their place within it.
But many photographers, maybe even you yourself, come away from the experience of trying to photograph the stars extremely disappointed. It’s not uncommon to botch your exposures when doing star photography the first time.
That’s why this article will cover the best camera settings for stars so you can take pictures of stars that you’ll be proud of.
Necessary Gear
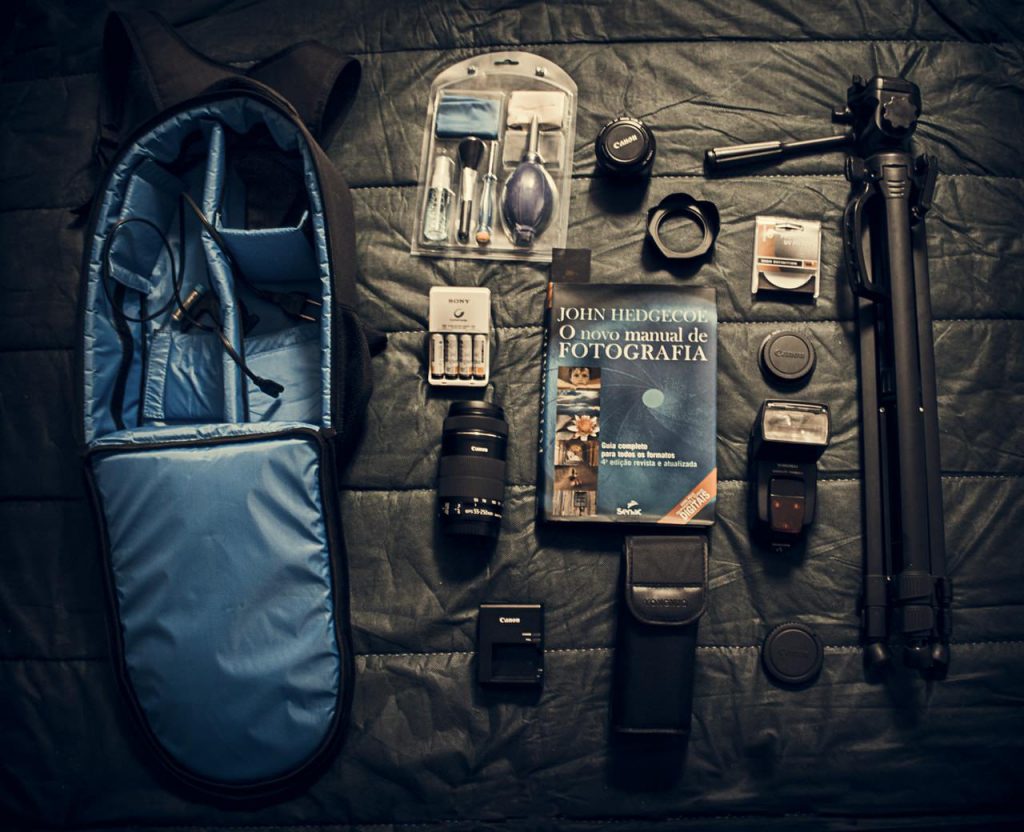
To photograph the stars, there is a long list of equipment that you can go buy, but I’m here to talk about how you can use the equipment you already have to get out and take pictures of the stars.
That said, the three things you’ll need is a camera body, a lens, and some form of camera support. I say camera support because if you don’t have a tripod, don’t buy one just yet.
Personally I prefer to use a full-frame sensor or at the very least, an aps-c “crop frame” sensor.
I’ve not had much experience with Micro four thirds size sensor but I’ve seen decent results. Smaller than that (1” or smaller), you’ll struggle to capture enough light when shooting the stars.
Most importantly, a camera needs to shoot RAW. Always shoot RAW when trying to capture the stars.
As for lenses, I always recommend something wide or ultra-wide angle. 35mm or wider (in full-frame equivalent) is ideal and we’ll get into that later when we discuss shutter speed.
I also recommend something with a wide aperture; f/4 or brighter is a good place to start.
As for a tripod, you’ll be happy if you buy a high-end sturdy tripod. First use whatever you have to make sure astrophotography is something you want to do. If you don’t have a tripod laying around the house, you’ll do just fine finding a sturdy surface to set your camera down.
When I was starting out, I used to use what I call the “rag-pod,” meaning I find any old rag laying around the house or in my car, a towel or t-shirt will do too, and just use that to prop my camera to the desired angle.
I used to use a bag of rice on the roof of my car when I was starting out and got decent results. It was only mobility that I had to sacrifice so eventually a sturdy tripod was a worth-while investment.
ISO
If you know only a little about photography you might be familiar with ISO or “film-speed” as it was called before the days of digital.
Quite simply, the ISO is the sensitivity of your camera sensor to light. Light is the be-all and end-all of photography so it stands to reason that increasing or decreasing sensitivity of your camera to the available light will be helpful.
In a studio, or other environment where you can control the light, it will always be best to leave your ISO at 100. These days with modern cameras, it is generally acceptable to increase ISO to 200, 400 or even 800 without a concern for image quality.
When shooting dark scenes, you can set a longer exposure time (slower shutter speed) to allow more light in.
However, when shooting stars, you can’t increase your lighting of your scene without leaving your sky dark and your shutter speed can’t be too long without causing problems which we’ll discuss later in the section on shutter sheed.
So have to be able to adjust your camera to match the dark world around you. With modern digital cameras, ISO ratings can go into the 100,000 range or higher but you’ll find quality drops off very quickly after the 10,000 mark.
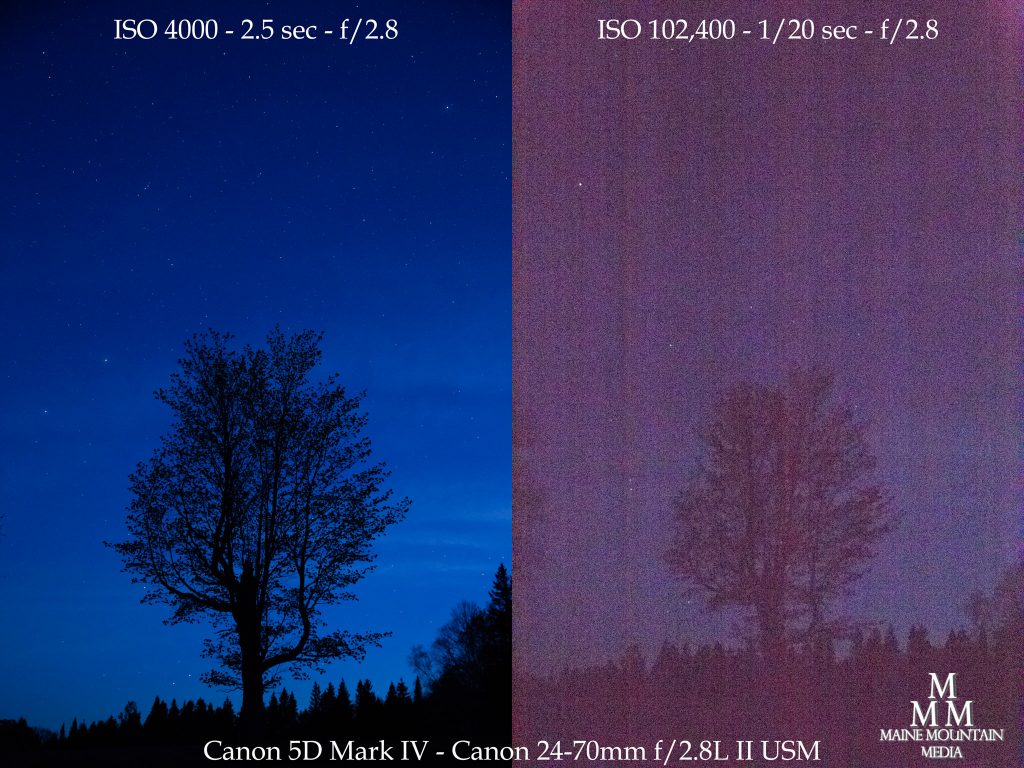
When shooting with your average camera, you’ll need to keep your ISO somewhere between 4000 and 10,000 in order to get the required amount of light to capture the stars so start at 6400 and adjust from there.
Exposure Time/Shutter Speed
When photographing the stars, a very important factor to consider the is earth’s rotation. Because the earth rotates, the stars slowly “move” across the sky.
As the stars move, they will drag across your image if your shutter is open for too long. You want each star to appear as a single point of light if possible.
To keep your stars as single points of light you’ll need to expose as long as possible without letting the stars travel from one pixel on your sensor to the next.
Higher resolution cameras and smaller sensors have made this actually harder to accomplish so shutter speeds on a 50mp crop sensor camera will have to be slightly shorter than that of a 20mp full-frame camera.
New technology has created a shift in the 600 rule, to the 500 rule, and now I generally subscribe to the 400 rule.
This states that if you take the number 400 and divide it by the focal length of your lens, the resulting number is the maximum shutter speed you can use without succumbing to the star trails problem.
| Focal Length | 400/Focal Length=Shutter Speed | Max. Shutter Speed |
|---|---|---|
| 16mm | 400/16 = 25 | 25sec |
| 20mm | 400/20 = 20 | 20sec |
| 24mm | 400/24 = 16.667 | 16sec |
| 35mm | 400/35 = 11.429 | 11sec |
| 50mm | 400/50 = 8 | 8sec |
This chart should perfectly exemplify why you’ll want to shoot with a wide-angle lens. If you shoot with a 24mm lens you can only shoot as long as 16 seconds letting in much less light than if you chose to shoot a 16mm for 25 seconds.
Unless I am shooting with a fast prime like a 24mm f/1.4, I usually choose to shoot at 16mm f/2.8
So let’s say for example you have a canon sl2 with the provided kit lens of 18-55mm f/3.5-5.6 and you want to go shoot the stars for the first time. Take into consideration that you have a crop sensor, so your 18mm is equivalent to a full frame 28mm.
This means you’ll need to keep your aperture wide open at f/3.5, and you can set your shutter speed to 10-15 seconds before you’ll find start trails.
Aperture and Focus
I lump these two together because of how closely they are tied in night photography.
When shooting the stars, you’ll need to capture lots of light meaning you’ll need to keep your aperture open wide. Exactly how wide open will depend on your situation and desired results. And of course, when shooting wide open apertures, you create a shallow depth of field which can be difficult in landscape/nightscape photography.
As mentioned before, you’ll want to keep your aperture as wide open as possible usually.
In the rare case that you have a very fast prime lens that is capable of apertures more than f/2.8 like a 12mm f/2, 16mm f/2, 20mm f/1.4, or 24mm f/1.4 you may want to consider stopping them down to 2.8 or 3.5 depending on the optics of that lens.
Some of these third party wide prime lenses from companies like Rokinon or Samyang can be purchased for a very reasonable price of around $300 so we’ll discuss them for now. Wide apertures in these lenses can create all sorts of issues including lens vignette, chromatic aberration, and general softness. Not to mention shallow depth of field.
If you shoot a 24mm lens wide open at f/1.4 you just might encounter some of the issues we mentioned. First of all, consider depth of field.
When shooting ultra-wide like 16mm, depth of field is less of a consideration because the wider your lens, the deeper your depth of field will be. In a 24mm lens or certainly in a 35mm f/1.4, you’ll never get your entire frame in focus shooting wide open.
The shallow nature of a wide aperture will leave you to choose where you want your focus to sit.
I personally prefer to decide this on a case-by-case basis because sometimes I consider the sky my subject and therefore focus out to infinity and let my foreground fall out of focus a tad. If however, I have a very interesting foreground subject, I might choose to let my stars become a tad blurred and focus on my foreground.
Another option when shooting very shallow depth of field, is a technique called focus stacking.
This is where you shoot multiple images without moving the camera in any way, and only change your focus point between images. You can then stack these images in post-processing, and keep only the focused region of each image resulting in a fully focused image.
It is best to get to know your lens and learn it’s capabilities and restrictions.
Get out under the stars, and take 30 images.
Change one thing between each image, and take notes on paper or type into your phone what you changed in each image. When you get home to inspect the images, you’ll be able to refer back to your notes so you can learn what works best for your camera and lens.
There is no perfect aperture setting so I can’t tell you exactly what to use but my best results usually are created somewhere around f/2.8 so if you have a lens that’s capable of that, start there and adjust as necessary.
White Balance for Star Photography
When it comes to what white balance to use for night photography and stars, things can really vary. The good thing though is that as long as you shoot in RAW, changing your white balance in post is non-destructive (i.e. it doesn’t damage your image quality). This means you can shoot in auto white balance and you’ll be good to go.
If you want to manually dial in your white balance before doing your star photography, 4000-4200 Kelvin is a good place to start and tweak from there if necessary.
Post-Processing
This is where the magic happens in night photography for me.
When I’m out shooting under the stars, I love my time out there and I spend hours just staring up into the sky. It’s an amazing time, but to be honest, the photography side of it can be tedious.
The time I spend lugging my heavy backpack around, and the arduous set-up and breakdown times, not to mention the time spent inspecting images on a 3” lcd display, is all well and good, but the results I try to achieve are all a means to an end.
I know now what I need to shoot in order to have something that will process well, but the RAW images are just never that visually stunning.
The reason for this is because the processing is a huge part of night photography.
When shooting the stars, prepare to be underwhelmed by your RAW images because the images you capture are just the negative, now it’s time to spend some time in the dark room…or Lightroom as it were.
In terms of processing, I run Apple products and edit with Adobe products. That means I’ll be speaking in those terms because it’s what I have experience with. That being said, I am certain whatever programs you use can create similar or even better results so stick to what you have for now.
So let’s dive into Adobe Lightroom Classic CC and I’ll discuss some of my favorite editing techniques.
As mentioned, I always shoot RAW and a raw image imported into lightroom, if all goes according to plan, it will look flat and desaturated, with little color and contrast, but generally the composition is usually close to my desired outcome and the sharpness should be there as well because you can’t fix fuzzy.
Here is a look at a before/after of an image I captured recently. The photo on the left “copy 1.” Is the RAW, unprocessed image and the image on the right is processed only using Lightroom.
I hope it is evident in this comparison that the image I began with was close to the desired results but intentionally without the color, contrast, detail, and overall impression that I had in mind when I took the photo.
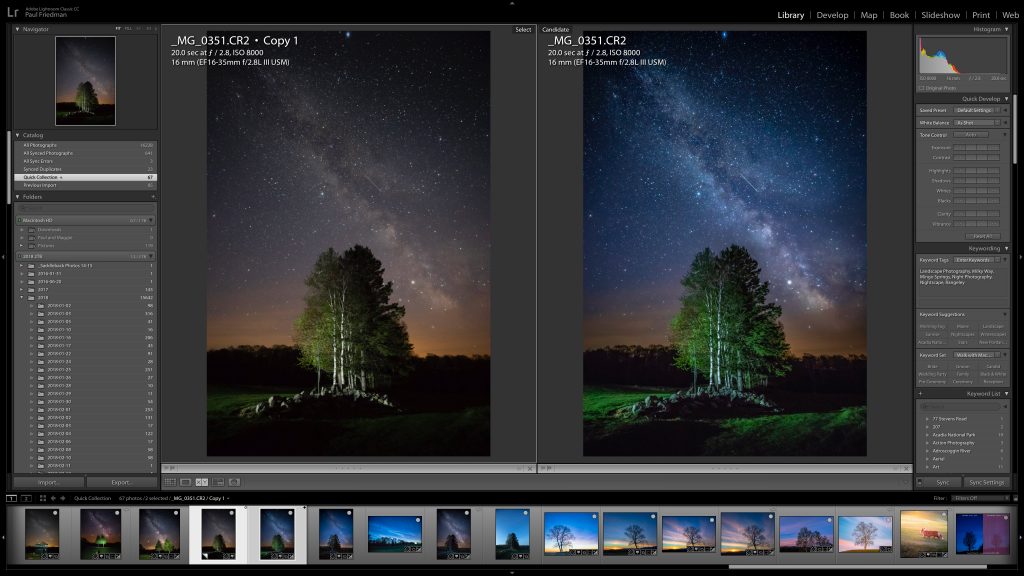
The reason for this is because if I shot the image with all the color and contrast and exposure in my tree that I wanted, the stars would be messy and poorly exposed. And if I shot my stars with all the contrast, clarity, and color that I wanted, the tree would be a big blurry, overexposed mess.
I have to meet in the middle so that all the necessary information is recorded.

Let’s dive in to the settings I chose to use.
If you look down the right side of the screen you can see all the adjustment sliders. I generally do all my work in the “Basic” adjustments panel and the “Tone Curve” Panel.
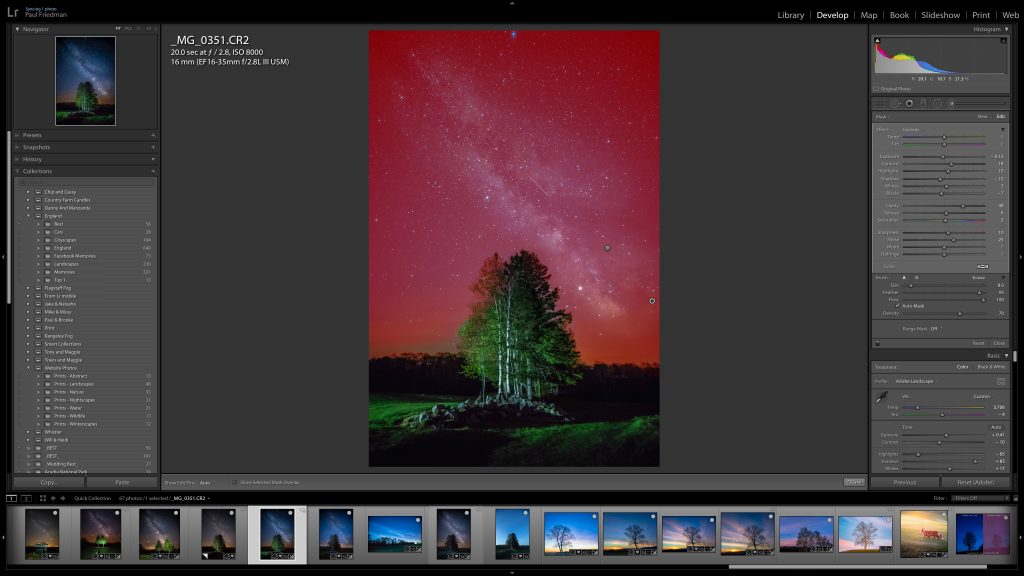
Look closely at the Basic Tone adjustments and you’ll see I have a lot of seemingly contradictory adjustments. I bring my highlights way down and my shadows way up but then my whites up and my blacks down.
This is so you have a high amount of dynamic range in the images (highlights up – shadows down) but still retain the contrast you want to make the image visually pleasing and relatable (whites up – blacks down).
My clarity is way up and I introduce some dehaze as well. This will pull some of that glow out of the sky so the stars can stand out better. It will also clean up my soft-contrast that I’ve created by bringing highlights down and shadows up.
To really accentuate these settings, I’ll do very similar adjustments to my tone curve sliders just until I’m happy with the result. I’ll also increase sharpness, and introduce some noise reduction to keep things from getting too grainy.
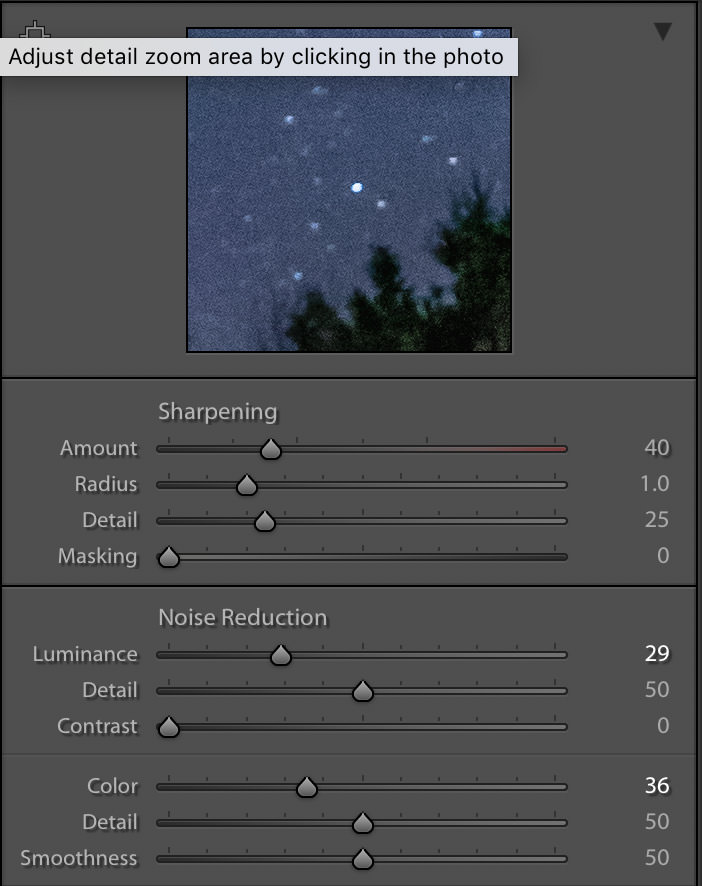
To finish off the image, I’ll use my adjustments brush to paint some more clarity and noise reduction into my sky to make the stars pop and the dark sky look less grainy.
That will inevitably darken my Milky Way so I’ll brush in some exposure just on the milky way to keep it standing out above the rest of the starry sky.

It’s worth noting that these are all just my personal preferences and when it comes to photography, everything is subjective.
Play around with everything we’ve discussed and find what works best for you.
It’s also worth noting that this is just one of my images edited, and the settings and adjustments for another image might be totally different.
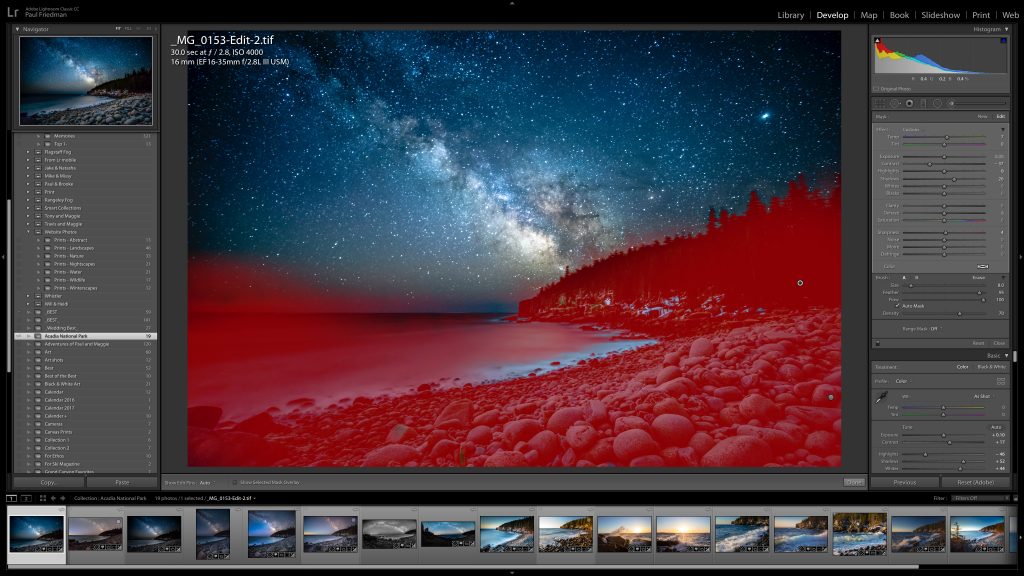
For example, this image of Boulder Beach in Acadia National Park I chose to stack 5 images of the sky together in Photoshop. This process is long and time consuming but the results are stunning if it works out right.
As you can see, since it is after the Photoshop processing, the file is now a TIFF. In this image you can see I chose to use much less clarity and almost no noise reduction because all of that has already been accomplished using the stacking technique.
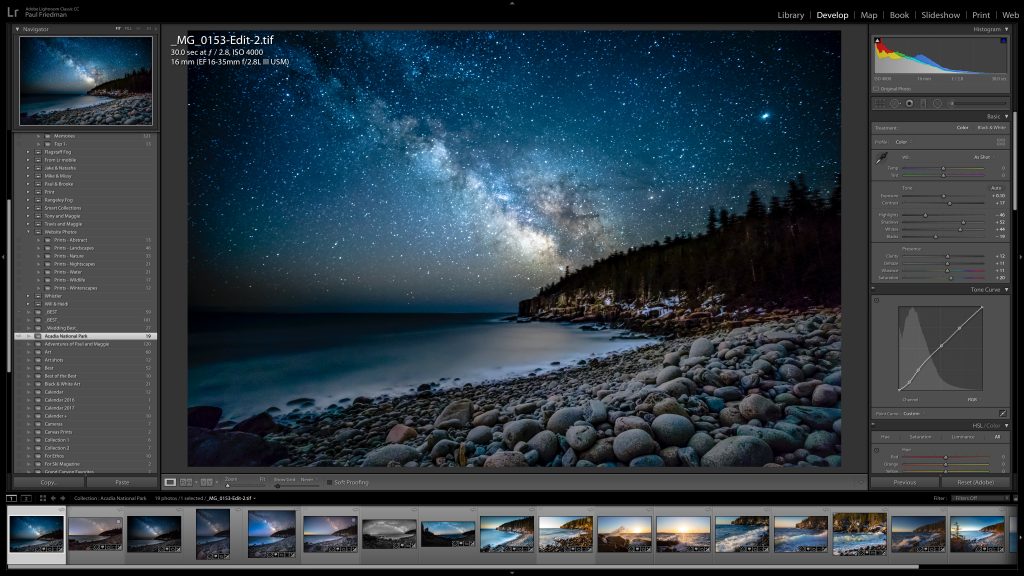
In this image I used my universal adjustments to create the results I liked in my sky and then brushed in necessary adjustments to my foreground to make everything match up the way I wanted.
See also: How to Remove Light Pollution in Astrophotography
Where to Take it From Here
The best camera settings for stars can vary greatly from scene to scene, so play around and find what works for you. I hope all of this will set you on a track to capturing beautiful images of the stars. I personally find the Milky Way to be visually stunning so I usually incorporate that feature into my starry sky images but don’t be shy about going out any day of the week.
The moonlight will cast beautiful light on your landscapes and can bring your images to life. Heck, even go out when it’s partly cloudy. Sometimes the clouds with twinkling stars poking through can make for amazing images.
Cover image by Paul Friedman