Street Photography Camera Settings: Mastering Your Camera for Best Results
If you’re just getting into street photography, you may be wondering what settings to use for it.
There are some differing opinions on this topic, but there’s a lot of common ground in the way that the masters of the craft approach their camera settings.
In this article, I’ll be sharing the camera settings I think are best for doing street photography plus briefly touch on how some street photographers do it differently.
Aperture
In my opinion, the best street photography images have everything (practically everything anyway) in the frame in focus. So that means shooting with as small an aperture as possible because it gives you a deeper depth of field. This can vary from lens to lens though, because with most lenses you’ll see diminishing image quality due to diffraction once you start getting down to the smaller apertures.
Somewhere between f/8 and f/11 is usually a lens’ sweet spot before diffraction starts to be an issue.
Photographing with everything in focus from front to back and doing it well is not easy. In fact, it may be one of the most difficult things to pull of in photography.
The reason being is that it makes you more responsible for the overall composition of your images. When shooting with a small aperture, you don’t have the crutch of having a subject in focus and then blurring out the background.
When everything is in focus, you have to consciously think more about every element in your photos. When using a wide aperture, you can just blur out any distracting elements. When your whole frame is in focus, you have to make sure that each element works together with everything else and add something relevant to the photo’s aesthetic.
But what you get with good street photos that have a deep depth of field is totally worth the effort. Street photos with a deep depth of field show a more realistic interpretation of what our eyes see. They also include relevant context that gets removed when you blur out parts of a photo.
People on the street exist in relation to the environment they’re in. When you remove that context, you’re not getting the whole story.
Obviously, sometimes shooting with a small aperture isn’t feasible because of low light, especially if you’re shooting at night. In these cases you just gotta do what you gotta do to get the shot, even if that means shooting wide open.
If you’re interested in learning more about this particular subject, I wrote an article about what apertures to use for street photography.
Shutter Speed
Slow shutter speeds can be used to creative effect in street photography by getting motion blur in your images, but in general faster shutter speeds are going to be more appropriate.
I want my images to be sharp, crisp, and have very little to no motion blur. To do that, I shoot with as fast a shutter speed as possible.
The lowest shutter speed I like to shoot is 1/250s if possible. At the speed you can shoot moving subjects and not have any problems due to your subjects moving or from camera shake.
1/125s can work too, but is less than ideal. If you’re shooting in really low light/at night, sometimes it’s necessary to drop your shutter speed down to this or even lower.
ISO
I just focus on shooting at the lowest ISO possible for the best image quality, but I have heard street photographers talk about how they like the natural noise they get from shooting their camera at high ISOs.
I don’t actively try to incorporate noise due to high ISO in my photos, but I don’t mind it (to an extent of course) either.
It’s important to know your camera so you know its limits—just because a camera’s ISO goes up to a certain point doesn’t mean the highest levels are going to be usable. With some cameras, before you get to the expanded range the high ISO results can be pretty disappointing.
If I could shoot at ISO 100 all the time I would, but doing street photography the way I do (using small apertures and fast shutter speeds), I’m often in the ISO 400 – 1600 range. It really depends on the lighting conditions.
White Balance
When it comes to choosing a white balance setting for street photography, I treat it like any other photography: I put the camera in auto white balance.
Most modern digital cameras do a very good job of choosing an accurate white balance. On top of that, you can always adjust white balance later in
Other than shooting in auto white balance, you have a few other options to choose from.
One is that you can manually set your own custom white balance. You do this by choosing a certain
The other two options that I think make sense for street photography are the ‘daylight’ and ‘cloudy’ settings.
With the daylight setting, you’ll get a normal to somewhat cool (meaning blueish) look to the color of your images. Photos taken with the cloudy white balance setting will be more on the warmer (i.e. reddish/orangish) side.
Focusing in Street Photography
Style of focusing may be the most variable camera settings among street photographers. There’s more than one way to do it and there’s not really a wrong way of doing it.
I don’t always use the same focusing method but one way I really like doing it is to find the hyperfocal distance of the lens I’m using and manually set my focal distance to that.
If you haven’t heard of hyperfocal distance, it’s essentially the distance at which you can focus with a given lens and have about half the distance from you to the hyperfocal distance be in focus and everything to infinity in focus.
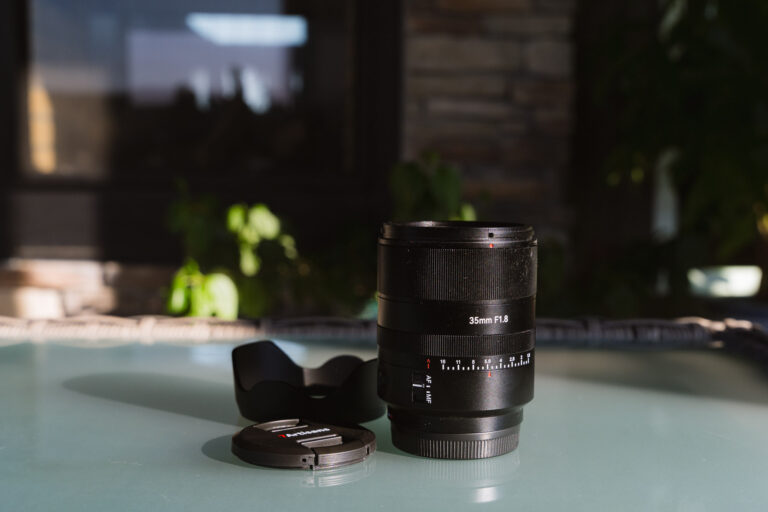
On a 28mm lens at f/8, the hyperfocal distance is about 3 meters. On a 35mm lens, it’s about 5 meters.
I’ve found though, that the main subjects in my photos are often a meter or less away, so I’ve had good results by setting my focus distance to a meter. Doing so results in having pretty much everything in focus. The biggest upside to focusing like this is that it’s one less thing to think about and you can focus completely on composition.
It’s nice now that with mirrorless cameras you get focus points that go all the way out to the edge of the frame. However, I find that moving focus points around isn’t as fast as I’d like. As a result, if and when I use autofocus for street photography, I use the center autofocus point and focus and recompose.
This is probably becoming less and less relevant on the latest cameras, but the center points for autofocus are also more accurate than the others further out to the edges of the frame.
If you’ve never heard of the focus and recompose method, you put your autofocus point on the subject you want, half press the shutter button to focus, and then compose your shot the way you want it.
In my opinion, the most effective way of doing the focus and recompose method is by setting up back button focusing on your camera. There’s usually a function button on the back of your camera that you can set to be your focus button. When you set it to this, the shutter button will only be used for taking an exposure.
By separating the two, there are fewer errors in your focusing and once you lock on to a subject and let go, you’re free to recompose and take the shot without the camera getting confused as to whether you want to focus more or take an exposure.
Shooting Modes for Street Photography
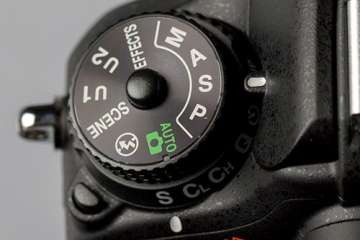
There are several modes available to you for shooting street photography and there’s really no right or wrong.
I’m not the purist type who says you always have to shoot in full manual or you’re not a “real” photographer or whatever.
What I will say though is that I think you should get familiar with each type of shooting mode (the ones you have on your camera at least) and be able to use all of them competently. That way, you have multiple tools at your disposal that you can use to get the shots.
Manual Mode
I think it’s perfectly fine to use some form of auto mode for street photography, and it’s often a good choice, especially if you’re working in frequently-changing lighting conditions. On the other hand, knowing how to shoot in manual is an important skill that you should have down in order to 1) shoot proper exposures and 2) to have creative control over your exposures.
In some situations, your camera may just get it wrong and you need to be able to dial in your settings on your own on these occasions.
If you haven’t gotten your settings totally down in manual mode yet, I wrote a big guide on getting started in photography here.
Aperture Priority
Aperture priority mode is an excellent option for shooting street photography because it allows you to choose your depth of field and then the camera does the rest of the work for you.
In other words, once you put the camera into aperture priority mode, you choose the aperture and the camera takes a reading of the light of the scene it’s pointed at and chooses the shutter speed and ISO accordingly.
Aperture priority for street photography works great in good light, but depending on the camera you’re using, you may run into issues using aperture priority mode in less than ideal lighting conditions. By that, I mostly mean some cameras will choose other settings that don’t make sense, like choosing a very slow shutter speed (resulting in motion blur) or a very high ISO (leading to noise).
One thing that solves this is by setting a minimum shutter speed or maximum ISO so that the camera doesn’t go below or above whatever you set. Unfortunately, not all cameras have these features, though, especially older models—which is all the more reason to know how to use your camera in manual and other modes so you can work around limitations like this. If you need some inspiration for what camera to use, I put together my picks for the best street photography cameras here.
Shutter Priority
Shutter priority mode for street photography can come in handy. I find myself using it in very dark situations or when shooting at night because it allows you to choose a shutter speed that’s relatively slow, but will still get you sharp images with minimal motion blur, such as 1/125s.
I normally like to have everything in focus, but in dark situations, you sometimes have to take what you can get, so letting the camera choose the aperture is fine.
Keep in mind you can manually set you’re ISO while in shutter priority or put it on auto ISO.
Tav Mode
Tav, or Tv mode, is a mode that’s exclusive to Pentax and Ricoh cameras. I think it’s worth mentioning because I’ve found it useful in many situations and you can manually set up the same thing as Tav mode on almost any camera.
Tav mode works by having you manually select your aperture and shutter speed. The camera then chooses the ISO for you.
Back when I had a Fuji X100s, I would sometimes do the exact equivalent by manually selecting the aperture I wanted on the lens (or the smallest possible aperture I could get based on the lighting conditions) and then setting the shutter speed to as high as I could go that would still give me a reasonable ISO. I would have the camera set to auto ISO, so from there the camera would choose the ISO based on the scene.
Find the Street Photography Camera Settings that Make Sense to You
When it comes to street photography camera settings, there are many ways to go about it, and there are no real mistakes in street photography, just preferences.
I prefer using a small aperture between f/8 and f/11 to get as much in focus as possible. I combine that with the fastest shutter speed possible so I don’t get motion blur. I use whatever camera mode to get to the settings that work the best in the given situation.
Everyone ends up having their own approach to using their cameras, and that’s perfectly fine. You’ll find your own preferred camera settings too—and you do that by getting to know your camera inside and out, experimenting, and trying out all the different shooting modes and features available to you.
If you’re interested in more content like this, be sure to check out my article where I talk about all the street photography tips that I’ve learned over the years.