Night Street Photography: Gear, Camera Settings, Techniques
Shooting street photography at night can make compelling images, but it’s also very challenging. Obviously, the biggest challenge is that you have less available light to work with. Low light can make it difficult to get proper exposures, and your camera’s autofocus may struggle.
Regardless, there are ways to overcome these challenges through your gear choices and street photography techniques.
In this article, I take a look at what you should look for in street photography gear and ideas to deal with the tricky lighting situations you’ll find yourself in when shooting night street photography.
Night Street Photography Equipment
The darker lighting conditions of night street photography will put your camera gear to the test more so than when shooting during the day.
There are plenty of very capable modern cameras and lenses available these days that can shoot night street photography. But there are some features and things to look out for when it comes to choosing your gear that’ll make for a better and more effective shooting experience.
Camera
When deciding on a camera to buy and use for night street photography, the most important things to consider are its high ISO performance and autofocus capabilities. Consider these street photography cameras.
High ISO Performance
The lower the light you’re dealing with, the higher the ISO you’ll need to use to make an exposure. A good rule of thumb is that the lower the ISO number, the slower the shutter speed is necessary to achieve a given exposure. So shooting at low ISOs can be good, but you have to shoot at slower shutter speeds to compensate, introducing motion blur.
It’s nice that cameras these days are getting higher and higher ISO capabilities, but the tradeoff is that you start to introduce digital noise, or grain, to your images. The good thing is that if there’s any genre of photography where grainy photos are welcome, it’s street photography. The nature of street photography means it has a gritty aesthetic, so noise/grain is welcome.
On the other hand, you can shoot at ISOs so high that image quality falls apart.
For night street photography, it’s important to choose a camera that has a high enough ISO performance to allow you to take photos in low light without having to resort to using a tripod. Luckily, these days, you don’t have to dig much to find cameras that have good enough high ISO performance for shooting street photography at night. Just beware if you’re considering an older model or used camera.
It’s also a good idea to choose a camera with in-camera image stabilization. It can come in handy when you need to slow your shutter speed down a lot, but you don’t want motion blur.
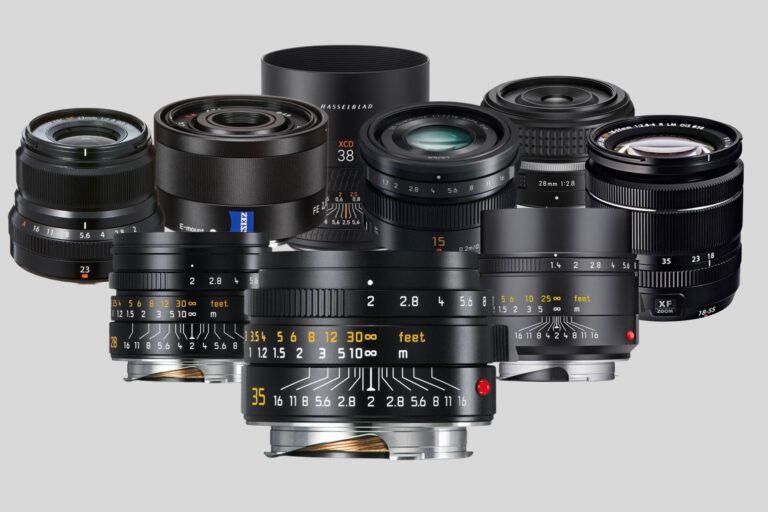
Lens
When choosing a lens for night street photography, there are a few things to keep in mind.
The most obvious is a lens’ maximum aperture. The larger a lens’ maximum aperture, the more light it can let in, meaning you can shoot in darker environments. Unfortunately, the larger a lens’s maximum aperture, the larger the lens must be physically.
You don’t necessarily need a lens with a huge maximum aperture to successfully shoot street photography at night, but it can certainly help. Modern cameras’ high ISO capabilities reduce the need to have a large maximum aperture for night street photography to some extent. Lenses with a maximum aperture of f/2 – f/2.8 are usually fine for night street photography, although using something like an f/1.4 lens will help gather more light.
Another thing to consider is how fast a lens focuses in low light and its autofocus speed in general. Both lenses and cameras affect the speed of your autofocus, so be sure to do your research on what lens you use for street photography, as some are faster than others.
It’s also worth considering manual focus for night street photography, as many cameras/lenses can struggle and hunt for autofocus.
Flash
Using flash for street photography at night is an option. I’m not opposed to anyone using flash for street photography, but I don’t do it. I find it awkward, abrasive, and it’s not the look I’m going for.
I have seen excellent examples of night street photography using flash, though. I would consider it if it works with your style and aesthetic of street photography.
The great thing about using flash for street photography at night is that it solves the low light issue and allows you to shoot at lower ISOs.
Camera Settings for Night Street Photography
Shooting street photography at night is different from shooting during the day and calls for different camera settings. Therefore, you have to make sacrifices to get enough light into your camera.
Aperture
For street photography during the day, I prefer to shoot somewhere in the range of f/8 – f/11 to get everything in focus. But, unfortunately, you don’t have the luxury of shooting at such small apertures at night. So for night street photography, you may be able to shoot at something like f/4 so that you have a little bit more in focus, or if it’s really dark, you may need to shoot wide open.
I like to use layers in street photography, which means stopping down as much as possible. So it depends on the lighting conditions, but I try to shoot with the smallest aperture possible while still keeping a reasonable shutter speed and ISO. Of course, the smaller your aperture, the more you’ll need to slow down your shutter speed and bump up your ISO.
Shooting night street photography in aperture priority mode can be a good option if the lighting conditions are frequently changing and you don’t want to deal with constantly changing your shutter speed and ISO. If you know what aperture you want to shoot at, you’re able to just set that and then let the camera deal with adjusting shutter speed and ISO. You can then use exposure compensation to brighten or darken your exposures in situations where you want more control.
Shutter Speed
You have to use slower shutter speeds when doing street photography at night because there isn’t nearly as much ambient light available to work with.
If you’re handholding your camera, you may be able to get away with shutter speeds around 1/30th of a second to get as much light into the camera as possible. Anything below that, and it becomes difficult getting usable images – unless you want motion blur. A rule of thumb is that your shutter speed shouldn’t dip below your lens’ focal length. In other words, if you’re shooting with a 50mm lens, your shutter speed should be 1/50s or faster.
However, if I want moving subjects in focus, I try to shoot at 1/125s – 1/250s if possible.
When shooting handheld, having image stabilization in your camera or lens can help.
You can use motion blur creatively in night street photography by shooting at around 1/20s and slower. You can also pan your camera to get a moving subject in focus and have a blurred background.
If you want to show an in-focus background with blurred moving subjects, you need to stay very still while taking your exposure. You can do this by just staying as still as possible, finding something to set your camera on, or by using a tripod. Of course, you can use a tripod to great effect, but I travel as lightly as possible for street photography, so you won’t see me setting up a tripod for night street photography anytime soon.
ISO
ISO is like your digital film. The higher your ISO, the more sensitive your camera sensor becomes to light. So because of the darker environments you’ll be shooting in when doing street photography at night, the higher you’ll have to raise your ISO.
However, too high of an ISO will cause noise in your photos. High ISO isn’t necessarily a problem, but your photos can get so noisy to the point where you get unusable images. In addition, very high ISOs can reduce your dynamic range, produce lots of grain, and degrade your overall image quality in general.
High ISO performance can vary significantly from camera to camera, so the best way to figure out how high an ISO you should use is to experiment. Once you find the highest ISO that you’re comfortable using on your camera, you can manually set your ISO to that in very dark situations, or you can set it as your maximum ISO if you’re using auto-ISO.
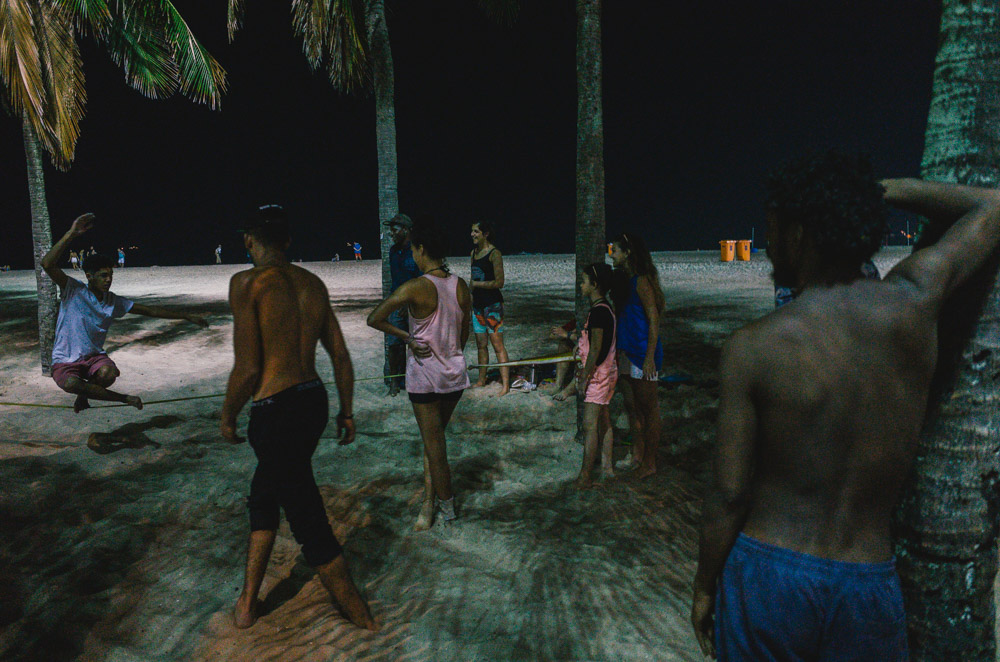
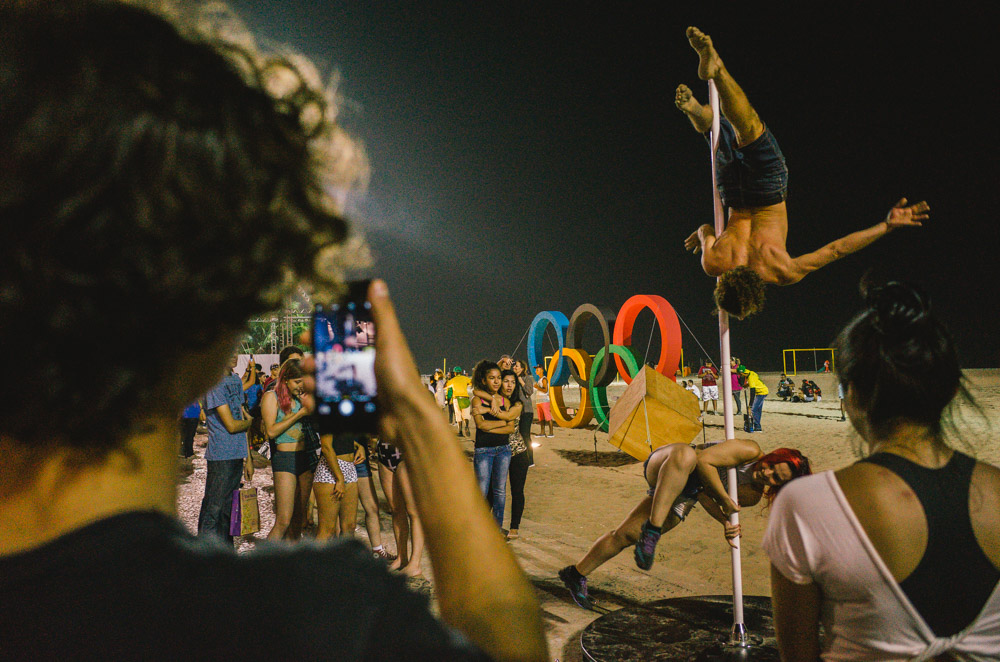
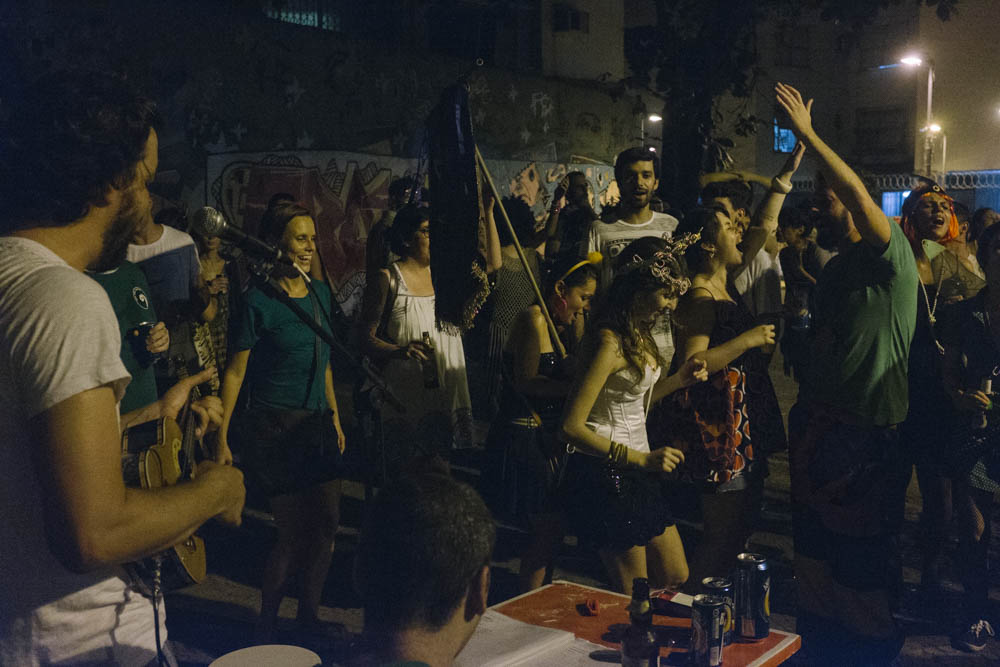
Light Sources for Night Street Photography
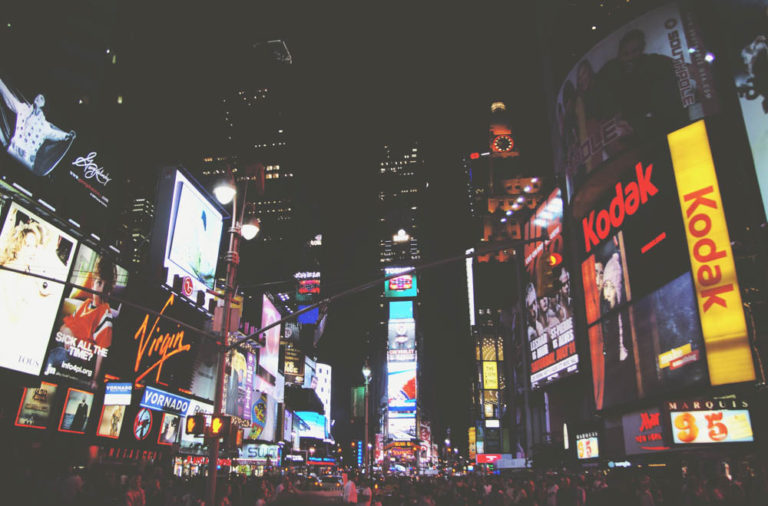
The most common light sources you’ll be working with when doing street photography at night are street lamps and things like advertising signage.
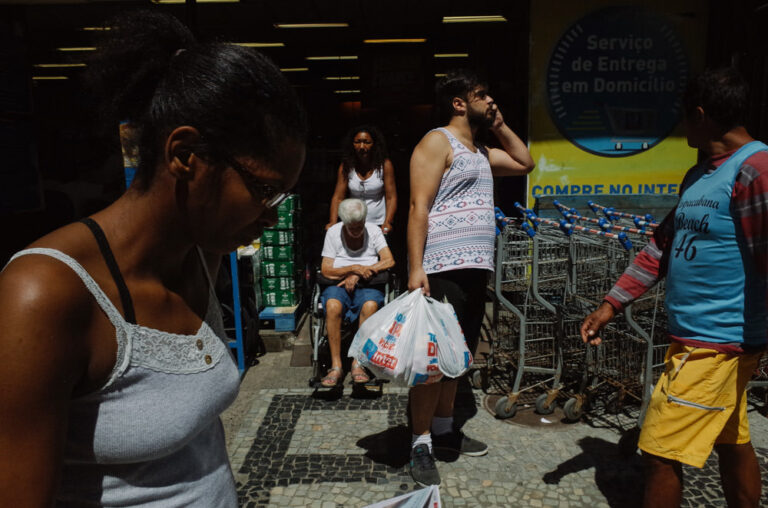
To me, the most interesting lighting for night street photography is when this kind of lighting lights subjects. It’s also hard to make street photography images otherwise because, without some sort of artificial light source around, your photos are going to be very dark, and your camera will struggle. Also, when using street lights, you have the opportunity to get a nice contrast between subjects lit by street lights and dark backgrounds.
Finding The Light
Because I like to have subjects illuminated for night street photography, I think it’s an excellent opportunity to use the “fishing” technique, where you find a setting and background (and in this case, lighting) and wait for subjects to enter the frame. I also think this is a less intrusive way of shooting street photography at night, as you’re already set up with your camera pointing at a scene, and then people are entering it. At night, it feels more awkward pointing your camera at people when you’re just walking around doing the “run and gun” style. People have their guard up more at night, and I think finding the light you want to shoot and then waiting for subjects can make that a more natural feeling experience.
High ISO is Fine
Street photography doesn’t require perfect image quality. It’s not like studio photography, where everything is expected to be pristine. Instead, we’re talking real life, on the gritty streets where they may even be some element of danger.
All of that to say that when you do night street photography, it will be darker than during the day, so naturally, you’re going to have to shoot at higher ISOs. But, of course, there does come a point when higher ISOs reduce the usability of your files, but at which point is subjective. But my overall point is that noise/grain is acceptable and expected in street photography at night.
Night Street Photography Images are Dark
I think there can be a tendency to try to brighten night street photos either by overexposing while shooting or by over-brightening your photos in post-processing by raising your exposure or bringing up shadows. I don’t think there’s anything wrong with brightening your night street images per se, but there’s nothing wrong with utilizing black space.
Leaving black space as-is (assuming it truly looked black when at the scene) can really make the things that are lit pop out at you. If you pay attention in movies, you’ll notice filmmakers effectively use black and white space all the time.
I would try to avoid this tendency to over-brighten your night street photography images. Don’t be afraid to leave blacks crushed when it makes sense.
Last Thoughts
When it comes to the technical side of night street photography, the important things are choosing the right gear to get the job done and knowing how to use it inside and out so that when you’re out on the street, you’re not fiddling with your camera settings. It’ll help if you get to the point where getting the correct exposures (or close enough to it) is second nature. That may mean getting your camera out while at home and experimenting with all of its settings.
The same goes for knowing the exposure triangle.
Another thing about night street photography is that it probably requires more patience than shooting during the day.
When shooting at night, you need to find pockets of light where some sort of artificial light source will light subjects, and you need to be patient enough to wait for the right moment to press the shutter button. Due to the limited lighting options for night street photography, it’s more attractive to find an interesting light source and background and camp out there rather than walking around employing the run-and-gun strategy.
If this content was helpful, you may also get something out of my street photography tips.