Street Photography Aperture Priority: When and How to Use It
Street photography is an amazing outlet for photographic creativity. But one thing that can get in the way sometimes is keeping up with your camera settings to get the correct exposures. In street photography, moments are fleeting and pass in the blink of an eye, so obviously, you want to have your camera settings ready at all times so that you don’t miss those shots.
A great way to have creative control over your photos and be ready at all times in street photography is to use aperture priority mode. Aperture priority mode gives you control over your depth of field (arguably the most important technical aspect of street photography) and frees your mind up to concentrate on composition.
Using this mode effectively can help you to get useable shots more consistently, so I thought I would put together my thoughts on street photography aperture priority.
What is Aperture Priority?
Aperture priority is a camera mode that allows you to set your lens’ f-stop (its aperture size) while the camera chooses the shutter speed for you to get a correct exposure. If you pair this with auto-ISO, the camera will choose the ISO for you as well. If you want to have more control over your ISO, you can set it manually, in which case the camera will only choose the correct shutter speed for you in aperture priority mode.
How to Set Your Camera to Aperture Priority for Street Photography
If you haven’t shot in aperture priority mode yet, it’s usually very straightforward, but it does depend on your camera and lens.
If your camera has a mode dial, you just set it to ‘A.’ Then, choose your aperture using your aperture dial.
If you don’t have a mode dial, like with many Fujifilm cameras, things work differently, but you get to the same thing. What you do is set your aperture on your lens to whatever aperture you want (I recommend f/8). Then, you set your shutter speed to automatic. You can also set your ISO to automatic if you want the camera to take care of that for you too.
Why Use Aperture Priority for Street Photography
Aperture priority mode is great for street photography because it gives you control over your depth of field, or in other words, how much of your frame is in focus.
There are many exceptions, but it’s more common than not for street photography images to have a deeper depth of field than other types of photography.
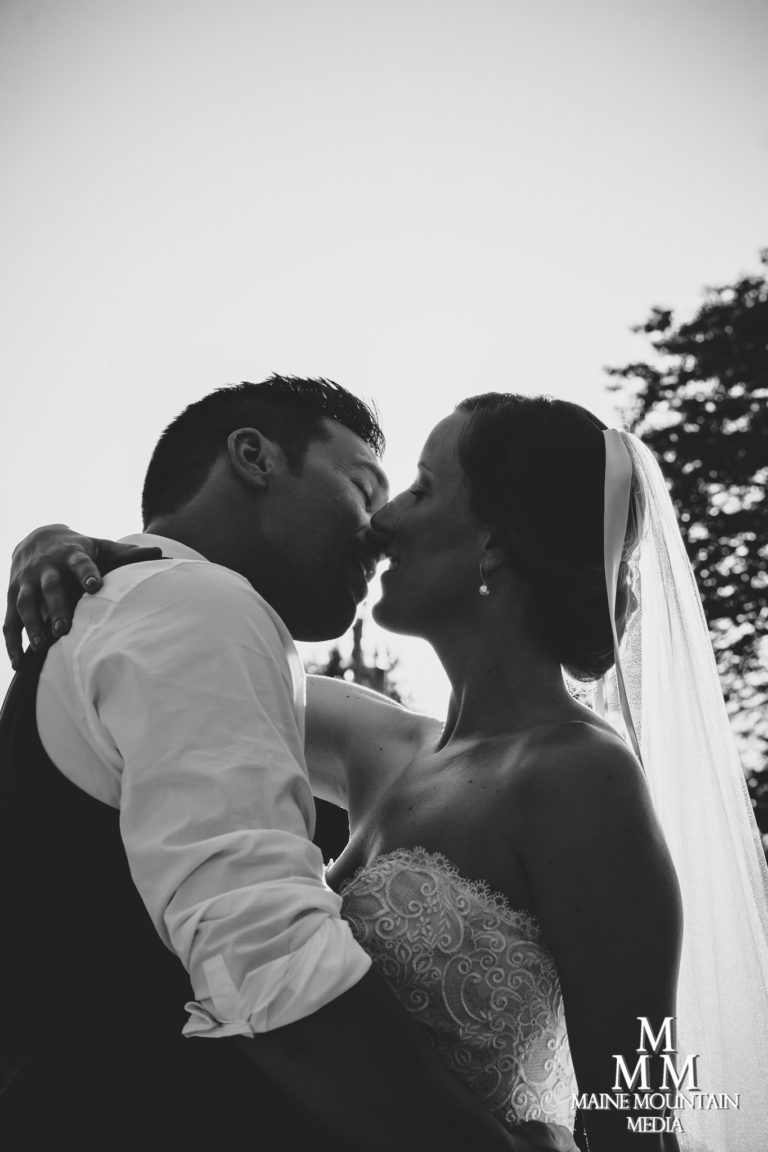
Most street photographers differ from what many portrait photographers do, which is to shoot wide open so that the subject is in focus and the background falls off into a bokeh blur.
Instead, street photography is more about both the subject and the environment, and many street photographers want that context in focus.
As I said, there are exceptions, and if you want shallow depth of field in your street photography images, that’s your prerogative. The point is that you have control over your depth of field, and aperture priority mode gives you that.
The other important thing that aperture priority gives you for street photography is the freedom not to have to think about your other street photography camera settings constantly. If you don’t get your shutter speed and ISO right, you can miss shots, particularly if you overexpose, because it’s harder to bring back highlights than shadows in digital photography. Using aperture priority for street photography lets you choose the aperture you want based on your desired depth of field, and then the camera does the rest for you. Of course, the camera may miscalculate and choose the wrong settings sometimes. Still, modern street photography cameras do a pretty good job these days, and you also have the option of using exposure compensation to dial things in more precisely.
For me, composition trumps everything in street photography, and aperture priority frees my mind up to just focus on composing shots. Sometimes I want more control over exposure, so I don’t always shoot in aperture priority mode, but the more you have to fiddle around with your settings, the more likely you are to miss shots.
When to Use Aperture Priority for Street Photography
There’s no limit to how much you can use aperture priority for street photography; you can use it 100% of the time if you want to, and you could create an amazing body of work doing so.
I use aperture priority a lot, but I like using a mixture of modes so that I have a variety of tools at my disposal, depending on what the situation calls for.
There are some specific times when aperture priority comes in clutch for street photography though.
When The Lighting Conditions are Changing Frequently
Like many other types of photography, the golden hour is a great time to shoot street photography. Golden hour light gives you that nice, warm light and dramatic shadows.
Golden hour light does present some challenges, though. Before, during, and at the end of the golden hour, the light constantly changes as the sun goes down over the horizon. As a result, an area that was fully lit by sunlight just a few minutes prior can soon be cast in shadow before you know it.
Aperture priority is great in this scenario because after choosing your aperture, the camera does the rest of the work for you, leaving you to find the light and focus on composition.
When You’re Walking from Scene to Scene
Similar to how lighting conditions frequently change as the sun rises and sets, physically walking from place to place can mean dramatic changes in light. You might find yourself walking from a scene illuminated by bright sunlight to an area that is totally cast in shadow from a building or other structure. The same thing goes if you go from being in an indoor public space, like a subway station, to outdoors in bright sunlight — and the settings to get the proper exposure will be very different.
When you know you’re walking in and out of different lighting conditions, using aperture priority can really help because it takes some time to look at your light meter and adjust your settings accordingly. When you’re using aperture priority, the camera can make the required adjustments pretty much instantaneously.
When You Have a Hard Time Seeing Your Exposure
When I’m out doing street photography, it’s not uncommon for me to have difficulty seeing my exposure or light meter on the camera because it’s too bright out or if you go from a very bright area to somewhere dark and your eyes haven’t adjusted yet. It doesn’t help that I like to compose using the back screen of my cameras rather than the viewfinder, but I have issues using the viewfinder sometimes too.
My eyes are sensitive to light, and if yours aren’t, that’s great, although I think every street photographer at some point or another will have some issues seeing their back screen or viewfinder. Either way, using aperture priority for street photography helps counteract this problem because even if you can’t make out your exposure, you can still likely see a decent amount of your frame for composing. With aperture priority mode, you choose the aperture you want to use, and then the camera will determine the correct shutter speed and ISO for you, even when you have trouble seeing your light meter.
When You Want to Just Focus on Composition
Shooting street photography in aperture priority mode is freeing because the camera does a lot of the work of getting correct exposures for you. In addition, the mental energy you save from using aperture priority lets you focus on composition, which is the most critical part of creating compelling street photographs anyway.
So if you have something on your mind, or you’re trying to make sure to not be hit by traffic, or you’re just plain in a lazy state of mind, aperture priority is there for you. Not everything has to be shot in manual, and there’s nothing wrong or unprofessional about using aperture priority mode.
What F-Stop to Use for Aperture Priority Street Photography
My recommendation for using aperture priority for street photography during the day is between f/8 – f/11. In general, shooting at these relatively small apertures will result in pretty much everything in your frame being in focus. That’s what I want, is for everything from front to back in my frames to be in focus.
If you want to go for a different look and want your subjects in focus and blurry backgrounds, shoot with a wider aperture. The wider the aperture you use, the shallower your depth of field will be (i.e., less in focus). Ultimately, this is totally up to you and your preferences as a street photographer. It’s not a bad idea to shoot at a wide range of apertures and review your work to find what appeals the most to you.
If you’re looking for a good starting place, though, I would start with f/8 and go from there. If you want even more in focus, you can go up to f/11, but just check your results because going smaller than f/8 is the point at which diffraction sets in on many lenses, which diminishes your image quality. But on many lenses, you can stop down to f/11 without much of a problem — if you need some ideas as to what lens to use, I put together my picks for the best lenses for street photography here. Stopping down smaller than f/11 will likely really start degrading your image quality.
Shooting at f/8 gives you a pretty ‘standard’ street photography look of having the whole frame in focus. It really forces you to come up with good compositions because you can’t just use bokeh to blur out distracting elements, which is a good challenge.
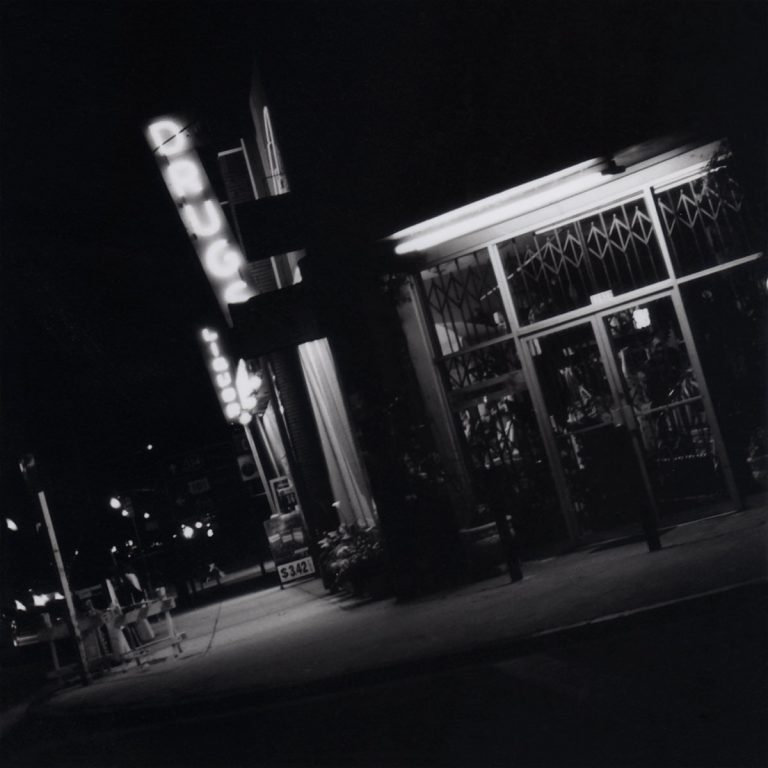
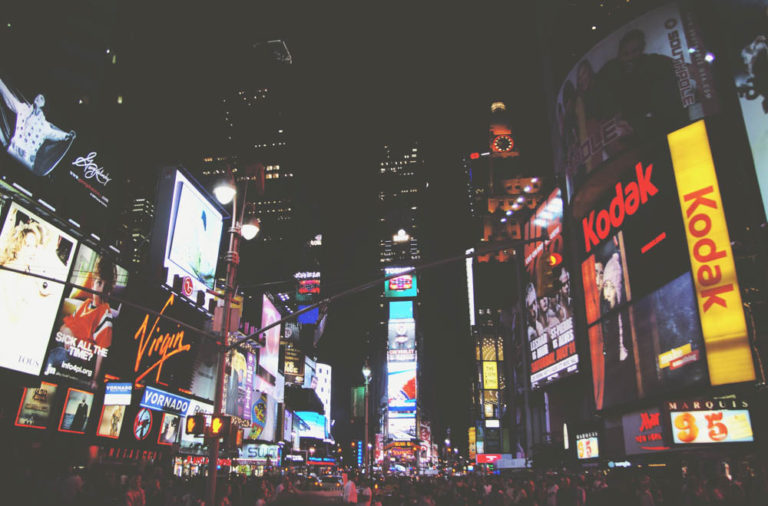
Using aperture priority for street photography at night is another beast entirely. There’s a lot less light, so you’re forced to use larger apertures just to be able to get enough light into your camera. If you want multiple subjects in focus for night street photography, you may be able to get away with something like f/4 to f/5.6, but I’ve shot in situations so dark that I needed to shoot wide open at f/2.
Last Thoughts on Aperture Priority and Street Photography
Aperture priority is great for street photography because it gives you control over your depth of field while adjusting the other camera settings to get the correct exposures according to the light.
For me, having control over aperture is the number one priority for camera settings for street photography. That’s because it has a significant impact on the aesthetic of your photos because it dictates your depth of field. Shutter speed and ISO are important too, obviously, but with aperture priority, you can set a minimum shutter speed and maximum ISO so that they stay within an acceptable range that you choose.
There are several good reasons to shoot in aperture priority mode for street photography. On a technical level, aperture priority really helps to get exposures in changing lighting conditions. But I can’t stress enough how beneficial it is to choose your aperture, have the camera do the rest for you, and then be able to use that freed-up mental energy towards composing your photos.
I hope my thoughts on aperture priority for street photography have been insightful for you. If you’re interested in more content like this, I wrote about everything I’ve learned over the last ten years in my street photography tips article.